HP Photosmart D5400 User Guide - Page 162
on the bottom of the ink cartridge., plastic ink window next to the contacts.
 |
View all HP Photosmart D5400 manuals
Add to My Manuals
Save this manual to your list of manuals |
Page 162 highlights
The print carriage moves to the center of the product. NOTE: Wait until the print carriage stops moving before proceeding. 3. Locate the ink cartridge that is indicated in the error message, and then press the tab on the ink cartridge to release it from the slot. 4. Hold the ink cartridge by its sides with the bottom pointing up and locate the electrical contacts on the ink cartridge. The electrical contacts are four small rectangles of copper or gold-colored metal on the bottom of the ink cartridge. 1 Ink window 2 Electrical contacts 5. Wipe the contacts with a dry swab or lint-free cloth. CAUTION: Be careful not to move any ink or other debris onto the clear plastic ink window next to the contacts. Errors 161 Troubleshooting
-
 1
1 -
2
-
3
-
4
-
5
-
6
-
7
-
8
-
9
-
10
-
11
-
12
-
13
-
14
-
15
-
16
-
17
-
18
-
19
-
20
-
21
-
22
-
23
-
24
-
25
-
26
-
27
-
28
-
29
-
30
-
31
-
32
-
33
-
34
-
35
-
36
-
37
-
38
-
39
-
40
-
41
-
42
-
43
-
44
-
45
-
46
-
47
-
48
-
49
-
50
-
51
-
52
-
53
-
54
-
55
-
56
-
57
-
58
-
59
-
60
-
61
-
62
-
63
-
64
-
65
-
66
-
67
-
68
-
69
-
70
-
71
-
72
-
73
-
74
-
75
-
76
-
77
-
78
-
79
-
80
-
81
-
82
-
83
-
84
-
85
-
86
-
87
-
88
-
89
-
90
-
91
-
92
-
93
-
94
-
95
-
96
-
97
-
98
-
99
-
100
-
101
-
102
-
103
-
104
-
105
-
106
-
107
-
108
-
109
-
110
-
111
-
112
-
113
-
114
-
115
-
116
-
117
-
118
-
119
-
120
-
121
-
122
-
123
-
124
-
125
-
126
-
127
-
128
-
129
-
130
-
131
-
132
-
133
-
134
-
135
-
136
-
137
-
138
-
139
-
140
-
141
-
142
-
143
-
144
-
145
-
146
-
147
-
148
-
149
-
150
-
151
-
152
-
153
-
154
-
155
-
156
-
 157
157 -
 158
158 -
 159
159 -
 160
160 -
 161
161 -
 162
162 -
 163
163 -
 164
164 -
 165
165 -
 166
166 -
 167
167 -
168
-
169
-
170
-
171
-
172
-
173
-
174
-
175
-
176
-
177
-
178
-
179
-
180
-
181
-
182
-
183
-
184
-
185
-
186
-
187
-
188
-
189
-
190
-
191
-
192
-
193
-
194
-
195
-
196
-
197
-
198
-
199
-
200
-
201
-
202
-
203
-
204
-
205
-
206
-
207
-
208
-
209
-
210
-
211
-
212
-
213
-
214
-
215
-
216
-
217
-
218
-
219
-
220
-
221
 |
 |
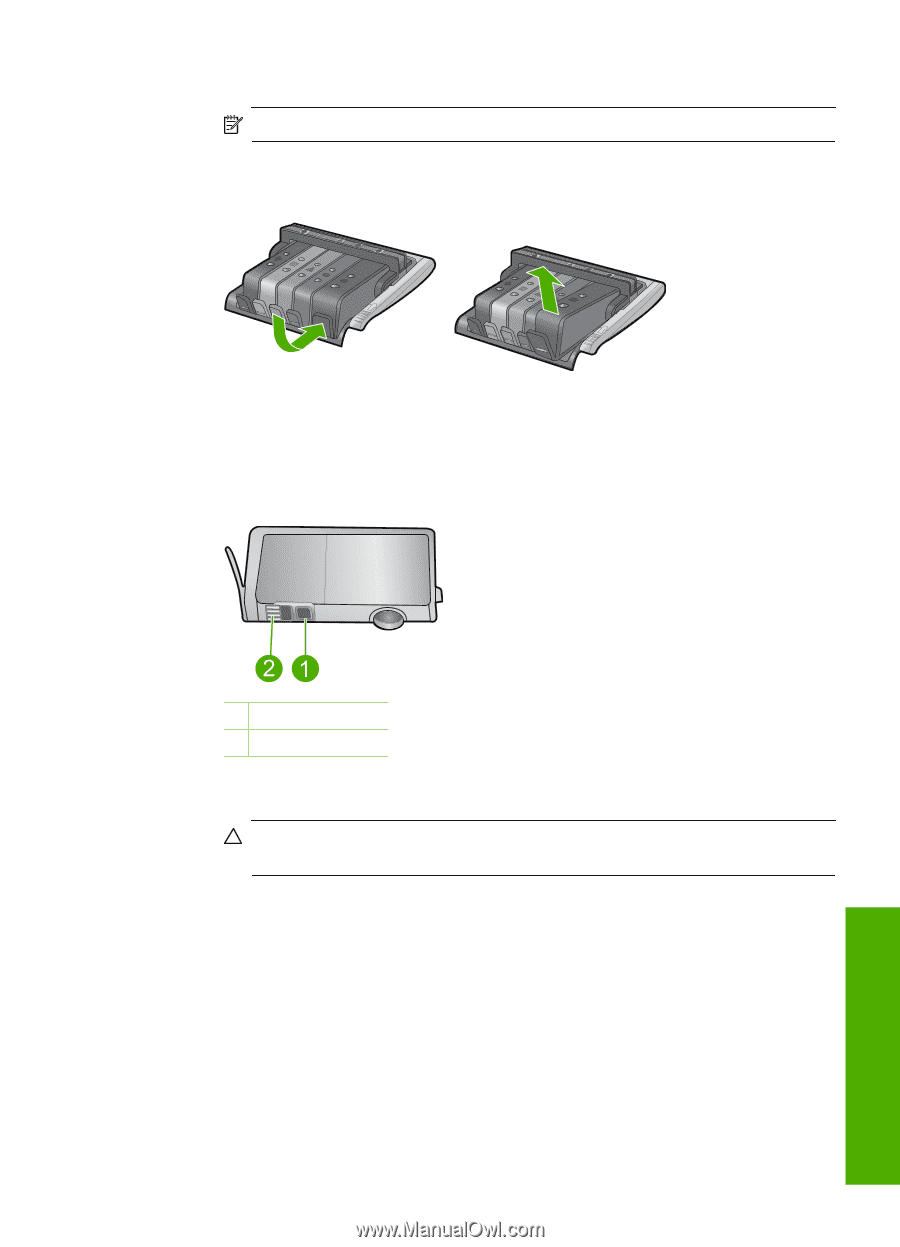
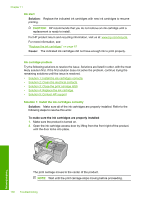
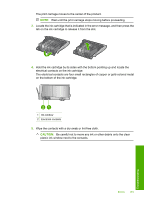
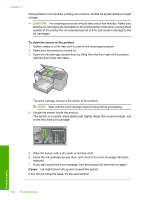
The print carriage moves to the center of the product.
NOTE:
Wait until the print carriage stops moving before proceeding.
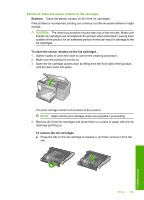
3.
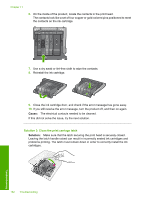
Locate the ink cartridge that is indicated in the error message, and then press the
tab on the ink cartridge to release it from the slot.
4.
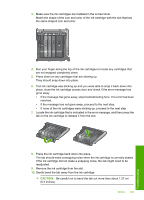
Hold the ink cartridge by its sides with the bottom pointing up and locate the
electrical contacts on the ink cartridge.
The electrical contacts are four small rectangles of copper or gold-colored metal
on the bottom of the ink cartridge.
1
Ink window
2
Electrical contacts
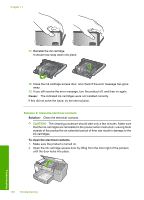
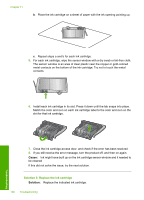
5.
Wipe the contacts with a dry swab or lint-free cloth.
CAUTION:
Be careful not to move any ink or other debris onto the clear
plastic ink window next to the contacts.
Errors
161
Troubleshooting