HP Photosmart D5400 User Guide - Page 180
Pull the ink cartridge up and then toward you out of its slot to remove it.
 |
View all HP Photosmart D5400 manuals
Add to My Manuals
Save this manual to your list of manuals |
Page 180 highlights
3. The print carriage moves to the middle of the product. 4. Remove all of the ink cartridges and place them on a piece of paper with the ink opening pointing up. To remove the ink cartridges a. Push in the tab on the ink cartridge you want to replace to release it from the slot. b. Pull the ink cartridge up and then toward you out of its slot to remove it. c. Repeat steps a and b to until all ink cartridges are removed. Errors 179 Troubleshooting
-
 1
1 -
2
-
3
-
4
-
5
-
6
-
7
-
8
-
9
-
10
-
11
-
12
-
13
-
14
-
15
-
16
-
17
-
18
-
19
-
20
-
21
-
22
-
23
-
24
-
25
-
26
-
27
-
28
-
29
-
30
-
31
-
32
-
33
-
34
-
35
-
36
-
37
-
38
-
39
-
40
-
41
-
42
-
43
-
44
-
45
-
46
-
47
-
48
-
49
-
50
-
51
-
52
-
53
-
54
-
55
-
56
-
57
-
58
-
59
-
60
-
61
-
62
-
63
-
64
-
65
-
66
-
67
-
68
-
69
-
70
-
71
-
72
-
73
-
74
-
75
-
76
-
77
-
78
-
79
-
80
-
81
-
82
-
83
-
84
-
85
-
86
-
87
-
88
-
89
-
90
-
91
-
92
-
93
-
94
-
95
-
96
-
97
-
98
-
99
-
100
-
101
-
102
-
103
-
104
-
105
-
106
-
107
-
108
-
109
-
110
-
111
-
112
-
113
-
114
-
115
-
116
-
117
-
118
-
119
-
120
-
121
-
122
-
123
-
124
-
125
-
126
-
127
-
128
-
129
-
130
-
131
-
132
-
133
-
134
-
135
-
136
-
137
-
138
-
139
-
140
-
141
-
142
-
143
-
144
-
145
-
146
-
147
-
148
-
149
-
150
-
151
-
152
-
153
-
154
-
155
-
156
-
157
-
158
-
159
-
160
-
161
-
162
-
163
-
164
-
165
-
166
-
167
-
168
-
169
-
170
-
171
-
172
-
173
-
174
-
 175
175 -
 176
176 -
 177
177 -
 178
178 -
 179
179 -
 180
180 -
 181
181 -
 182
182 -
 183
183 -
 184
184 -
 185
185 -
186
-
187
-
188
-
189
-
190
-
191
-
192
-
193
-
194
-
195
-
196
-
197
-
198
-
199
-
200
-
201
-
202
-
203
-
204
-
205
-
206
-
207
-
208
-
209
-
210
-
211
-
212
-
213
-
214
-
215
-
216
-
217
-
218
-
219
-
220
-
221
 |
 |
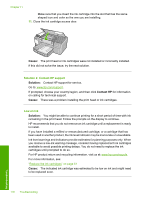
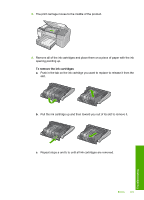
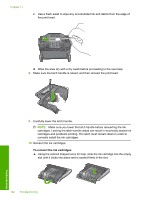
3.
The print carriage moves to the middle of the product.
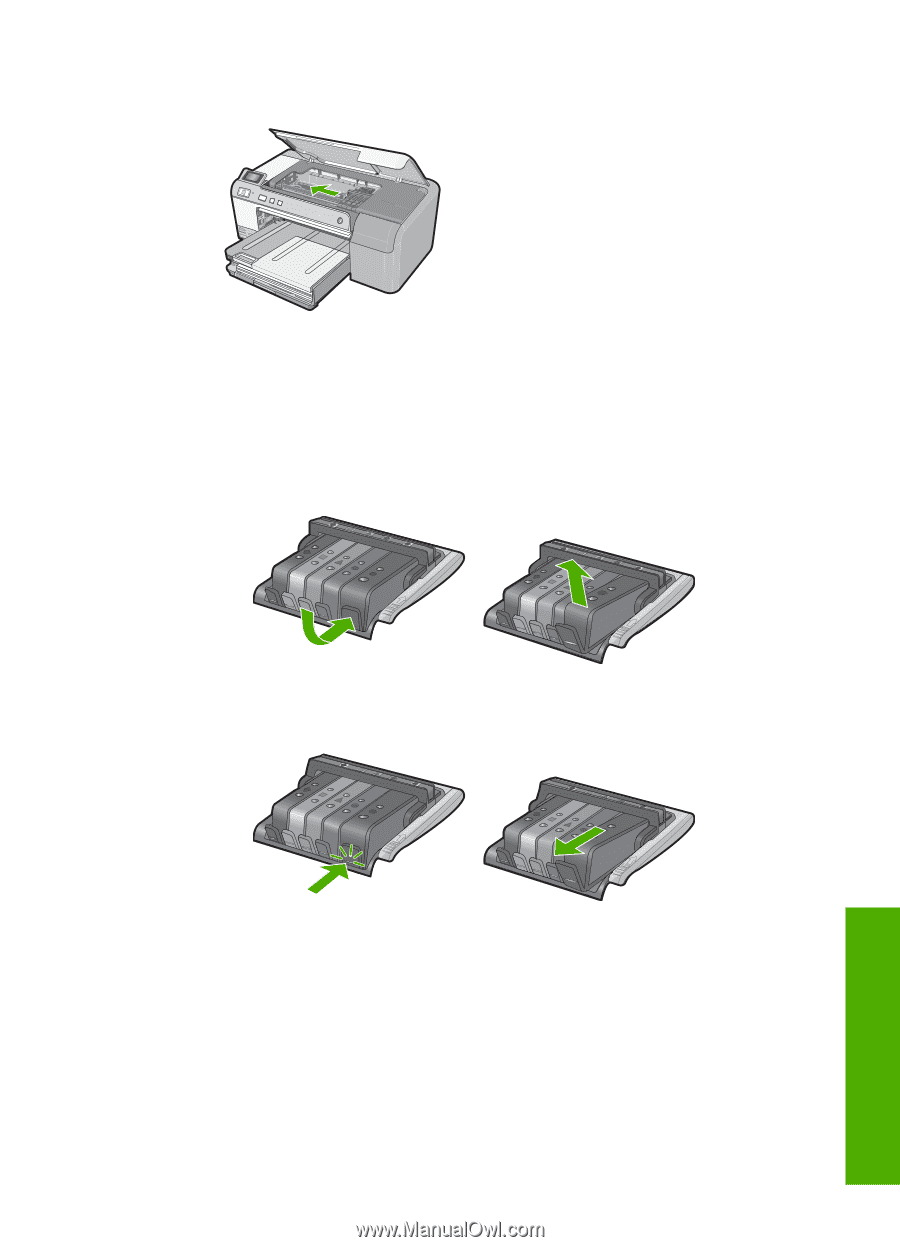
4.
Remove all of the ink cartridges and place them on a piece of paper with the ink
opening pointing up.
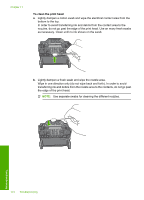
To remove the ink cartridges
a
.
Push in the tab on the ink cartridge you want to replace to release it from the
slot.
b
.
Pull the ink cartridge up and then toward you out of its slot to remove it.
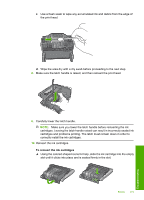
c
.
Repeat steps a and b to until all ink cartridges are removed.
Errors
179
Troubleshooting