HP ProDesk 600 G1 EliteDesk 800 G1 Desktop Mini ProDesk 600 G1 Desktop Mini Ma - Page 55
Drive cage, Remove the three screws
 |
View all HP ProDesk 600 G1 manuals
Add to My Manuals
Save this manual to your list of manuals |
Page 55 highlights
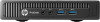
Drive cage The drive cage is located next to the heat sink. The drive cage is secured with three Phillips screws. To remove the drive cage: 1. Prepare the computer for disassembly (see Preparing to disassemble the computer on page 25). 2. Remove the access panel (see Access panel on page 26). 3. Remove the three screws (1) that secure the drive cage to the computer. Drive cage 47
-
 1
1 -
2
-
3
-
4
-
5
-
6
-
7
-
8
-
9
-
10
-
11
-
12
-
13
-
14
-
15
-
16
-
17
-
18
-
19
-
20
-
21
-
22
-
23
-
24
-
25
-
26
-
27
-
28
-
29
-
30
-
31
-
32
-
33
-
34
-
35
-
36
-
37
-
38
-
39
-
40
-
41
-
42
-
43
-
44
-
45
-
46
-
47
-
48
-
49
-
 50
50 -
 51
51 -
 52
52 -
 53
53 -
 54
54 -
 55
55 -
 56
56 -
 57
57 -
 58
58 -
 59
59 -
 60
60 -
61
-
62
-
63
-
64
-
65
-
66
-
67
-
68
-
69
-
70
-
71
-
72
-
73
-
74
-
75
-
76
-
77
-
78
-
79
-
80
-
81
-
82
-
83
-
84
-
85
-
86
-
87
-
88
-
89
-
90
-
91
-
92
-
93
-
94
-
95
-
96
-
97
-
98
-
99
-
100
-
101
-
102
-
103
-
104
-
105
-
106
-
107
-
108
-
109
-
110
-
111
-
112
-
113
-
114
-
115
-
116
-
117
-
118
-
119
-
120
-
121
-
122
-
123
-
124
-
125
-
126
-
127
-
128
-
129
-
130
-
131
-
132
-
133
-
134
-
135
-
136
-
137
-
138
-
139
-
140
-
141
-
142
-
143
-
144
-
145
-
146
-
147
-
148
-
149
-
150
-
151
-
152
-
153
-
154
-
155
-
156
-
157
-
158
-
159
-
160
-
161
-
162
-
163
-
164
-
165
-
166
 |
 |

Drive cage
The drive cage is located next to the heat sink. The drive cage is secured with three Phillips screws.
To remove the drive cage:
1.
Prepare the computer for disassembly (see
Preparing to disassemble the computer
on page
25
).
2.
Remove the access panel (see
Access panel
on page
26
).
3.
Remove the three screws
(1)
that secure the drive cage to the computer.
Drive cage
47