HP ProLiant BL420c HP ProLiant BL420c Gen8 Server Blade Maintenance and Servic - Page 57
lift the system board from the base pan.
 |
View all HP ProLiant BL420c manuals
Add to My Manuals
Save this manual to your list of manuals |
Page 57 highlights
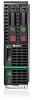
12. While holding the system board in place, turn the base pan on its side and remove the two system board screws from the bottom of the base pan. 13. Place the server blade on a flat, level surface. 14. Slide the system board approximately 1.27 cm (0.50 inches) towards the rear of the server, and then lift the system board from the base pan. 15. Remove the three T-10 screws from the outside of the base pan, and then remove the server blade release lever bracket. Removal and replacement procedures 57
-
 1
1 -
2
-
3
-
4
-
5
-
6
-
7
-
8
-
9
-
10
-
11
-
12
-
13
-
14
-
15
-
16
-
17
-
18
-
19
-
20
-
21
-
22
-
23
-
24
-
25
-
26
-
27
-
28
-
29
-
30
-
31
-
32
-
33
-
34
-
35
-
36
-
37
-
38
-
39
-
40
-
41
-
42
-
43
-
44
-
45
-
46
-
47
-
48
-
49
-
50
-
51
-
 52
52 -
 53
53 -
 54
54 -
 55
55 -
 56
56 -
 57
57 -
 58
58 -
 59
59 -
 60
60 -
 61
61 -
 62
62 -
63
-
64
-
65
-
66
-
67
-
68
-
69
-
70
-
71
-
72
-
73
-
74
-
75
-
76
-
77
-
78
-
79
-
80
-
81
-
82
-
83
-
84
-
85
 |
 |

Removal and replacement procedures
57
12.
While holding the system board in place, turn the base pan on its side and remove the two system
board screws from the bottom of the base pan.
13.
Place the server blade on a flat, level surface.
14.
Slide the system board approximately 1.27 cm (0.50 inches) towards the rear of the server, and then
lift the system board from the base pan.
15.
Remove the three T-10 screws from the outside of the base pan, and then remove the server blade
release lever bracket.