HP R1500 HP R1500 G3 UPS User Guide - Page 28
Port Settings, Advanced, COM Port Number, Action, Scan for hardware changes
 |
View all HP R1500 manuals
Add to My Manuals
Save this manual to your list of manuals |
Page 28 highlights
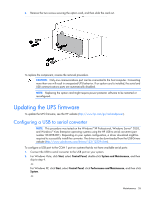
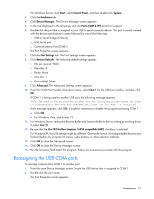
3. Click the Port Settings tab. The Port Settings screen appears. 4. Click Advanced. The Advanced Settings screen appears. 5. Select an available USB port number from the COM Port Number drop down menu. 6. Click OK to close the Advanced screen. 7. Click OK to close the Port Settings screen. 8. Verify that the Device Manager screen shows that the USB to serial converter is assigned to COM 1, and that the other USB device is assigned to a different port. If the Device Manager screen does not automatically refresh to show the change: a. Click Action. The Action Menu appears. b. Click Scan for hardware changes to refresh the screen and display the changes. Maintenance 28
-
 1
1 -
2
-
3
-
4
-
5
-
6
-
7
-
8
-
9
-
10
-
11
-
12
-
13
-
14
-
15
-
16
-
17
-
18
-
19
-
20
-
21
-
22
-
 23
23 -
 24
24 -
 25
25 -
 26
26 -
 27
27 -
 28
28 -
 29
29 -
 30
30 -
 31
31 -
 32
32 -
 33
33 -
34
-
35
-
36
-
37
-
38
-
39
-
40
-
41
-
42
-
43
-
44
-
45
-
46
-
47
-
48
-
49
-
50
-
51
 |
 |

Maintenance 28
3.
Click the
Port Settings
tab.
The Port Settings screen appears.
4.
Click
Advanced
.
The Advanced Settings screen appears.
5.
Select an available USB port number from the
COM Port Number
drop down menu.
6.
Click
OK
to close the Advanced screen.
7.
Click
OK
to close the Port Settings screen.
8.
Verify that the Device Manager screen shows that the USB to serial converter is assigned to COM 1,
and that the other USB device is assigned to a different port.
If the Device Manager screen does not automatically refresh to show the change:
a.
Click
Action
.
The Action Menu appears.
b.
Click
Scan for hardware changes
to refresh the screen and display the changes.