HP RP3 Maintenance & Service Guide HP RP3 Retail System Model 3100 - Page 47
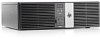
Front USB and Power Switch Assembly
 |
View all HP RP3 manuals
Add to My Manuals
Save this manual to your list of manuals |
Page 47 highlights
Front USB and Power Switch Assembly Description Front USB and power switch assembly Spare part number 682432-001 1. Prepare the computer for disassembly (Preparation for Disassembly on page 15). 2. Remove the access panel (Access Panel on page 16). 3. Remove the front bezel (Front Bezel on page 17). 4. Remove the fan Front Fan/Baffle on page 38. 5. Disconnect the cables from the following system board connectors: ● FRONT USB (yellow) ● PB/LED (black) ● FRONT AUD (blue) 6. Press in on the two tabs on each side of the assembly (1). 7. Rotate the top of the assembly downward, and then pull the assembly out through the hole in the front of the chassis (2) while guiding the wires through the hole in the chassis. To reinstall the front USB and power switch, reverse the removal procedure. 40 Chapter 4 Removal and Replacement Procedures
-
 1
1 -
2
-
3
-
4
-
5
-
6
-
7
-
8
-
9
-
10
-
11
-
12
-
13
-
14
-
15
-
16
-
17
-
18
-
19
-
20
-
21
-
22
-
23
-
24
-
25
-
26
-
27
-
28
-
29
-
30
-
31
-
32
-
33
-
34
-
35
-
36
-
37
-
38
-
39
-
40
-
41
-
 42
42 -
 43
43 -
 44
44 -
 45
45 -
 46
46 -
 47
47 -
 48
48 -
 49
49 -
 50
50 -
 51
51 -
 52
52 -
53
-
54
-
55
-
56
-
57
-
58
-
59
-
60
-
61
-
62
-
63
-
64
-
65
-
66
-
67
-
68
-
69
-
70
-
71
-
72
-
73
-
74
-
75
-
76
-
77
-
78
-
79
-
80
-
81
-
82
-
83
-
84
-
85
-
86
-
87
-
88
-
89
-
90
-
91
-
92
-
93
-
94
-
95
-
96
-
97
-
98
-
99
-
100
-
101
-
102
-
103
-
104
-
105
-
106
-
107
-
108
-
109
-
110
-
111
-
112
-
113
-
114
-
115
-
116
-
117
-
118
-
119
-
120
-
121
-
122
-
123
-
124
-
125
-
126
-
127
-
128
-
129
-
130
-
131
-
132
-
133
-
134
-
135
-
136
-
137
-
138
-
139
-
140
 |
 |
