HP Scanjet 3770 Users Manual - Page 19
Scanner has stopped working properly
 |
View all HP Scanjet 3770 manuals
Add to My Manuals
Save this manual to your list of manuals |
Page 19 highlights
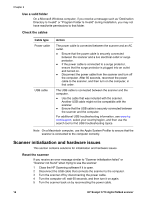
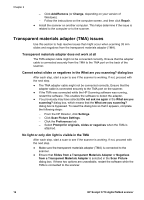
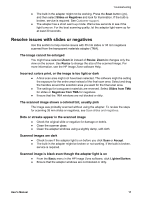
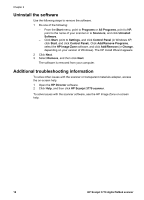
Troubleshooting 6 Reconnect the USB cable that connects the computer and the scanner. - Make sure that the USB cable is properly connected to the back of the scanner. The USB symbol on the end of the cable (the connector) should be facing up. When connected correctly, the USB connector feels slightly loose. When connected incorrectly, the USB plug feels overly tight. - Try connecting the USB cable to a different USB port on your computer. If the scanner still fails to initialize, run the Repair utility (Windows computers only) as described in the Scanner has stopped working properly section. Test scanner hardware If you think the scanner has a hardware issue, verify that the cables are firmly connected to the scanner, the computer, and the power source. If the cables are correctly connected, test the scanner using this procedure. 1 Ensure that the TMA cable on the scanner lid is connected to the back of the scanner. 2 Ensure that the scanner is not connected to the computer. 3 Reset the scanner. See Reset the scanner. 4 Disconnect the USB cable and power cable from the scanner. 5 Ensure that the scanner power cable is still connected to the power source. 6 Press and hold the Scan( ) and Copy buttons ( ) on the scanner at the same time while reconnecting the power cable to the scanner. The TMA should turn on for three seconds and then turn off. After the TMA turns off, the carriage in the scanner should move forward and backward, and the scanner lamp should turn on. The scanner lamp should flash six times while the carriage is still in motion. 7 To end the test, disconnect the power cable. Scanner has stopped working properly If the scanner stops scanning, complete the following steps in order. After each step, start a scan to see if the scanner is working. If not, proceed with the next step. ● A cable might be loose. Ensure that both the USB cable and power cable are securely connected ● Unplug the power cable from the power source, wait 60 seconds, and then plug it back in. ● Restart your computer. ● A software conflict might exist on your computer. You might need to reinstall the HP Image Zone software. To do this, run the Repair utility (Windows computers only). - Click Start, point to Settings, and then click Control Panel (in Windows XP, click Start, and click Control Panel). - Click Add/Remove Programs, and then select the HP Image Zone software. User's Manual 15
-
 1
1 -
2
-
3
-
4
-
5
-
6
-
7
-
8
-
9
-
10
-
11
-
12
-
13
-
 14
14 -
 15
15 -
 16
16 -
 17
17 -
 18
18 -
 19
19 -
 20
20 -
 21
21 -
 22
22 -
 23
23 -
 24
24 -
25
-
26
-
27
-
28
-
29
-
30
 |
 |
