HP Scanjet 3770 Users Manual - Page 9
Scan multiple pictures with one scan
 |
View all HP Scanjet 3770 manuals
Add to My Manuals
Save this manual to your list of manuals |
Page 9 highlights
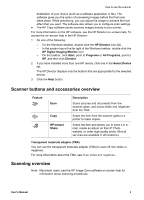
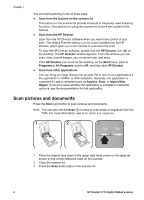
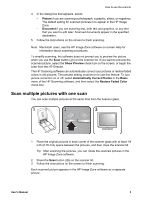
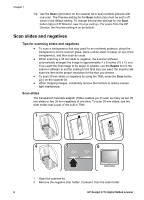
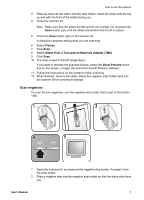
How to use the scanner 4 In the dialog box that appears, select: - Picture if you are scanning a photograph, a graphic, slides, or negatives. The default setting for scanned pictures is to appear in the HP Image Zone. - Document if you are scanning text, both text and graphics, or any text that you want to edit later. Scanned documents appear in the specified destination. 5 Follow the instructions on the screen to finish scanning. Note Macintosh users, see the HP Image Zone software on-screen Help for information about scanning procedures. To simplify scanning, the software does not prompt you to preview the picture when you use the Scan button ( ) on the scanner lid. If you want to preview the scanned picture, select the Show Preview check box on the screen, or begin the scan from the HP Director. The HP Scanning software can automatically correct your pictures or restore faded colors in old pictures. The preview setting must be on to use this feature. To turn picture correction on or off, select Automatically Correct Photos in the Basic menu of the HP Scanning software, and then select the Restore Faded Color check box. Scan multiple pictures with one scan You can scan multiple pictures at the same time from the scanner glass. 1 Place the original pictures in each corner of the scanner glass with at least 1/4 inch (6.35 mm) space between the pictures, and then close the scanner lid. Tip After scanning the pictures, you can rotate the scanned pictures in the HP Image Zone software. 2 Press the Scan button ( ) on the scanner lid. 3 Follow the instructions on the screen to finish scanning. Each scanned picture appears in the HP Image Zone software as a separate picture. User's Manual 5
-
 1
1 -
2
-
3
-
 4
4 -
 5
5 -
 6
6 -
 7
7 -
 8
8 -
 9
9 -
 10
10 -
 11
11 -
 12
12 -
 13
13 -
 14
14 -
15
-
16
-
17
-
18
-
19
-
20
-
21
-
22
-
23
-
24
-
25
-
26
-
27
-
28
-
29
-
30
 |
 |
