HP Scanjet 7450c HP Scanjet 7400C Series Scanner Windows - (English) Setup and - Page 12
Connecting the scanner, Testing the SCSI installation, Start, Settings, Control Panel, For Windows 98
 |
View all HP Scanjet 7450c manuals
Add to My Manuals
Save this manual to your list of manuals |
Page 12 highlights
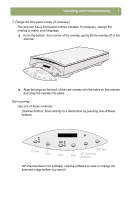
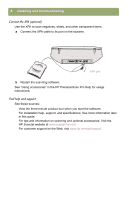
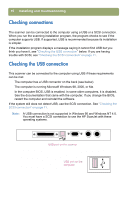
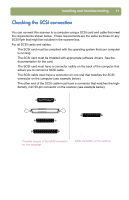
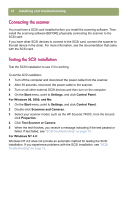
12 Installing and troubleshooting Connecting the scanner You must have a SCSI card installed before you install the scanning software. Then, install the scanning software BEFORE physically connecting the scanner to the SCSI card. If you have other SCSI devices to connect to the SCSI card, connect the scanner to the last device in the chain. For more information, see the documentation that came with the SCSI card. Testing the SCSI installation Test the SCSI installation to see if it is working. To test the SCSI installation 1 Turn off the computer and disconnect the power cable from the scanner. 2 After 30 seconds, reconnect the power cable to the scanner. 3 Turn on all other external SCSI devices and then turn on the computer. 4 On the Start menu, point to Settings, and click Control Panel. For Windows 98, 2000, and Me: 1 On the Start menu, point to Settings, and click Control Panel. 2 Double-click Scanners and Cameras. 3 Select your scanner model, such as the HP ScanJet 7400C, from the list and click Properties. 4 Click Test Scanner or Camera. 5 When the test finishes, you receive a message indicating if the test passed or failed. If test failed, see "SCSI troubleshooting" on page 13. For Windows NT 4.0: Windows NT 4.0 does not provide an automatic method for testing the SCSI installation. If you experience problems with the SCSI installation, see "SCSI troubleshooting" on page 13.
-
 1
1 -
2
-
3
-
4
-
5
-
6
-
 7
7 -
 8
8 -
 9
9 -
 10
10 -
 11
11 -
 12
12 -
 13
13 -
 14
14 -
 15
15 -
 16
16 -
 17
17 -
18
-
19
-
20
-
21
-
22
-
23
-
24
-
25
-
26
-
27
-
28
-
29
-
30
-
31
-
32
 |
 |