HP Scanjet 7450c HP Scanjet 7400C Series Scanner Windows - (English) Setup and - Page 6
Install software, Connect interface cable, Connect the power cable, Start
 |
View all HP Scanjet 7450c manuals
Add to My Manuals
Save this manual to your list of manuals |
Page 6 highlights
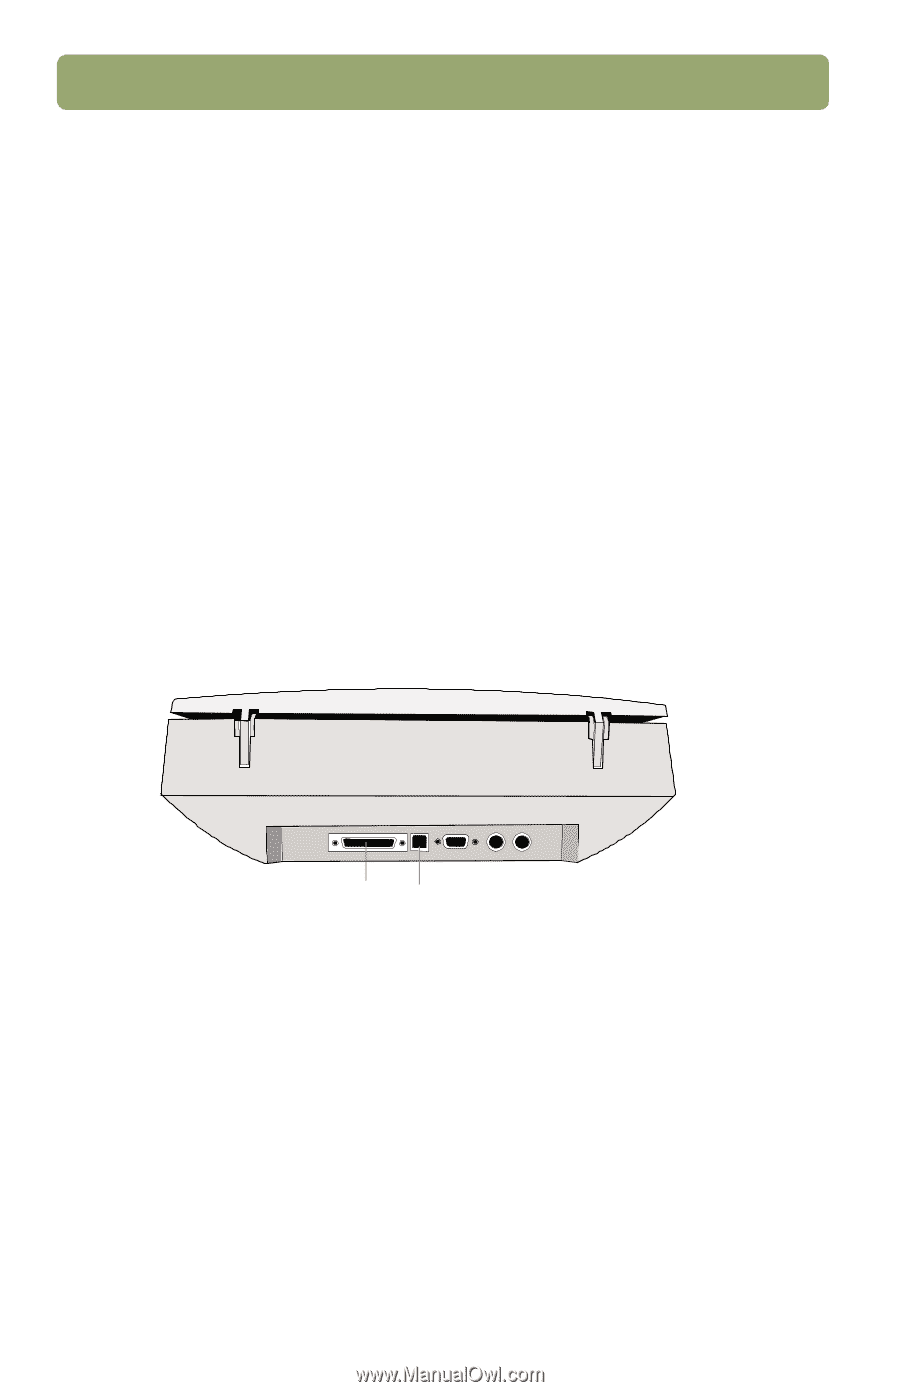
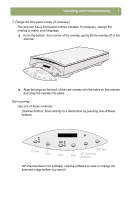
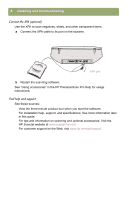
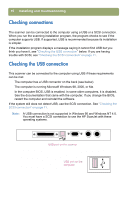
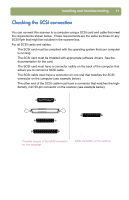
6 Installing and troubleshooting 4. Install software a Quit all open programs. b Insert the CD-ROM. The installation program should start automatically. If the installation program does not start: On the Start menu, click Run and type: x:setup.exe, where x is the letter of the CD-ROM drive. c Follow the directions on screen. The installation program suggests which connection, USB or SCSI, you should use. 5. Connect interface cable a Turn off the computer. b Choose ONE: q Connect the USB cable between the USB ports on the scanner and the computer. q Connect the SCSI cable between the SCSI ports on the scanner and the computer. Note: You MUST install the scanning software before connecting a SCSI cable. SCSI USB 6. Connect the power cable a Connect the power cable between the scanner and a surge protector or grounded wall outlet that is easily accessible. This turns on the scanner. (There is no power switch.) b Turn on the computer. If you see a dialog box informing you that new hardware has been found, follow the directions on screen.
-
 1
1 -
 2
2 -
 3
3 -
 4
4 -
 5
5 -
 6
6 -
 7
7 -
 8
8 -
 9
9 -
 10
10 -
 11
11 -
 12
12 -
13
-
14
-
15
-
16
-
17
-
18
-
19
-
20
-
21
-
22
-
23
-
24
-
25
-
26
-
27
-
28
-
29
-
30
-
31
-
32
 |
 |