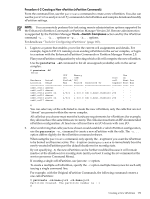
HP Server rp7405 nPartition Administrator's Guide, Second Edition - Page 178
Removing an Inactive Remote, nPartition, Removing a Local nPartition, Tools for Configuring
 |
View all HP Server rp7405 manuals
Add to My Manuals
Save this manual to your list of manuals |
Page 178 highlights
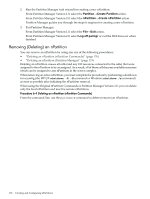
3. Remove the nPartition. Use one of the following procedures to remove the nPartition: "Removing an Inactive Remote nPartition", "Removing a Local nPartition", or "Removing an Active Remote nPartition". • Removing an Inactive Remote nPartition 1. Issue the parremove -p# command to remove the inactive remote nPartition (-p# where # is the nPartition number). For example: #parremove -p1 2. Issue the parstatus -P command to confirm that the nPartition was removed. If the nPartition was removed, it no longer is listed in the parstatus command output. • Removing a Local nPartition To remove the local nPartition (the nPartition on which you currently are issuing commands), perform the following steps. 1. Shut down all applications and warn users. Follow the same procedures you would use if you were to reboot the nPartition. 2. Issue the parremove -F -p# command to force-remove (-F) the local nPartition (-p# where # is the number of the local nPartition). Note that the local nPartition remains active following the parremove -F -p# command, until you perform a shutdown for reconfig to complete the removal. As soon as possible proceed with the shutdown for reconfig because the server Complex Profile will remain locked-and no other changes can occur-until the pending nPartition removal is completed. 3. Perform a shutdown for reconfig of the local nPartition (HP-UX: shutdown -R -H; Windows: shutdown /s; Linux: shutdown -h time; OpenVMS: @SYS$SYSTEM:SHUTDOWN with no automatic system reboot then MP Command menu RR command). The shutdown for reconfig command shuts down the nPartition and all cells so that the configuration changes occur and the nPartition is deleted. • Removing an Active Remote nPartition To remove an active remote nPartition, you must use the Enhanced nPartition Commands or Partition Manager Version 2.0 and the remote nPartition must be in a complex based on the HP sx1000 chipset or HP sx2000 chipset. 1. Shut down all applications and warn users. Follow the same procedures you would use if you were to reboot the nPartition. 2. Issue the parremove -F -p# command and specify either the -u... -h... options or -g... -h... options. For details see "Tools for Configuring nPartitions" (page 165). You must specify both the force-remove option (-F) and the nPartition number (-p# where # is the number for the nPartition being removed). 3. Perform a shutdown for reconfig of the nPartition that is being removed. Use any of the following methods, as appropriate, to perform the shutdown for reconfig. - From the operating system, put the nPartition into a shutdown for reconfig state (HP-UX: shutdown -R -H; Windows: shutdown /s; Linux: shutdown -h time; OpenVMS: @SYS$SYSTEM:SHUTDOWN with no automatic system reboot then MP Command menu RR command). 178 Creating and Configuring nPartitions
-
 1
1 -
2
-
3
-
4
-
5
-
6
-
7
-
8
-
9
-
10
-
11
-
12
-
13
-
14
-
15
-
16
-
17
-
18
-
19
-
20
-
21
-
22
-
23
-
24
-
25
-
26
-
27
-
28
-
29
-
30
-
31
-
32
-
33
-
34
-
35
-
36
-
37
-
38
-
39
-
40
-
41
-
42
-
43
-
44
-
45
-
46
-
47
-
48
-
49
-
50
-
51
-
52
-
53
-
54
-
55
-
56
-
57
-
58
-
59
-
60
-
61
-
62
-
63
-
64
-
65
-
66
-
67
-
68
-
69
-
70
-
71
-
72
-
73
-
74
-
75
-
76
-
77
-
78
-
79
-
80
-
81
-
82
-
83
-
84
-
85
-
86
-
87
-
88
-
89
-
90
-
91
-
92
-
93
-
94
-
95
-
96
-
97
-
98
-
99
-
100
-
101
-
102
-
103
-
104
-
105
-
106
-
107
-
108
-
109
-
110
-
111
-
112
-
113
-
114
-
115
-
116
-
117
-
118
-
119
-
120
-
121
-
122
-
123
-
124
-
125
-
126
-
127
-
128
-
129
-
130
-
131
-
132
-
133
-
134
-
135
-
136
-
137
-
138
-
139
-
140
-
141
-
142
-
143
-
144
-
145
-
146
-
147
-
148
-
149
-
150
-
151
-
152
-
153
-
154
-
155
-
156
-
157
-
158
-
159
-
160
-
161
-
162
-
163
-
164
-
165
-
166
-
167
-
168
-
169
-
170
-
171
-
172
-
 173
173 -
 174
174 -
 175
175 -
 176
176 -
 177
177 -
 178
178 -
 179
179 -
 180
180 -
 181
181 -
 182
182 -
 183
183 -
184
-
185
-
186
-
187
-
188
-
189
-
190
-
191
-
192
-
193
-
194
-
195
-
196
-
197
-
198
-
199
-
200
-
201
-
202
-
203
-
204
-
205
-
206
-
207
-
208
-
209
-
210
-
211
-
212
-
213
-
214
-
215
-
216
-
217
-
218
-
219
-
220
-
221
-
222
-
223
-
224
-
225
-
226
-
227
-
228
-
229
-
230
-
231
-
232
-
233
-
234
-
235
-
236
-
237
-
238
-
239
-
240
-
241
-
242
-
243
-
244
-
245
-
246
-
247
-
248
-
249
-
250
-
251
-
252
-
253
-
254
-
255
-
256
-
257
-
258
-
259
-
260
-
261
-
262
-
263
-
264
-
265
-
266
 |
 |