HP T5520 Administrator's Guide Microsoft Windows CE Image for HP Compaq t5000 - Page 61
SNTP Client, Authentication Failure Trap
 |
View all HP T5520 manuals
Add to My Manuals
Save this manual to your list of manuals |
Page 61 highlights
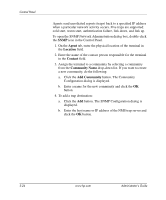
Control Panel 5. Select the Security tab to add/change SNMP security settings. 6. To enable an authentication failure trap, make sure the Enable Authentication Failure Trap check box is selected. 7. To add an accepted community and assign rights to the community: a. Click the Add button in the Accepted Community Names section. The Community Configuration dialog is displayed. b. Enter the name of the community in the Community Name field. c. Select the rights to the community from the Rights drop-down list and click the OK button. 8. Select the hosts from which SNMP packets may be accepted. Choose either Accept SNMP packets from any host or Accept SNMP packets from these hosts. If you choose the latter, enter the host(s) as follows: a. Click the Add button in the SNMP packets section. The SNMP Configuration dialog is displayed. b. Enter the host name or IP address and click the OK button. c. Repeats steps a and b above to add as many hosts as necessary. 9. After entering all the necessary SNMP information, click the OK button in the upper right corner of the SNMP Network Administration dialog box. SNTP Client The SNTP GUI Applet allows administrators to synchronize the clocks on all thin clients. Administrators can set thin clients to automatically synchronize with an Internet time server or with a boot server. ✎ Synchronization can occur only when your computer is connected to the Internet. Administrator's Guide www.hp.com 5-25
-
 1
1 -
2
-
3
-
4
-
5
-
6
-
7
-
8
-
9
-
10
-
11
-
12
-
13
-
14
-
15
-
16
-
17
-
18
-
19
-
20
-
21
-
22
-
23
-
24
-
25
-
26
-
27
-
28
-
29
-
30
-
31
-
32
-
33
-
34
-
35
-
36
-
37
-
38
-
39
-
40
-
41
-
42
-
43
-
44
-
45
-
46
-
47
-
48
-
49
-
50
-
51
-
52
-
53
-
54
-
55
-
 56
56 -
 57
57 -
 58
58 -
 59
59 -
 60
60 -
 61
61 -
 62
62 -
 63
63 -
 64
64 -
 65
65 -
 66
66 -
67
-
68
-
69
-
70
-
71
-
72
-
73
-
74
 |
 |
