HP t420 Troubleshooting Guide - Page 37
HP ThinUpdate (add-on only), In the Control Panel, click
 |
View all HP t420 manuals
Add to My Manuals
Save this manual to your list of manuals |
Page 37 highlights
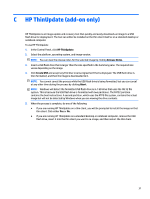
C HP ThinUpdate (add-on only) HP ThinUpdate is an image update and recovery tool that quickly and easily downloads an image to a USB flash drive for deployment. The tool can either be installed on the thin client itself or on a standard desktop or notebook computer. To use HP ThinUpdate: 1. In the Control Panel, click HP ThinUpdate. 2. Select the platform, operating system, and image version. NOTE: You can view the release notes for the selected image by clicking Release Notes. 3. Insert a USB flash drive that is larger than the size specified in the Summary pane. The required size varies depending on the image. 4. Click Create USB and accept any End User License Agreement that is displayed. The USB flash drive is then formatted, and then the image is downloaded to it. NOTE: You cannot cancel the process while the USB flash drive is being formatted, but you can cancel at any other time during the process by clicking Abort. NOTE: Windows will detect the formatted USB flash drive as a 1 GB drive that uses the FAT32 file system. This is because the USB flash drive is formatted with two partitions. The FAT32 partition contains the boot instructions. A second partition, which uses the NTFS file system, contains the actual image but will not be detected by Windows when you are viewing the drive contents. 5. When the process is complete, do one of the following: ● If you are running HP ThinUpdate on a thin client, you will be prompted to install the image on that thin client. Click either Yes or No. ● If you are running HP ThinUpdate on a standard desktop or notebook computer, remove the USB flash drive, insert it into the thin client you want to re-image, and then restart the thin client. 31
-
 1
1 -
2
-
3
-
4
-
5
-
6
-
7
-
8
-
9
-
10
-
11
-
12
-
13
-
14
-
15
-
16
-
17
-
18
-
19
-
20
-
21
-
22
-
23
-
24
-
25
-
26
-
27
-
28
-
29
-
30
-
31
-
 32
32 -
 33
33 -
 34
34 -
 35
35 -
 36
36 -
 37
37 -
 38
38 -
 39
39 -
 40
40 -
 41
41 -
 42
42 -
43
-
44
-
45
-
46
-
47
-
48
 |
 |
