HP t5400 Microsoft® Windows Embedded Standard 2009 (WES) v. 5.1.910 a - Page 16
Administrator Logon Access, Logging Off, Restarting, and Shutting Down the Thin Client - memory configuration
 |
View all HP t5400 manuals
Add to My Manuals
Save this manual to your list of manuals |
Page 16 highlights
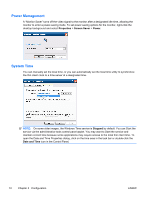
Windows Security dialog box, and then selecting Change Password. You cannot change the password when logged on as a user. ● Passwords are case-sensitive, but user names are not. ● The administrator may create additional user accounts using the User Manager utility available in the Administrative Tools option in Control Panel. However, due to local memory constraints, you should keep the number of additional users to a minimum. For more information, see User Accounts on page 12. Administrator Logon Access To access Administrator logon regardless of the state of the thin client user mode: ▲ While holding down Shift, click Start > Shut Down. Still holding down Shift, from the Shut Down dialog box, select Log Off, and then click OK. The screen for Administrator logon is displayed. NOTE: The default username and password for the Administrator account is Administrator. The default user name and password for the User account is User. You can use the HP Windows Logon Configuration Manager to permanently modify the default login user. Located in the Control Panel, only the Administrator can access this application. Logging Off, Restarting, and Shutting Down the Thin Client To restart, shut down, or log off from the thin client, click Start > Shut Down. From the Shut Down dialog box, select the desired action, and then click OK. NOTE: You may also log off or shut down using the Windows Security dialog box. Press Ctrl+Alt +Delete to open the dialog box. If automatic logon is enabled, when you log off (without shutting down), the thin client immediately logs on the pre-defined User account set up in Windows Login Configuration. For instructions for logging on as a different user, see Logging On on page 7. 8 Chapter 3 Configuration ENWW
-
 1
1 -
2
-
3
-
4
-
5
-
6
-
7
-
8
-
9
-
10
-
 11
11 -
 12
12 -
 13
13 -
 14
14 -
 15
15 -
 16
16 -
 17
17 -
 18
18 -
 19
19 -
 20
20 -
 21
21 -
22
-
23
-
24
-
25
-
26
-
27
-
28
-
29
-
30
-
31
-
32
-
33
-
34
-
35
-
36
-
37
-
38
-
39
-
40
-
41
-
42
-
43
-
44
-
45
-
46
-
47
-
48
-
49
-
50
-
51
-
52
-
53
-
54
-
55
-
56
-
57
 |
 |
