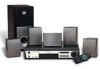
Hitachi DV-S522U Owners Guide - Page 32
Initial Settings - programming code
 |
View all Hitachi DV-S522U manuals
Add to My Manuals
Save this manual to your list of manuals |
Page 32 highlights
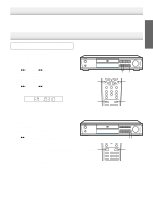
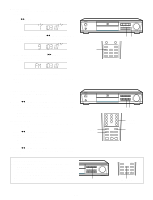
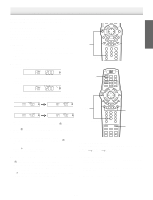
INITIAL SETTINGS Once the initial settings have been completed, the unit can always be operated under the same conditions. The settings will be retained in the memory until they are changed, even if the power is turned off. Common Procedures of Initial Settings 1. Press [SET UP] in the stop mode. "SET UP MENU (Language, Display, Digital out, and Parental)" appears on the TV screen. 2. Press [4], [5], [b] or [a], then press [ENTER] to select the menu. Please refer to the on-screen instructions. 3. Press [SET UP]. Example: OSD: ENGLISH AUDIO: DISC, ENGLISH, SPANISH, FRENCH, OTHERS SUBTITLE: DISC, ENGLISH, SPANISH, FRENCH, OTHERS DVD MENU: DISC, ENGLISH, SPANISH, FRENCH, OTHERS (DISC: It will use its first priority language setting.) SET ITLE NU TOP M 1, 3 UP ME 2 SHIFT CLEAR ENTER TRIM REV SLOW ENU SUBT FWD SLOW Notes: • You cannot switch audio sound track languages if there is only one language recorded on the disc. • When you play back a DVD video disc, the unit automatically displays the pre-selected subtitle language if it is included on the disc. • If "OTHERS" is selected, enter the language code. (See "LANGUAGE CODE LIST" on page E33.) TV TYPE: COMPONENT OUTPUT: PROGRESSIVE MODE: 4:3 LB, 4:3 PS, 16:9 INTERLACE, PROGRESSIVE AUTO, VIDEO, FILM TV TYPE: Select the appropriate setting for your TV screen size. 4:3 LB (Letterbox): Select when a conventional TV set is connected. When the wide screen disc is played back, the black bands appear at the top and bottom of screen. 4:3 PS (Panscan): Select when a conventional TV set is connected. When the wide screen disc is played back, it displays pictures cropped to fill to your TV screen. The left and right edges are cut off. 16:9 : Select when a wide screen TV set is connected. Played in "FULL" size. (Setting the wide screen TV to "FULL" mode is also necessary.) Cut off Cut off COMPONENT OUTPUT: If you use a conventional TV and connect it to the COMPONENT VIDEO OUT jacks (see Page E10), select "INTERLACE". If you use a TV with progressive-scan capability and connect it to the COMPONENT VIDEO OUT jacks (see Page E12), select "PROGRESSIVE". Notes: • If the VIDEO OUT SELECT and VIDEO OUT SCAN SELECT switches are not correct position, you cannot select "COMPONENT OUTPUT: PROGRESSIVE". • If you select "CONPONENT OUTPUT: PROGRESSIVE" when using a conventional TV, the TV screen is disturbed. In this case, turn off the power, and then set the VIDEO OUT SCAN switch to the INTERLACE position. PROGRESSIVE MODE: When "COMPONENT OUTPUT: PROGRESSIVE" is selected as above, select "AUTO", "VIDEO" or "FILM". AUTO: It automatically selects the Video Source (VIDEO) or Film Source (FILM). Normally, select this mode. VIDEO (Video Source): Major DVD-Video sources consist of video source and film source. Video source is DVD-Video recording produced by converting TV programs like drama or animation video (30 frames per second, 60 fields) into DVD video disc. FILM (Film Source): Major DVD-Video sources consist of video source and film source. Film source is DVD-Video recording produced by converting movie films (24 frames per second) into DVD video disc. Notes: • The screen size may differ depending on the DVD video discs. • If you select 16:9 to get rid of the black bands on screen when wide screen disc is played back, picture may be slightly Notes: • Initial setting is "AUTO". • If picture flickering occurs at "AUTO" mode, select "VIDEO" or "FILM". distorted. • In some discs, even if 4:3 PS is selected, the black bands may remain on the screen. -E31-
-
 1
1 -
2
-
3
-
4
-
5
-
6
-
7
-
8
-
9
-
10
-
11
-
12
-
13
-
14
-
15
-
16
-
17
-
18
-
19
-
20
-
21
-
22
-
23
-
24
-
25
-
26
-
 27
27 -
 28
28 -
 29
29 -
 30
30 -
 31
31 -
 32
32 -
 33
33 -
 34
34 -
 35
35 -
 36
36 -
 37
37 -
38
-
39
-
40
-
41
 |
 |
