Hitachi c15fb User Manual - Page 4
B. Disconnect the two Stator Brush Terminal Ass'ys - brushes
 |
UPC - 717709001060
View all Hitachi c15fb manuals
Add to My Manuals
Save this manual to your list of manuals |
Page 4 highlights
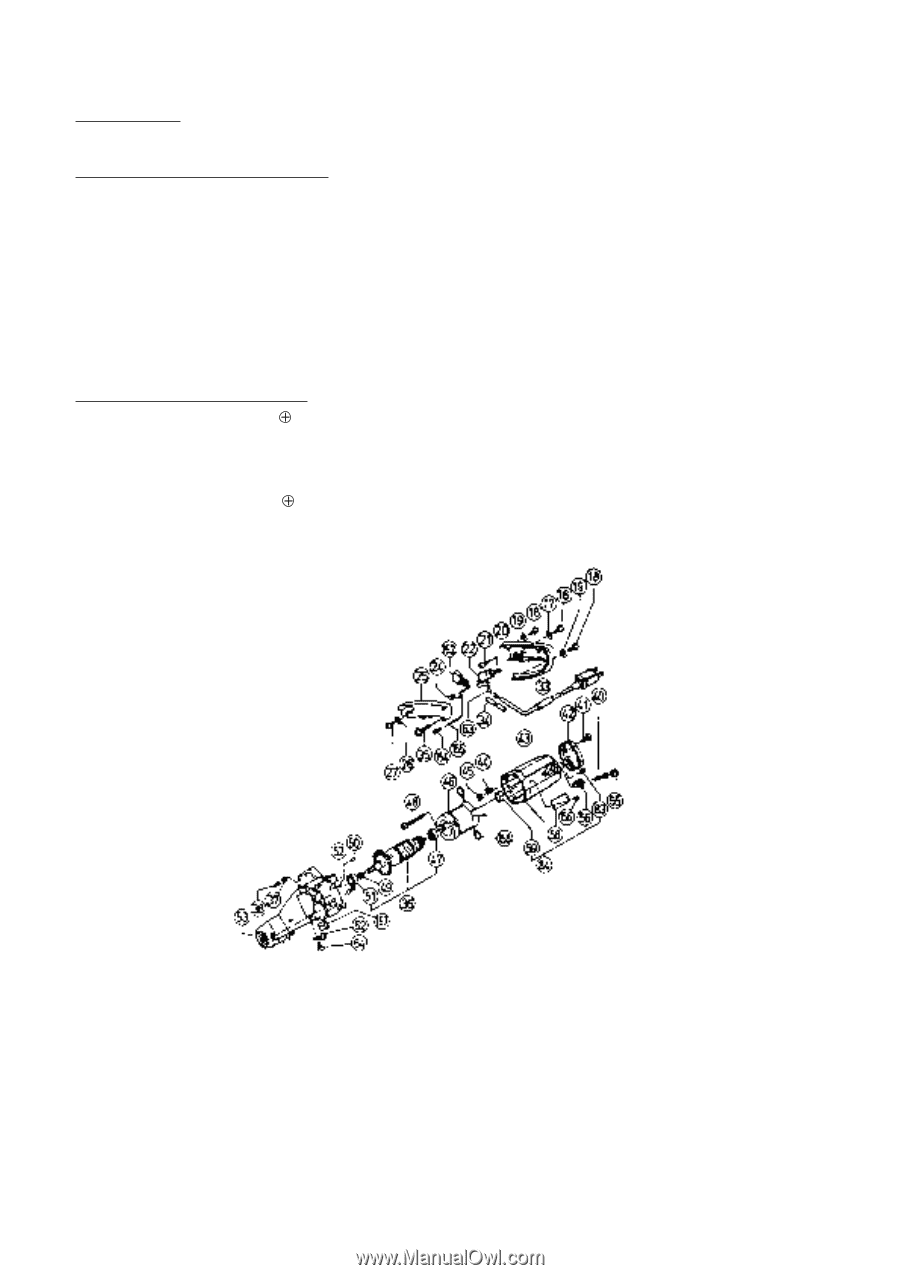
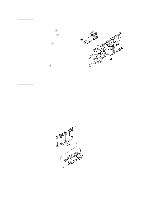
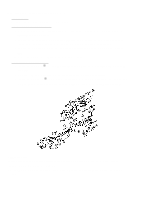
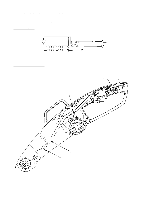
(6) Disassembly of the Armature Ass'y and Stator Ass'y: Tools Required: • Plus Screwdriver, Nippers, Wooden or Plastic Hammer 1. Disassembly of the Armature Ass'y: A. Remove the Saw Cover Ass'y [3] and handle Cover [25] by following the disassembly procedures in paragraphs (3) and (4), above. B. Remove the two leadwires of the Stator Ass'y [46] from the Switch [22]. As there is another leadwire connected at the Connector [24], cut off the wires as closely to the Connector as possible. C. Remove the two Brush Caps [55] from the Housing Ass'y [84], and take out the two Carbon Brushes [40]. D. Remove the Armature Ass'y [36] from the Housing Ass'y [84]. 2. Disassembly of the Stator Ass'y: A. Loosen the two D4 x 10 -Hd. Tapping Screws [41], and remove the Tail Cover [42] from the Housing Ass'y [84]. B. Disconnect the two Stator Brush Terminal Ass'ys [158] from the Brush Holders [56]. C. Loosen the two M5 x 75 -Hd. Machine Screws [48] which fix the Stator Ass'y [46]. Then tap gently on the Gear Case mounting end of the Housing Ass'y [84] to loosen and remove the Stator Ass'y [46]. 1-2. Reassembly: Reassembly can be accomplished by following the disassembly procedures in reverse. However, special attention should be given to the following items. (1) If the Armature, Stator, Switch or any other electrical component has been replaced, conduct the following tests: --- 4 ---
-
 1
1 -
 2
2 -
 3
3 -
 4
4 -
 5
5 -
 6
6 -
 7
7 -
 8
8 -
 9
9 -
 10
10 -
11
 |
 |