Honeywell RCWL8000A1002 User Guide - Page 4
Setting up - we
 |
UPC - 085267333979
View all Honeywell RCWL8000A1002 manuals
Add to My Manuals
Save this manual to your list of manuals |
Page 4 highlights
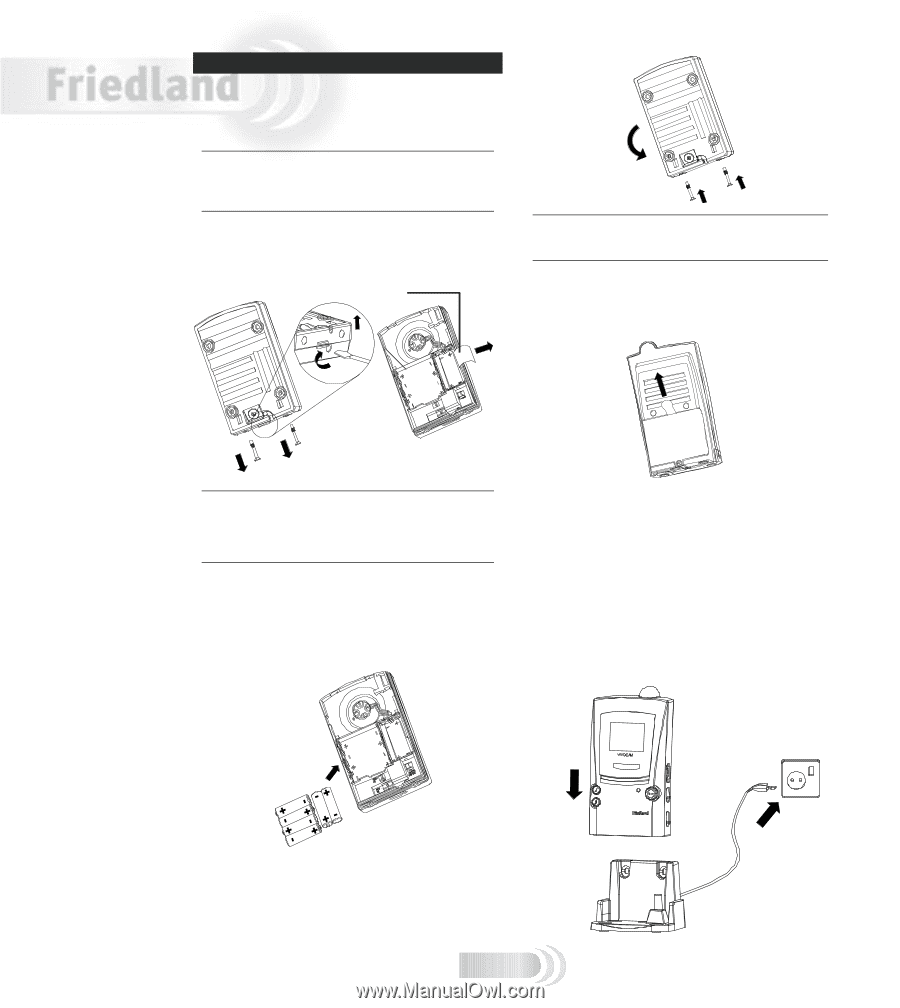
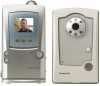
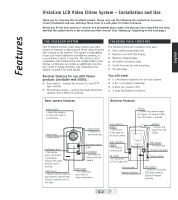
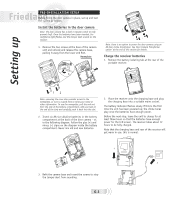
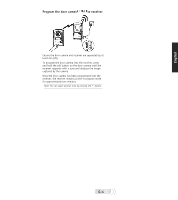
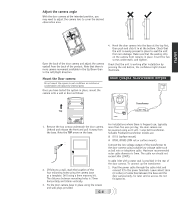
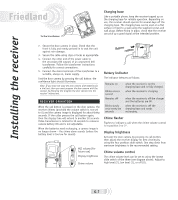
Setting up PRE-INSTALLATION SETUP Before fixing the door camera in place, set up and test the system as follows: Install the batteries in the door camera Note: The door camera has a built in tamper switch to help prevent theft. Once the batteries have been inserted, the confidence light flashes and the tamper alert sounds on the receiver. 1. Remove the two screws at the base of the camera unit and unhook and release the camera base, pulling it away from the lower end first. Nameplate 1 2 3 Note: there is an option to power the door camera using an 8V door chime transformer. See 'Door Camera Transformer option' at the end of this section for details. Charge the receiver batteries 1. Remove the battery isolating tab at the rear of the portable receiver. � �� Note: removing the cover also provides access to the nameplate, so now is a good time to write your name or other information. To use the nameplate, pull the end out from the side of the battery compartment, add your text at the end of the strip and carefully push it back into the slot. 2. Insert six AA-size alkaline batteries in the battery compartment at the back of the door camera - as in the following diagram. Follow the plus (+) and minus (-) signs on the diagram inside the battery compartment. Never mix old and new batteries. 2. Place the receiver onto the charging base and plug the charging base into a suitable mains socket. The battery indicator flashes slowly if this is the first time the unit has been powered up; the chime tunes play once the batteries have enough power. Before the next step, leave the unit to charge for at least three hours so that the batteries have enough power for the LCD screen. The receiver takes about 12 hours to be fully charged. Note that the charging base and rear of the receiver will get warm in use: this is normal. � � 3. Refit the camera base and insert the screws to stop the tamper alert from sounding. G-3
-
 1
1 -
 2
2 -
 3
3 -
 4
4 -
 5
5 -
 6
6 -
 7
7 -
 8
8 -
 9
9 -
 10
10 -
11
-
12
-
13
-
14
-
15
-
16
-
17
-
18
-
19
-
20
-
21
-
22
-
23
-
24
-
25
-
26
-
27
-
28
-
29
-
30
-
31
-
32
-
33
-
34
-
35
-
36
-
37
-
38
-
39
-
40
-
41
-
42
-
43
-
44
-
45
-
46
-
47
-
48
-
49
-
50
-
51
-
52
 |
 |