Honeywell RCWL8000A1002 User Guide - Page 6
Installing the door camera - visiocam
 |
UPC - 085267333979
View all Honeywell RCWL8000A1002 manuals
Add to My Manuals
Save this manual to your list of manuals |
Page 6 highlights
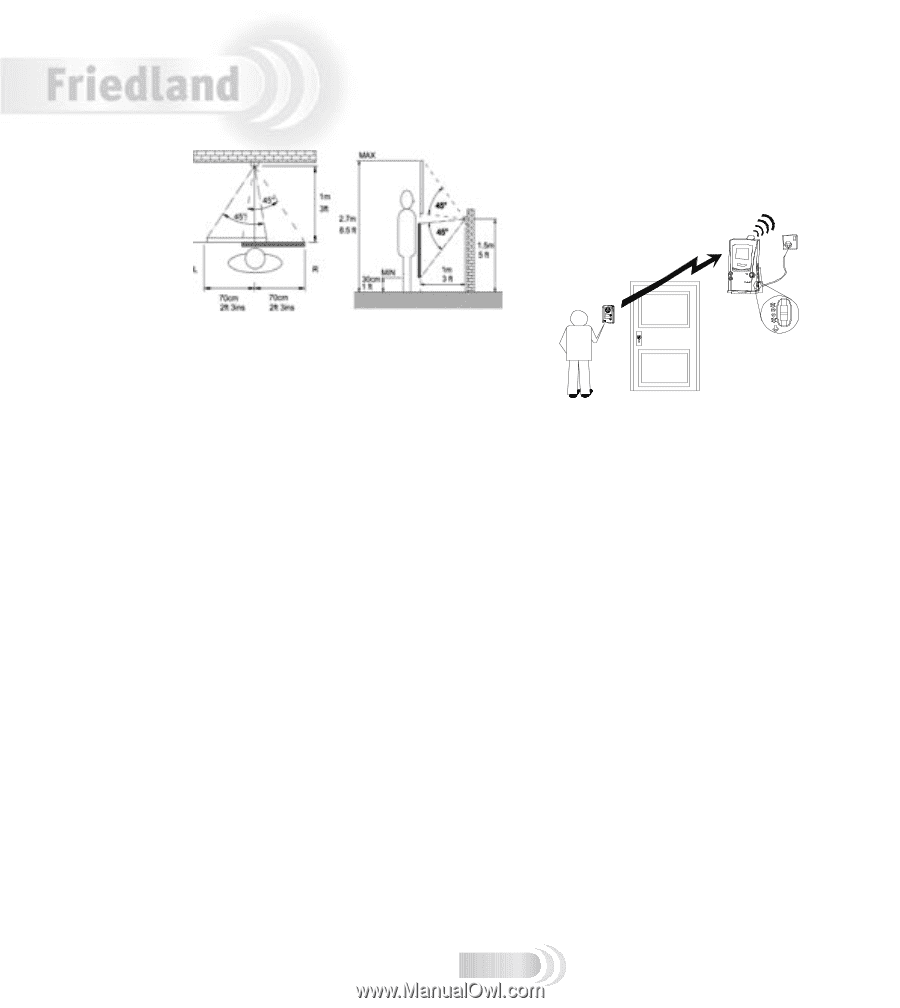
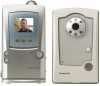
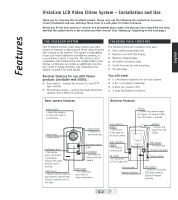
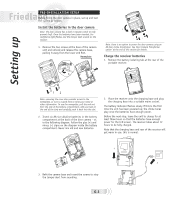
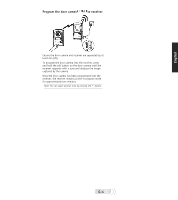
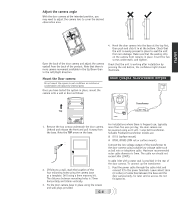
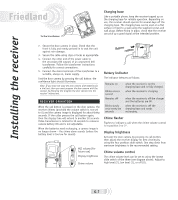
Installing the door camera Position the door camera Find a position for the door camera where the call button is easy to press and the camera can 'see' visitors clearly. Horizontal Vertical top view Position the receiver The receiver must be positioned within range of the door camera (i.e. less than 30m in a typical building). Test the system To ensure reliable operation, we recommend that both the door camera and receiver are powered up in their planned position(s), to check that the receiver has a good signal from the door camera. VISIOCAM The following points are important: ■ The height needs to be between 1.3 and 1.5 metres (4.5 to 5ft) above the ground or step where visitors normally stand. ■ The camera is adjustable through a 30° total angle left to right, and 60° top to bottom. Position the unit to ensure the camera has sight of your visitor. ■ Avoid a position where the camera faces into the sun, as this may overload the camera and visitors will appear very dark. Facing large areas of bright sky should also be avoided when possible by pointing the camera down, rather than up. ■ Position the camera where the motion sensor is not blocked from approaching visitors. Avoid locating the camera where passing people or traffic will cause false triggering. Note that the motion sensor range is approximately 4m and that it can be switched off if necessary (see 'Door camera', page 9). ■ The mounting surface should be of brick or wood construction, and not of metal, reinforced concrete, or heavy stone (i.e. more than 40cm thick) construction - as this may block the transmitted signal. ■ The mounting surface should be even and flat, to avoid distorting the door camera case, Level any uneven surface before mounting, as a distorted base can let rainwater into the unit. ■ Do not mount within 30cm of large metal objects, or steel reinforced PVC frames, as this reduces or blocks signals to the receiver. ■ Keep the base of the door camera clear of shelves or other projections that might block the light sensor under the unit. An obscured sensor causes the camera to switch into black and white mode. ■ If the door camera is to be powered separately by a bell transformer, then routing and fixing of the power cable must also be considered. To test the system, have someone hold the door camera against the wall in the selected mounting position and press the call button, while you check the reception on the receiver unit. If the picture quality is poor, or there is no response when the call button is pressed, then there are three possible reasons: 1. The units may be too far apart (more than 30-40m in a typical house). Try moving the receiver closer. 2. There is nearby interference on the video channel. Remove the door camera back and change the video channel switch from CH 1 to, for example, CH 3. Test the system again, selecting a different channel if channel 3 is no better. Refer to the troubleshooting section for more information on interference reduction. 3. The door camera has not been programmed into the receiver (refer to page 4). G-5
-
 1
1 -
 2
2 -
 3
3 -
 4
4 -
 5
5 -
 6
6 -
 7
7 -
 8
8 -
 9
9 -
 10
10 -
 11
11 -
 12
12 -
13
-
14
-
15
-
16
-
17
-
18
-
19
-
20
-
21
-
22
-
23
-
24
-
25
-
26
-
27
-
28
-
29
-
30
-
31
-
32
-
33
-
34
-
35
-
36
-
37
-
38
-
39
-
40
-
41
-
42
-
43
-
44
-
45
-
46
-
47
-
48
-
49
-
50
-
51
-
52
 |
 |