Honeywell RCWL8000A1002 User Guide - Page 8
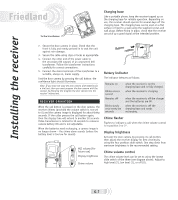
Installing the receiver
 |
UPC - 085267333979
View all Honeywell RCWL8000A1002 manuals
Add to My Manuals
Save this manual to your list of manuals |
Page 8 highlights
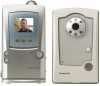
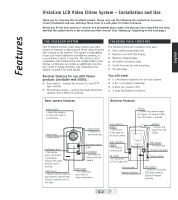
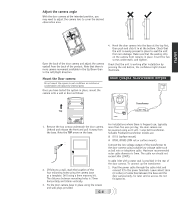
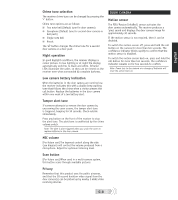
Installing the receiver To the transformer Charging base Like a portable phone, keep the receiver topped up on the charging base for reliable operation. Depending on use, the receiver should operate for several days off the charging base. The charging base can be used on a flat surface or fixed to a wall using the supplied screws and wall plugs. Before fixing in place, check that the receiver can pick up a good signal at the intended position. 2. Secure the door camera in place. Check that the front is fully and evenly pressed in to seal the unit against rain damage. 3. Secure the cable using clips or tacks as appropriate. 4. Connect the other end of the power cable to the secondary (8V output) of an unpowered bell transformer. Follow the transformer instructions carefully for correct connections. 5. Connect the mains terminals of the transformer to a suitable, always on, mains supply. Test the door camera by pressing the call button: the confidence light should illuminate. Note: If you have not used the door camera with batteries for a trial test, then you must program the door camera with the receiver by following the 'program the door camera into the receiver' instructions. RECEIVER OPERATION When the call button is pressed on the door camera, the receiver chimes (provided the volume switch is not set to 0) and the camera image is displayed for about thirty seconds. If the caller presses the call button again, then the display time will extend to another 30 seconds. Video transmission is limited to 30 seconds to conserve camera battery life and is not adjustable. When the batteries need recharging, a camera image is no longer shown - the chime alone sounds (unless the battery level is too low for sound). MIC volume [for future use] Display brightness Chime volume Battery indicator The indicator behaves as follows: Remains on Blinks once a second Remains off Blinks slowly once every ten seconds when the receiver is on the charging base and is fully charged. when the receiver is charging. when the receiver is off the charger and the batteries are OK. when the receiver is off the charging base and needs recharging. Chime flasher Flashes to indicate a call when the chime volume control is in position 0 or 2*. Display brightness Activate the door camera by pressing its call button, then adjust the receiver display for best viewing by using the four position slide switch. One step down from maximum brightness is the recommended setting. Chime volume control The chime volume level can be set to using the lowest slide switch of the three (see diagram above). Adjust to high level (2), low level (1), or off (0). G-7
-
 1
1 -
2
-
 3
3 -
 4
4 -
 5
5 -
 6
6 -
 7
7 -
 8
8 -
 9
9 -
 10
10 -
 11
11 -
 12
12 -
 13
13 -
14
-
15
-
16
-
17
-
18
-
19
-
20
-
21
-
22
-
23
-
24
-
25
-
26
-
27
-
28
-
29
-
30
-
31
-
32
-
33
-
34
-
35
-
36
-
37
-
38
-
39
-
40
-
41
-
42
-
43
-
44
-
45
-
46
-
47
-
48
-
49
-
50
-
51
-
52
 |
 |
