Hotpoint HDF310PGRWW Installation Instructions - Page 6
Dishwasher Installation
 |
View all Hotpoint HDF310PGRWW manuals
Add to My Manuals
Save this manual to your list of manuals |
Page 6 highlights
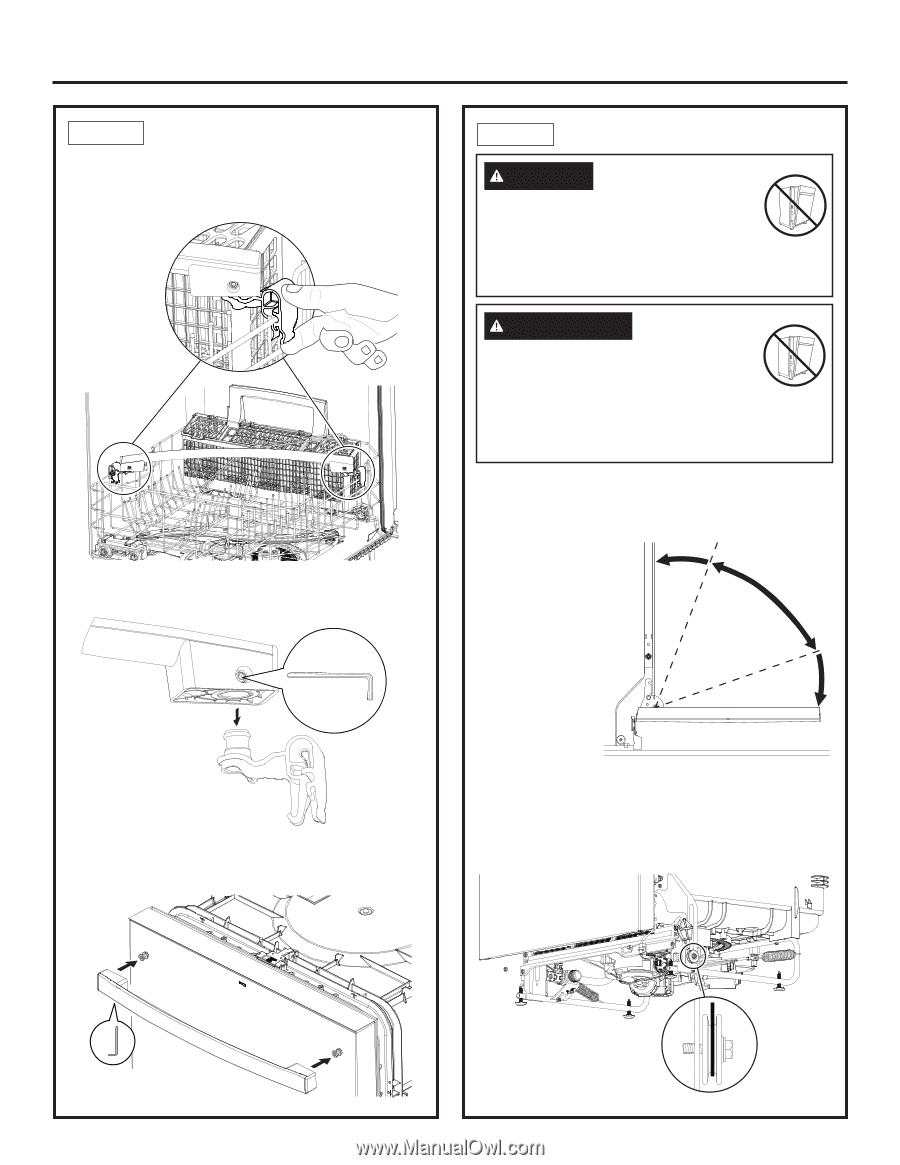
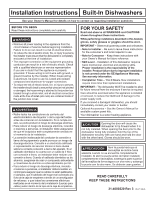
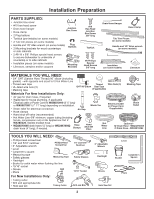
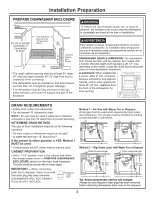
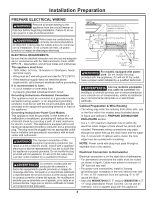
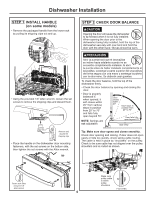
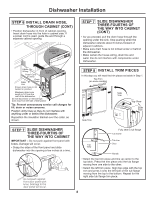
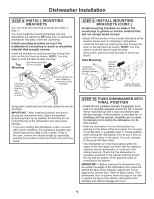
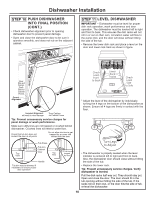
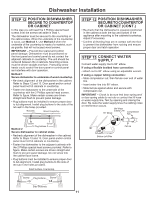
Dishwasher Installation STEP 1 INSTALL HANDLE (on some models) • Remove the packaged handle from the lower rack by pulling its shipping clips out and up. • Using the provided 1/8" Allen wrench, loosen the set screws to remove the shipping clips and discard them. Remove and discard the shipping clips • Place the handle on the dishwasher door mounting fasteners, with the set screws on the bottom side, then tighten the set screws with the Allen wrench. STEP 2 CHECK DOOR BALANCE CAUTION Opening the door will cause the dishwasher to tip forward when it is not fully installed. When opening the door prior to the dishwasher being fully installed, hold the top of the dishwasher securely with one hand and hold the door with the other hand. Gloves should be worn. PRECAUCIÓN Abrir la puerta hará que el lavavajillas se incline hacia adelante cuando no se encuentre completamente instalado. Al abrir la puerta antes de haber instalado completamente el lavavajillas, sostenga la parte superior del lavavajillas de forma segura con una mano y sostenga la puerta con la otra mano. Se deberán usar guantes. To check the door balance, hold the top of the dishwasher firmly. • Check the door balance by opening and closing the door. • Door is properly balanced if, when opened, it self closes within 20° from vertical, stays in position from 20° to 70° and falls fully open beyond 70°. NOTE: Springs are not adjustable. Door closes within 20° Door stays in position from 20° to 70° Door falls fully open beyond 70° Side View Tip: Make sure door opens and closes smoothly. Check door opening and closing. If door does not open easily or falls too quickly, check spring cable routing. The cable is held in place by "shoulders" on the pulley. Check to be sure cable has not slipped over the pulley shoulders and is routed as shown. Fasten both sides using the 1/8" Allen wrench Make sure pulley cable is within pulley shoulders Front View 6
-
 1
1 -
 2
2 -
 3
3 -
 4
4 -
 5
5 -
 6
6 -
 7
7 -
 8
8 -
 9
9 -
 10
10 -
 11
11 -
 12
12 -
13
-
14
-
15
-
16
-
17
-
18
-
19
-
20
-
21
-
22
-
23
-
24
-
25
-
26
-
27
-
28
-
29
-
30
-
31
-
32
 |
 |