Husqvarna Z246 Owners Manual - Page 21
Operating On Hills, Mowing Tips - mulching kit
 |
View all Husqvarna Z246 manuals
Add to My Manuals
Save this manual to your list of manuals |
Page 21 highlights
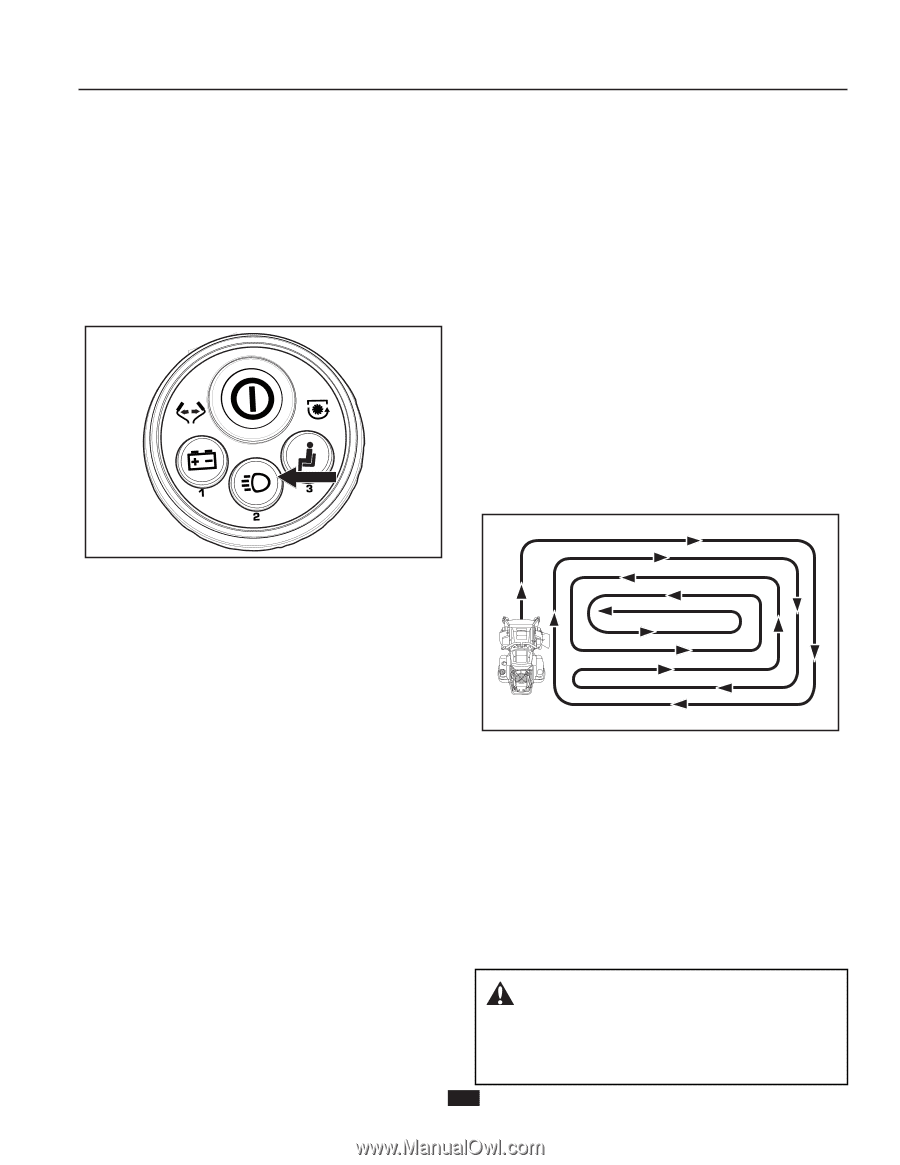
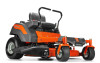
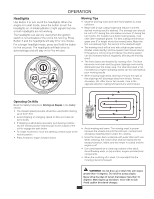
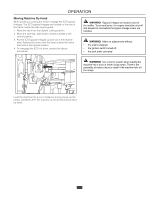
OPERATION Headlights Use Button 2 to turn on/off the headlights. When the engine is in start mode, press the button to turn the headlights on. A blinking Button 2 light signals that one or both headlights are not working. The headlights can also be used when the ignition switch is not activated or the unit is not running. Press Button 2 and the headlights will stay lit for one minute. For a longer headlight mode, press and hold the button for five seconds. The headlights will flash twice to acknowledge and will stay on for five minutes. Mowing Tips • Observe and flag rocks and other fixed objects to avoid collisions. • Begin with a high cutting height and reduce it until the desired mowing result is attained. The average lawn should be cut to 2½" during the cool season and over 3" during the hot months. For healthier and better looking lawns, mow often after moderate growth. For best cutting performance, grass over 6" in height should be mowed twice. Make the first cut relatively high, the second to the desired height. • The mowing result will be best with a high engine speed (blades rotate rapidly) and low speed (rider moves slowly). If the grass is not too long and dense, the driving speed can be increased without negatively affecting the mowing result. • The finest lawns are obtained by mowing often. The lawn becomes more even and the grass clippings more evenly distributed over the mown area. The total time taken is not increased as a higher operating speed can be used without poor mowing results. • When mowing large areas, start by turning to the right so that clippings will discharge away from shrubs, fences, driveways, etc. After one or two rounds, mow in the opposite direction making left hand turns until finished. Operating On Hills Read the Safety Instructions Driving on Slopes in the Safety section. • The slowest speed possible should be used before starting up or down hills. • Avoid stopping or changing speed on hills and make all turns slowly. • If stopping is absolutely necessary, pull steering controls into the neutral position and the push to the outside of the unit to engage the park brake. • To restart movement, move the steering controls back to the neutral position. • Press forward to regain forward motion. • Avoid mowing wet lawns. The mowing result is poorer because the wheels sink into the soft lawn, clumps build, and grass clippings fasten under the cowling. • Hose the mower deck underside with water after each use. When cleaning, the mower deck shall be raised into the transport position. Make sure the mower is cooled and the engine is off. • Use compressed air to clean top surface of the deck. Avoid flooding water on top surface, engine and electrical components. • When the mulching kit is used, it is important that the mowing interval is frequent. WARNING! Do not drive up or down hills with slopes greater than 10 degrees. Do not drive across slopes. Never drive the rider on terrain that slopes more than 10 degrees. Mow slopes up and down, never side to side. Avoid sudden directional changes. 21
-
 1
1 -
2
-
3
-
4
-
5
-
6
-
7
-
8
-
9
-
10
-
11
-
12
-
13
-
14
-
15
-
 16
16 -
 17
17 -
 18
18 -
 19
19 -
 20
20 -
 21
21 -
 22
22 -
 23
23 -
 24
24 -
 25
25 -
 26
26 -
27
-
28
-
29
-
30
-
31
-
32
-
33
-
34
-
35
-
36
-
37
-
38
-
39
-
40
-
41
-
42
-
43
-
44
 |
 |