IBM 4530-N01 User Guide
IBM 4530-N01 Manual
 |
View all IBM 4530-N01 manuals
Add to My Manuals
Save this manual to your list of manuals |
IBM 4530-N01 manual content summary:
- IBM 4530-N01 | User Guide - Page 1
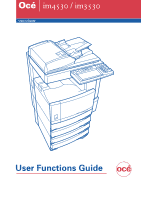
Océ im4530 / im3530 User's Guide User Functions Guide - IBM 4530-N01 | User Guide - Page 2
Incorporated. - Netscape is a trademark of Netscape Communications Corporation. - IBM, AT and AIX are trademarks of International Business Machines Corporation. - Novell, Inc. - Other company names and product names in this manual are the trademarks of their respective companies. Copyright © 2006 Oc - IBM 4530-N01 | User Guide - Page 3
TABLE OF CONTENTS TABLE OF CONTENTS ...1 PREFACE...3 FEATURES OF THE Océ im3530 /im4530 4 1. MANAGING ADDRESS BOOK (ADDRESS MENU 5 1. MANAGING ADDRESS BOOK...6 • About Managing Contacts in Address Book 6 • Registering Contacts ...7 • Editing Contacts...10 • Deleting Contacts ...12 • Searching - IBM 4530-N01 | User Guide - Page 4
112 • Setting the HTTP Network Service 114 • Setting the Ethernet Speed...116 • Setting the LDAP and SNMP Network Service 118 4. SETTING COPY FUNCTIONS the Reception List...147 10. PRINTING LISTS...149 11. SETTING PRINTER/E-FILING FUNCTIONS 150 12. WIRELESS SETTINGS AND Bluetooth SETTINGS 151 5. - IBM 4530-N01 | User Guide - Page 5
your Multifunctional Digital System in optimum working order, this Operator's Manual should be readily available for future reference. To ensure correct and ensure the optimal performance of the Multifunctional Digital System and problem-free copying. • Tip Describes handy information that is useful - IBM 4530-N01 | User Guide - Page 6
just like a book. • Installing a finisher with the optional manual staple function allows you only to staple the documents without copying will turn off the power switch on the machine. When the optional printer/scanner kit, both printer kit and scanner kit, or Fax board is installed, the machine - IBM 4530-N01 | User Guide - Page 7
1. MANAGING ADDRESS BOOK (ADDRESS MENU) 1 1. MANAGING ADDRESS BOOK 6 • About Managing Contacts in Address Book 6 • Registering Contacts ...7 • Editing Contacts ...10 • Deleting Contacts...12 • Searching Contacts...14 2. MANAGING GROUPS ...18 • About Managing Groups in Address Book 18 • Creating - IBM 4530-N01 | User Guide - Page 8
, you can use them to specify the destinations for Scan to E-mail or Internet Fax only when the Scanner Kit is installed, or when the Printer/Scanner Kit is installed. • You can register the fax numbers in the Address Book, however, you can use them to specify the destinations for fax - IBM 4530-N01 | User Guide - Page 9
Registering Contacts The following procedure describes how to register new contact in the Address Book. 1 1 Press the [USER FUNCTIONS] button on the control panel to enter the User Functions menu. 2 Press the [ADDRESS] button, and then press the [ADDRESS BOOK] button on the touch panel. • The - IBM 4530-N01 | User Guide - Page 10
1.MANAGING ADDRESS BOOK (Cont.) 4 Press each button on the touch panel to enter following contact infor- 1 mation. • [FIRST NAME] - Enter the first name of the contact. This name will appear in the address book list on the touch panel. • [LAST NAME] - Enter the last name of the contact. This - IBM 4530-N01 | User Guide - Page 11
6 Specify following items as you required. 1 • TX TYPE - This sets the type of the fax transmission mode. Press the [MEMORY TX] button to select the memory transmission mode or the [DIRECT TX] button to select the direct transmission mode. • ECM - Select whether enabling or disabling the ECM (Error - IBM 4530-N01 | User Guide - Page 12
1.MANAGING ADDRESS BOOK (Cont.) Editing Contacts The following procedure describes how to edit existing contacts in the Address Book. 1 1 Press the [USER FUNCTIONS] button on the control panel to enter the User Functions menu. 2 Press the [ADDRESS] button, and then press the [ADDRESS BOOK] button on - IBM 4530-N01 | User Guide - Page 13
4 Press each button on the touch panel to edit the contact information. 1 • For the description of each item, see the Step 4 in the procedure of "Registering Contacts" in the previous section. 5 Press the [OPTION] button to specify the default settings for a fax transmission. This is available only - IBM 4530-N01 | User Guide - Page 14
1.MANAGING ADDRESS BOOK (Cont.) Deleting Contacts The following procedure describes how to delete existing contact in the Address Book. 1 1 Press the [USER FUNCTIONS] button on the control panel to enter the User Functions menu. 2 Press the [ADDRESS] button, and then press the [ADDRESS BOOK] button - IBM 4530-N01 | User Guide - Page 15
4 Press the [YES] button to delete the contact, or the [NO] button to cancel deleting. 1 • When you press the [YES] button, the selected contact is deleted. 13 - IBM 4530-N01 | User Guide - Page 16
1.MANAGING ADDRESS BOOK (Cont.) Searching Contacts The following procedure describes how to search for contacts in the Address Book. This function is useful 1 to find the contact that you want to edit. You can search for the contacts by entering an ID number or the search strings. Searching a - IBM 4530-N01 | User Guide - Page 17
press the [EDIT] button to edit the contact 1 information, or press the [DELETE] button to delete the contact. • See "Editing Contacts" for the instruction to edit the contact. P.10 Searching Contacts by Entering Search String 1 Press the [USER FUNCTIONS] button on the control panel to enter the - IBM 4530-N01 | User Guide - Page 18
1.MANAGING ADDRESS BOOK (Cont.) 4 Press the button that is used for searching to specify the search 1 string. • When you press each button, the input screen is displayed. 5 Enter the search string using the keyboard and digital keys, and press the [ENTER] button. It will search for the contacts - IBM 4530-N01 | User Guide - Page 19
7 The touch panel displays the screen that contains the searched con- tacts. Press the contact and press the [ENTER] button to edit the con- 1 tact information. • See "Editing Contacts" for the instruction to edit the contact. P.10 17 - IBM 4530-N01 | User Guide - Page 20
, you can use them to specify the destinations for Scan to E-mail or Internet Fax only when the Scanner Kit is installed, or when the Printer/ Scanner Kit is installed. • You can register the fax numbers in the Groups, however, you can use them to specify the destinations for fax transmission - IBM 4530-N01 | User Guide - Page 21
Creating New Group The following procedure describes how to create a new group in the Address Book. 1 1 Press the [USER FUNCTIONS] button on the control panel to enter the User Functions menu. 2 Press the [ADDRESS] button, and then press the [GROUP] button on the touch panel. • The GROUP screen is - IBM 4530-N01 | User Guide - Page 22
contacts that you want to add to the group, and then press the [ENTER] button. • To add or remove the contacts by selecting each contacts manually, see "Adding or Removing Contacts". P.24 • To add the contacts by searching them with the ID number, see "Adding Contacts by Searching with ID Number - IBM 4530-N01 | User Guide - Page 23
8 New Group is created and appears on the touch panel. 1 21 - IBM 4530-N01 | User Guide - Page 24
2.MANAGING GROUPS (Cont.) Editing Groups The following procedure describes how to edit the name of groups, add or remove the members in groups. 1 Editing Group Name 1 Press the [USER FUNCTIONS] button on the control panel to enter the User Functions menu. 2 Press the [ADDRESS] button, and then press - IBM 4530-N01 | User Guide - Page 25
4 Press the [GROUP NAME] button to edit the group name. 1 • The input screen is displayed. 5 Enter the group name using the keyboard and digital keys, and press the [ENTER] button. 6 Press the [ENTER] button. • The CHECK OF GROUP MEMBER screen is displayed. 23 - IBM 4530-N01 | User Guide - Page 26
In the screen, the contacts that have been registered in the group are 1 highlighted. • To add or remove the contacts by selecting each contacts manually, see "Adding or Removing Contacts". P.24 • To add the contacts by searching them with the ID number, see "Adding Contacts by Searching with ID - IBM 4530-N01 | User Guide - Page 27
Adding Contacts by Searching with ID Number 1 1 Press the [KNOWN ID] button. • The KNOWN ID screen is displayed. 2 Enter the ID Number using the digital keys and press the [ENTER] button. 3 The touch panel displays the screen that contains the searched contact. Press the contact to be added to - IBM 4530-N01 | User Guide - Page 28
2.MANAGING GROUPS (Cont.) 4 Press the [ENTER] button to add to the group. 1 • The contacts in the group are modified. Adding Contacts by Searching with Search String 1 Press the [SEARCH ADDRESS] button. • The SEARCH ADDRESS screen is displayed. 2 Press the button that is used for searching to - IBM 4530-N01 | User Guide - Page 29
4 Specify the search string in the items that you require and press the [SEARCH] button. 1 5 The touch panel displays the screen that contains the searched contacts. Press the contacts that you want to add to the group. • To add both the fax number and E-mail address of a contact to the group, - IBM 4530-N01 | User Guide - Page 30
2.MANAGING GROUPS (Cont.) Deleting Groups The following procedure describes how to delete a group in the Address Book. 1 1 Press the [USER FUNCTIONS] button on the control panel to enter the User Functions menu. 2 Press the [ADDRESS] button, and then press the [GROUP] button on the touch panel. • - IBM 4530-N01 | User Guide - Page 31
4 Press the [YES] button to delete the contact, or [NO] button to cancel deleting. 1 • When you press the [YES] button, the selected group is deleted. 29 - IBM 4530-N01 | User Guide - Page 32
2.MANAGING GROUPS (Cont.) Searching Groups The following procedure describes how to search for groups in the Address Book. This function is useful 1 to find the contact that you want to edit. You can search for the groups by entering the ID number or the search string. Searching a Group by ID - IBM 4530-N01 | User Guide - Page 33
that contains the searched group. Press the group and press the [EDIT] button to edit the group 1 information. • See "Editing Groups" for the instruction to edit the group. P.22 Searching Groups by Group Name 1 Press the [USER FUNCTIONS] button on the control panel to enter the User Functions - IBM 4530-N01 | User Guide - Page 34
2.MANAGING GROUPS (Cont.) 4 Press the [GROUP NAME] button to specify the search string. 1 • The input screen is displayed. 5 Enter the search string using the keyboard and digital keys, and press the [ENTER] button. It will search for the groups that contain the search string in the group name field - IBM 4530-N01 | User Guide - Page 35
7 The touch panel displays the screen that contains the searched groups. Press the group and press the [ENTER] button to edit the 1 group information. • See "Editing Groups" for the instruction to edit the contact. P.22 33 - IBM 4530-N01 | User Guide - Page 36
2.MANAGING GROUPS (Cont.) Confirming the Members of the Groups The following procedure describes how to confirm the contacts that are added in the group. 1 1 Press the [USER FUNCTIONS] button on the control panel to enter the User Functions menu. 2 Press the [ADDRESS] button, and then press the [ - IBM 4530-N01 | User Guide - Page 37
2. MANAGING COUNTERS (COUNTER MENU) 2 1. TOTAL COUNTER ...36 • Displaying Print Counter ...36 • Displaying Scan Counter...37 2. PRINT OUT TOTAL COUNTER 38 3. DEPARTMENT COUNTER 39 • Displaying Print Counter for Department Code 39 • Displaying Scan Counter for Department Code 41 • Displaying Fax - IBM 4530-N01 | User Guide - Page 38
that have been printed by copy operations. • Fax Counter - indicates the number of sheets that have been printed by fax receptions. • Printer Counter - indicates the number of sheets that have been printed by print operations and E- 2 mail receptions (Internet Fax receptions). • List Counter - IBM 4530-N01 | User Guide - Page 39
Displaying Scan Counter This feature allows you to display the Scan Counter. The scan counter contains following counters: • Copy Counter - indicates the number of originals that has been scanned by copy operations. • Fax Counter - indicates the number of originals that has been scanned by fax - IBM 4530-N01 | User Guide - Page 40
2. PRINT OUT TOTAL COUNTER This feature allows you to print the total counter list. 1 Press the [USER FUNCTIONS] button on the control panel to enter the User Functions menu. 2 2 Press the [COUNTER] button, and then press the [PRINT OUT TOTAL COUNTER] button on the touch panel. • The total - IBM 4530-N01 | User Guide - Page 41
sheets that has been printed by copy operations. • Fax Counter - indicates the number of sheets that has been printed by polling operations. • Printer Counter - indicates the number of sheets that has been printed by print operations. • List Counter - indicates the number of sheets that has been - IBM 4530-N01 | User Guide - Page 42
3.DEPARTMENT COUNTER (Cont.) 4 Press the [PRINT COUNTER] button. 2 5 The Print Counter for the specified department code is displayed. 40 2.MANAGING COUNTERS (COUNTER MENU) - IBM 4530-N01 | User Guide - Page 43
Displaying Scan Counter for Department Code This feature allows you to display the number of the scan counter for each department code. The department counter is available only when this equipment has been managed with the department code. P.45 "4.MANAGING DEPARTMENT CODE" 2 The scan counter - IBM 4530-N01 | User Guide - Page 44
3.DEPARTMENT COUNTER (Cont.) 4 Press the [SCAN COUNTER] button. 2 5 The Scan Counter for the specified department code is displayed. 42 2.MANAGING COUNTERS (COUNTER MENU) - IBM 4530-N01 | User Guide - Page 45
Displaying Fax Communication Counter for Department Code This feature allows you to display the number of the Fax and Internet Fax Transmission and Reception counter for each department code. The department counter is available only when this equipment has been managed with the department code. P. - IBM 4530-N01 | User Guide - Page 46
3.DEPARTMENT COUNTER (Cont.) 4 Press the [FAX COMMUNICATION] button. 2 5 The Fax Communication Counter for the specified department code is displayed. 44 2.MANAGING COUNTERS (COUNTER MENU) - IBM 4530-N01 | User Guide - Page 47
4. MANAGING DEPARTMENT CODE Logging On As Administrator You can audit the copy quantity of copy, print, scan, and facsimile pages performed by setting a department code. Up to 1000 department codes can be registered. To manage the department code, you must know the administrator password for this - IBM 4530-N01 | User Guide - Page 48
4.MANAGING DEPARTMENT CODE (Cont.) 4 Enter the administrator password and press the [ENTER] button. 2 • The DEPT. MANAGEMENT menu is displayed. 5 Continue the operation that you want. • P.47 "Printing Department Codes List" • P.48 "Enabling Department Code" • P.49 "Resetting All Department Counters" - IBM 4530-N01 | User Guide - Page 49
Printing Department Codes List You can print out the department codes list and counters for each department code. 1 In the DEPT. MANAGEMENT menu, press the [PRINT OUT DEPARTMENT CODES] button. 2 • Printing begins. • For the procedure to display the screen above, see "Logging On As Administrator". P. - IBM 4530-N01 | User Guide - Page 50
code. P.51 "Registering a New Department Code" • Using Printer Utility, you can also configure the Department Code Enforcement setting the department management is enabled. For instructions on how to set the Department Code Enforcement, see Printer Utility Guide. • When the User Management Setting - IBM 4530-N01 | User Guide - Page 51
Resetting All Department Counters This function clears all department counters to "0". • This function is available only when the department code is enabled. • This function clears only the department counters. You cannot clear the total counter. 2 1 In the DEPT. MANAGEMENT menu, press the [ - IBM 4530-N01 | User Guide - Page 52
4.MANAGING DEPARTMENT CODE (Cont.) Deleting All Department Codes This function deletes all department codes that have been registered. The [DELETE ALL] button will be available after registering a department code. 2 P.51 "Registering a New Department Code" 1 In the DEPT. MANAGEMENT menu, press - IBM 4530-N01 | User Guide - Page 53
Registering a New Department Code The function allows you to register new department code. After registering the department code(s), you must enable the Department Code function. P.48 "Enabling Department Code" 2 1 In the DEPT. MANAGEMENT menu, press the [DEPARTMENT REGISTRATION] button. • The - IBM 4530-N01 | User Guide - Page 54
4.MANAGING DEPARTMENT CODE (Cont.) 3 Enter the department name using the keyboard and digital keys, and press the [ENTER] button. 2 • The REGISTRATION DEPARTMENT CODE screen is displayed. 4 Enter the 5-digit code in the "New Code" field using the digital keys, and then press the [SET] button to set - IBM 4530-N01 | User Guide - Page 55
If you want to return to the "New Code" field to retype it, press the [RESET] button. 6 Press the [ENTER] button at the bottom of the touch panel. • The LIMITATION screen is displayed. 2 7 Set the limitation of this department code as required. • Press the [ON] button to enable the output - IBM 4530-N01 | User Guide - Page 56
4.MANAGING DEPARTMENT CODE (Cont.) Editing the Department Code The function allows you to edit the existing department code. 1 In the DEPT. MANAGEMENT menu, press the [DEPARTMENT REGISTRATION] button. 2 • The DEPARTMENT CODE screen is displayed. For the procedure to display the screen above, see " - IBM 4530-N01 | User Guide - Page 57
3 Press the [ENTER] button. 2 • The input screen is displayed. 4 Enter the department name using the keyboard and digital keys, and press the [ENTER] button. • The CHANGE DEPARTMENT CODE screen is displayed. 5 Enter current department code in the "Current Code" field using the digital keys, and then - IBM 4530-N01 | User Guide - Page 58
4.MANAGING DEPARTMENT CODE (Cont.) 6 Enter new 5-digit code in the "New Code" field using the digital keys, and then press the [SET] button to set the entry. 2 • If you enter the code, asterisks (*) appear in the "New Code" field. • If you want to clear the code to retype it, press the [CLEAR] - IBM 4530-N01 | User Guide - Page 59
9 Set the limitation of this department code as required. 2 • Press the [ON] button to enable the output limitation for this department code. When you select the [ON] button, press the "Limitation" field and enter the maximum number of the outputs for this department code using the digital keys. You - IBM 4530-N01 | User Guide - Page 60
4.MANAGING DEPARTMENT CODE (Cont.) Deleting the Department Code The function allows you to delete the existing department code. 1 In the DEPT. MANAGEMENT menu, press the [DEPARTMENT REGISTRATION] button. 2 • The DEPARTMENT CODE screen is displayed. For the procedure to display the screen above, see - IBM 4530-N01 | User Guide - Page 61
3 Press the [YES] button to delete the department code, or [NO] button to cancel deleting. 2 • When you press the [YES] button, the department code is deleted. 59 - IBM 4530-N01 | User Guide - Page 62
4.MANAGING DEPARTMENT CODE (Cont.) Resetting the Counter of Each Department The function allows you to reset the counter of specific department code only. 1 In the DEPT. MANAGEMENT menu, press the [DEPARTMENT REGISTRATION] button. 2 • The DEPARTMENT CODE screen is displayed. For the procedure to - IBM 4530-N01 | User Guide - Page 63
3 Press the [YES] button to clear the counter of the department code, or [NO] button to cancel clearing the counter. 2 • When you press the [YES] button, the counter of the department code is cleared. 61 - IBM 4530-N01 | User Guide - Page 64
4.MANAGING DEPARTMENT CODE (Cont.) Setting Output Limitations for All Departments This function allows you to set the output limitation for all departments by a single operation. When you select [ON], the output will be disabled for all departments. When you select [OFF], the infinite outputs will - IBM 4530-N01 | User Guide - Page 65
3. SETTING ITEMS (USER) 1. SETTING GENERAL FUNCTIONS 64 3 • Setting the Auto Clear Mode ...64 • Changing the Display Language ...65 • Setting the Reversed Display Mode 66 2. SETTING COPY FUNCTIONS 68 3. SETTING FAX FUNCTIONS 69 4. SETTING SCAN FUNCTIONS 71 5. PRINTING LISTS ...73 • - IBM 4530-N01 | User Guide - Page 66
1. SETTING GENERAL FUNCTIONS Setting the Auto Clear Mode This function sets how long the machine waits before clearing the previous functions set on the control panel. 1 Press the [USER FUNCTIONS] button on the control panel to enter the User Functions menu. 2 Press the [USER] button, and then press - IBM 4530-N01 | User Guide - Page 67
Changing the Display Language The language used on the touch panel can be changed to a different one. 1 Press the [USER FUNCTIONS] button on the control panel to enter the User Functions menu. 2 Press the [USER] button, and then press the [GENERAL] button on the touch panel. 3 • The GENERAL menu is - IBM 4530-N01 | User Guide - Page 68
1.SETTING GENERAL FUNCTIONS (Cont.) Setting the Reversed Display Mode You can change the touch panel to be displayed in the Reversed Display mode (which the white portion will be black and the black portion will be white). Changing to the Reversed Display mode helps you to display the touch panel - IBM 4530-N01 | User Guide - Page 69
4 Press the [ON] button to enable the Reversed Display, or [OFF] button to disable the Reversed Display. 3 • When you select the [ON] button, the touch panel is displayed in the Reversed Display mode. 67 - IBM 4530-N01 | User Guide - Page 70
originals. • In the "BYPASS FEED" option, press the desired media type button. For more information about the paper type, please see the Operator's Manual For Basic Functions. 4 Press the [ENTER] button. • The default settings for each mode are changed as you specified. 68 3.SETTING ITEMS (USER - IBM 4530-N01 | User Guide - Page 71
the [USER] menu will be available only when the Scanner Kit or Printer/Scanner Kit is installed, or when the optional Fax unit is installed. "EXPOSURE" option, press light or dark buttons to specify the default exposure manually, or press the [AUTO] button to select auto mode for the default - IBM 4530-N01 | User Guide - Page 72
3.SETTING FAX FUNCTIONS (Cont.) 5 Specify the following items as you require. 3 • In the "TTI" option, specify whether the TTI is enabled or disabled as default setting. [ON] - Press this to print a transmission header (TTI) on received faxes to clearly identify the sender name of received faxes. [ - IBM 4530-N01 | User Guide - Page 73
(default setting) of scan job. The [SCAN] button in the [USER] menu will be available only when the Scanner Kit is installed, or when the Printer/Scanner Kit is installed. 1 Press the [USER FUNCTIONS] button on the control panel to enter the User Functions menu. 3 2 Press the [USER] button, and - IBM 4530-N01 | User Guide - Page 74
.) 5 Specify the following items as you require. 3 • In the "EXPOSURE" option, press light or dark buttons to specify the default exposure for scans manually, or press the [AUTO] button to select auto mode for the default exposure mode for scans. 6 Press the [ENTER] button. • The default settings - IBM 4530-N01 | User Guide - Page 75
5. PRINTING LISTS Printing the Address Book List You can print the address book list that shows all registered contacts and groups in this equipment. 1 Press the [USER FUNCTIONS] button on the control panel to enter the User Functions menu. 2 Press the [USER] button, and then press the [LIST] button - IBM 4530-N01 | User Guide - Page 76
5.PRINTING LISTS (Cont.) Printing the Group Numbers List You can print the group numbers list that shows all registered groups and members in this equipment. 1 Press the [USER FUNCTIONS] button on the control panel to enter the User Functions menu. 2 Press the [USER] button, and then press the [LIST - IBM 4530-N01 | User Guide - Page 77
Printing the Function List (User) You can print the function list that shows the function flow under the [USER] button of the User Functions. 1 Press the [USER FUNCTIONS] button on the control panel to enter the User Functions menu. 2 Press the [USER] button, and then press the [LIST] button on the - IBM 4530-N01 | User Guide - Page 78
) on the POP3 server. The [CHECK E-MAIL] button in the [USER] menu will be available only when the Scanner Kit is installed, or when the Printer/Scanner Kit is installed. This equipment also automatically checks for new E-mails on the POP3 server. 3 1 Press the [USER FUNCTIONS] button on the control - IBM 4530-N01 | User Guide - Page 79
7. SETTING DRAWER This function allows you to set the paper size and paper type of each drawer. 1 Press the [USER FUNCTIONS] button on the control panel to enter the User Functions menu. 2 Press the [USER] button, and then press the [DRAWER] button on the touch panel. 3 3 Press the drawer portion in - IBM 4530-N01 | User Guide - Page 80
8. TURN OFF THE POWER (SHUT DOWN) When turning off the power of the equipment, perform the following shutdown procedure. DO NOT turn off the power by switching off the power switch of the equipment as it can cause the failure of the hard disk. Before turning off the power, be sure that the - IBM 4530-N01 | User Guide - Page 81
4 "Shutdown in progress" appears on the screen, and then the equipment is shut down. 3 • The power switch automatically returns to the OFF position. 79 - IBM 4530-N01 | User Guide - Page 82
3 80 3.SETTING ITEMS (USER) - IBM 4530-N01 | User Guide - Page 83
...112 • Setting the HTTP Network Service 114 • Setting the Ethernet Speed ...116 • Setting the LDAP and SNMP Network Service 118 4. SETTING COPY FUNCTIONS 120 5. ...147 10.PRINTING LISTS ...149 11. SETTING PRINTER/E-FILING FUNCTIONS 150 12.WIRELESS SETTINGS AND Bluetooth SETTINGS 151 81 - IBM 4530-N01 | User Guide - Page 84
1. ENTERING TO ADMIN MENU When the administrator password has been set, you must enter the administrator password to enter the [ADMIN] menu in the User Functions screen. 1 Press the [USER FUNCTIONS] button on the control panel to enter the User Functions menu. 2 Press the [ADMIN] button. • The - IBM 4530-N01 | User Guide - Page 85
menu. This button will be available only when the optional Wireless LAN Module is installed. For the instructions on how to operate the WIRELESS SETTINGS, please refer to the cm4530300 Operator's Manual for Wireless LAN. • There is also the [Bluetooth SETTINGS] button in the ADMIN menu. This button - IBM 4530-N01 | User Guide - Page 86
of this equipment. These items appear in the Device page of Printer Utility, that is the web-based device management utility. 1 Press the location where this device is located. • [SERVICE PHONE NUMBER] - Press this button to enter the service call number. • [CONTACT INFORMATION] - Press this - IBM 4530-N01 | User Guide - Page 87
When you press each button, the input screen is displayed. Enter the value using the keyboard and digital keys, and press the [ENTER] button to set the entry. To enter the [SERVICE PHONE NUMBER], enter the number using only the digital keys. 4 Press the [ENTER] button. 4 85 - IBM 4530-N01 | User Guide - Page 88
message. • You can specify the events that you want to be notified using the Printer Utility web utility. For instructions on how to specify the events for the notification, please refer to Printer Utility Guide. • To enable this function, there must be a SMTP server in your network. In addition - IBM 4530-N01 | User Guide - Page 89
3 Press the [E-MAIL] buttons. • The input screen is displayed. 4 Enter the E-mail address using the keyboard and digital keys, and press the [ENTER] key to set the entry. 4 • You can specify up to three E-mail addresses to which the notification message will be sent, as required. When you enable - IBM 4530-N01 | User Guide - Page 90
2.SETTING GENERAL FUNCTIONS (Cont.) Changing the Administrator Password You can change the administrator password. The administrator password must be alphanumeric characters of 6 or more and 10 or less. 1 Press the [GENERAL] button in the ADMIN menu. 4 • The GENERAL menu is displayed. To display the - IBM 4530-N01 | User Guide - Page 91
4 Enter the current administrator password and press the [ENTER] button. • The input password appears as asterisks (*). 4 If the administrator password will be changed at the first time, enter "123456" in the "Old Password" field. 5 Same as "OLD PASSWORD", press the [NEW PASSWORD] and [RETYPE NEW - IBM 4530-N01 | User Guide - Page 92
2.SETTING GENERAL FUNCTIONS (Cont.) Setting the Date and Time The clock built in to this equipment can be set by entering the date, day of the week and time using the digital keys. Also, you can easily change the clock to and from the daylight saving system at the touch of a button. 1 Press the [ - IBM 4530-N01 | User Guide - Page 93
4 Highlight the section that you want to edit using the arrow buttons, and enter the number using the digital keys. • The "DAY" section describes the day of week with a number. The numbers corresponding to the days of week as following: 4 1: Sun, 2: Mon, 3:Tue, 4: Wed, 5: Thu, 6:Fri, 7: Sat 5 - IBM 4530-N01 | User Guide - Page 94
2.SETTING GENERAL FUNCTIONS (Cont.) Setting the Weekly Timer Using the built-in weekly timer, you can have this equipment automatically turned ON and OFF at specified times. For instance, you can set the timer for the starting time and closing time of your office so that the copier will - IBM 4530-N01 | User Guide - Page 95
3 Press the [WEEKLY TIMER] button. • The TIMER screen is displayed. 4 Check the settings on the display, and if corrections are necessary, press the [CHANGE] button. 4 • If no correction is needed, press the [ENTER] button and complete the operation. 5 Press the [] buttons to - IBM 4530-N01 | User Guide - Page 96
2.SETTING GENERAL FUNCTIONS (Cont.) 6 In the "OFF" field, enter the time that the device will automatically turn off the power using the digital keys and press the [SET] button to set the entry. 4 • If you want to clear entered time to retype it, press the [CLEAR] button on the Control Panel. • - IBM 4530-N01 | User Guide - Page 97
Setting the Auto Power Save Mode This function allows this equipment automatically to go into the energy saving mode (unnecessary electricity is cut off at standby) if it is left inactive for a certain period of time. 1 Press the [GENERAL] button in the ADMIN menu. 4 • The GENERAL menu is displayed. - IBM 4530-N01 | User Guide - Page 98
2.SETTING GENERAL FUNCTIONS (Cont.) 4 Press the desired period of time (in minutes) that this equipment waits before the Automatic Power Save mode is activated. • The Auto Power Save mode setting is completed. 4 96 4.SETTING ITEMS (ADMIN) - IBM 4530-N01 | User Guide - Page 99
Setting the Sleep/Auto Shut Off Mode This function allows this equipment goes into the Sleep/Auto Shut Off Mode that stands by with the minimum power consumption. 1 Press the [GENERAL] button in the ADMIN menu. 4 • The GENERAL menu is displayed. To display the ADMIN menu, see "1.ENTERING TO ADMIN - IBM 4530-N01 | User Guide - Page 100
2.SETTING GENERAL FUNCTIONS (Cont.) 4 Press the desired period of time (in minutes) that this equipment waits before the Sleep/Auto Shut Off Mode is activated. • The Sleep/Auto Shut Off Mode setting is completed. 4 98 4.SETTING ITEMS (ADMIN) - IBM 4530-N01 | User Guide - Page 101
Setting the Drawer Setup Pop-Up When this functions is enabled, the message to ask users to change the paper size setting every time you open the drawer. 1 Press the [GENERAL] button. 4 • The GENERAL menu is displayed. To display the ADMIN menu, see "1.ENTERING TO ADMIN MENU". P.82 2 Press the [ - IBM 4530-N01 | User Guide - Page 102
recommended to configure the TCP/IP protocol because Printer Utility, the device management web-based utility, address, subnet mask, and default gateway (if manually assigned). How the TCP/IP protocol is configured if the network supports the DHCP. If the network does not support the DHCP, this - IBM 4530-N01 | User Guide - Page 103
2 Press the [TCP/IP] button. • The TCP/IP screen is displayed. 3 Press the [DYNAMIC] button in the "ADDRESS MODE" option. 4 4 Press the [ENTER] button. • Returns you to the NETWORK menu. 5 Continue to another network setting if required, then press the [APPLY NOW] button. • This equipment - IBM 4530-N01 | User Guide - Page 104
3.SETTING NETWORK FUNCTIONS (Cont.) Setting the TCP/IP for DHCP Server Only 1 Press the [NETWORK] button in the ADMIN menu. 4 • The NETWORK menu is displayed. To display the ADMIN menu, see "1.ENTERING TO ADMIN MENU". P.82 2 Press the [TCP/IP] button. • The TCP/IP screen is displayed. 3 Press - IBM 4530-N01 | User Guide - Page 105
5 Continue to another network setting if required, then press the [APPLY NOW] button. • This equipment starts initializing the network interface card to apply the changes. 4 Setting the TCP/IP for Static IP Address 1 Press the [NETWORK] button in the ADMIN menu. • The NETWORK menu is displayed. To - IBM 4530-N01 | User Guide - Page 106
3.SETTING NETWORK FUNCTIONS (Cont.) 3 Press the [STATIC] button in the "ADDRESS MODE" option. 4 Press the [IP ADDRESS] button and enter the IP address of this 4 device using the digital keys. Enter also the subnet mask and default gateway as required. 5 Press the [ENTER] button. • Returns you - IBM 4530-N01 | User Guide - Page 107
Setting the IPX/SPX Protocol You can set the IPX/SPX protocol on this equipment. The IPX/SPX protocol is usually used to communicate with the NetWare file server through the network. 1 Press the [NETWORK] button in the ADMIN menu. 4 • The NETWORK menu is displayed. To display the ADMIN menu, see "1. - IBM 4530-N01 | User Guide - Page 108
3.SETTING NETWORK FUNCTIONS (Cont.) 5 Continue to another network setting if required, then press the [APPLY NOW] button. • This equipment starts initializing the network interface card to apply the changes. 4 106 4.SETTING ITEMS (ADMIN) - IBM 4530-N01 | User Guide - Page 109
Setting the NetWare Settings You can set the NetWare network mode and the NetWare configuration to be connected. This must be set when you use the NetWare file server for Novell printing. 1 Press the [NETWORK] button in the ADMIN menu. 4 • The NETWORK menu is displayed. To display the ADMIN menu, - IBM 4530-N01 | User Guide - Page 110
3.SETTING NETWORK FUNCTIONS (Cont.) 3 Specify following items as required. • ENABLE BINDERY - Press the [ENABLE] button to enable communicating with the NetWare file server in bindery mode, or [DISABLE] button to disable the bindery mode. 4 • ENABLE NDS - Press the [ENABLE] button to enable - IBM 4530-N01 | User Guide - Page 111
Setting the SMB Protocol When you want to enable this equipment visible in the Windows network, you must enable the SMB protocol and enter the NetBIOS name and workgroup to specify the device name of this equipment and workgroup where this equipment will be visible. Also if your network uses the - IBM 4530-N01 | User Guide - Page 112
Printer Utility. For instructions on how to set the workgroup or domain, please see "Setting up the SMB Session" in "Chapter 7 Printer Utility Administrator Mode" of Printer Utility Guide However, if you enter the IP address for them manually here, this equipment will use the entered IP address - IBM 4530-N01 | User Guide - Page 113
4 Continue to another network setting if required, then press the [APPLY NOW] button. • This equipment starts initializing the network interface card to apply the changes. 4 111 - IBM 4530-N01 | User Guide - Page 114
3.SETTING NETWORK FUNCTIONS (Cont.) Setting the AppleTalk Protocol The AppleTalk protocol must be enabled and properly configured to enable AppleTalk printing with the Macintosh computer. 1 Press the [NETWORK] button in the ADMIN menu. 4 • The NETWORK menu is displayed. To display the ADMIN menu, - IBM 4530-N01 | User Guide - Page 115
When you press the [APPLETALK NAME] and [DESIRED ZONE] buttons, the input screen is displayed. Enter the value using the keyboard and digital keys, and press the [ENTER] button to set the entry. 4 Press the [ENTER] button. • Returns you to the NETWORK menu. 5 Continue to another network setting if - IBM 4530-N01 | User Guide - Page 116
This function allows you to enable or disable the HTTP network server service that provides the webbased utility on this equipment, such as Printer Utility and e-Filing web utility. The HTTP network server service also must be enabled for IPP printing. 1 Press the [NETWORK] button in the ADMIN - IBM 4530-N01 | User Guide - Page 117
required. • ENABLE HTTP SERVER - Press the [ENABLE] button to enable the HTTP network server service, or [DIS- ABLE] button to disable the HTTP network server service. This must be enabled for Printer Utility, e-Filing web utility, and IPP printing. • [PRIMARY PORT NUMBER] - Press this to enter - IBM 4530-N01 | User Guide - Page 118
3.SETTING NETWORK FUNCTIONS (Cont.) Setting the Ethernet Speed This function allows you to specify the ethernet speed. 1 Press the [NETWORK] button in the ADMIN menu. 4 • The NETWORK menu is displayed. To display the ADMIN menu, see "1.ENTERING TO ADMIN MENU". P.82 2 Press the [ETHERNET] button. - IBM 4530-N01 | User Guide - Page 119
4 Press the [ENTER] button. • Returns you to the NETWORK menu. 5 Continue to another network setting if required, then press the [APPLY NOW] button. 4 • This equipment starts initializing the network interface card to apply the changes. 117 - IBM 4530-N01 | User Guide - Page 120
the contacts in the LDAP server. To add the LDAP directory service, you must operate using Printer Utility. For more information about registering the directory service, please see the Printer Utility Guide. • When the LDAP network service is disabled, it is not possible to obtain the user's e-mail - IBM 4530-N01 | User Guide - Page 121
3 Press the [OTHER] button. • The OTHER screen is displayed. 4 Press the [ENABLE] button to enable the LDAP network service, or [DISABLE] button to disable it. 4 • Optionally you can enter the trap community name for the SNMP Traps by pressing the [SNMP READ COMMUNITY] button. - IBM 4530-N01 | User Guide - Page 122
4. SETTING COPY FUNCTIONS You can change the system behaviors for the copy operation, such as maximum number of copies, auto 2sided mode, and the sort mode priority. 1 Press the [COPY] button in the ADMIN menu. 4 • The COPY screen is displayed. To display the ADMIN menu, see "1.ENTERING TO ADMIN - IBM 4530-N01 | User Guide - Page 123
4 Specify following items as required. • AUTOMATIC CHANGE OF PAPER SOURCE - When this is set to [ON], this equipment will print on the dif- ferent size of paper when the specified paper size is not set. When this is set to [OFF], this equipment will dis- play a message to set the correct paper. • - IBM 4530-N01 | User Guide - Page 124
5. SETTING FAX FUNCTIONS Setting the Terminal ID The Terminal ID settings are available only when the optional Fax unit is installed. Once programmed, Terminal ID information will be printed on the leading edge of transmitted or received documents if the TTI and RIT are enabled. • ID information is - IBM 4530-N01 | User Guide - Page 125
3 Specify following items as required. • [ID NAME] - Press this to enter the terminal ID of this equipment. • [FAX NUMBER] - Press this to enter the fax number of this equipment. • [LINE2 NUMBER] - Press this to enter the 2 line fax number of this equipment if the Line2 board is installed. This - IBM 4530-N01 | User Guide - Page 126
5.SETTING FAX FUNCTIONS (Cont.) 4 Press the [ENTER] button. • Returns you to the FAX menu. 4 124 4.SETTING ITEMS (ADMIN) - IBM 4530-N01 | User Guide - Page 127
Fax unit is installed. Set the initial settings for the fax functions such as the volume settings and reception mode. • Reception mode: AUTO, MANUAL • Monitor tone volume: Adjustable 0-7 steps (0: tone OFF) The "monitor tone" is the line monitor tone which is heard when the [MONITOR/PAUSE - IBM 4530-N01 | User Guide - Page 128
(Cont.) 3 Specify following items as required. • RX MODE - Press the [AUTO] button to receive faxes automatically, or [MANUAL] button to receive faxes manually. When you select the manual mode, you can receive the faxes by pressing the [START] button when 4 it rings. • MONITOR VOLUME - Press the - IBM 4530-N01 | User Guide - Page 129
terminal ID P.122 • Dial type setting P.125 • Line-2 setting (following instruction) • The 1st line takes precedence in the initial setting (not including the 2nd line to have priority in the initial setting, ask your service technician. When the optional 2nd line board is installed, its operation - IBM 4530-N01 | User Guide - Page 130
5.SETTING FAX FUNCTIONS (Cont.) 2 Press the [LINE-2 MODE] button. • The LINE-2 MODE screen is displayed. 4 3 Continue the procedure depending on how you set the Line-2 mode. • P.128 "Transmission and Reception (TX /RX)" • P.128 "Reception Only (24HR)" • P.129 "Reception Only (TIMER)" - IBM 4530-N01 | User Guide - Page 131
2 Press the [ENTER] button. Reception Only (TIMER) 1 Press the [RX ONLY (TIMER)] button. 4 • Using the 2nd line for reception only during the specified period. • Enter the START time and END time using the digital keys. • Pressing the arrow buttons moves the cursor. • Time is displayed in the 24- - IBM 4530-N01 | User Guide - Page 132
the paper printing area. * For detail of DISCARD setting, contact your service technician. RX Reduction Printing: ON, OFF 4 • ON (default area. * Only drawers can be set for received FAX printing. Please see the Operator's Manual for Basic Functions. Be sure to use LD, LG, LT, LT-R, A3, A4, - IBM 4530-N01 | User Guide - Page 133
the function list. P.149 Setting Duplex Printing The "Duplex Print" function is available only when the optional Fax unit is installed. This printer setting determines whether or not to print received originals on both sides of sheet. * Duplex printing is available only if the received originals - IBM 4530-N01 | User Guide - Page 134
of direction. (1) C (2) C Setting the Rotate Sort The "Rotate Sort" function is available only when the optional Fax unit is installed. The printer setting determines whether or not to output each separate job of received originals in the different orientation. 132 4.SETTING ITEMS (ADMIN) - IBM 4530-N01 | User Guide - Page 135
* Rotate Sort printing is available only for LT/A4-sized paper. Set the LT and LT-R, or A4 and A4-R drawers. * When the system runs out of paper during Rotate Sort printing, the rest of the documents is printed on the remaining paper. 1 Press the [FAX] button in the ADMIN menu. 4 • The FAX menu is - IBM 4530-N01 | User Guide - Page 136
in the memory after failing the redial attempts. You can retransmit the document held in the memory. For instructions on how to send the recovery transmission, see the Operator's Manual For Facsimile Function. 4 1 Press the [FAX] button in the ADMIN menu. • The FAX menu is displayed. To display - IBM 4530-N01 | User Guide - Page 137
3 Change the document-stored time with the [< 1H] or [24H >] button, and press the [ENTER] button. • The document-holding time can be changed by the 1 hour. 4 When the Recovery transmission is enabled, the [RECOVERY TX] button will be grayed icon. You can disable the Recovery transmission by - IBM 4530-N01 | User Guide - Page 138
the available hard disk space. The [FILE] button in the [ADMIN] menu will be available only when the Scanner Kit is installed, or when the Printer/Scanner Kit is installed. 1 Press the [FILE] button in the ADMIN menu. 4 • The FILE menu is displayed. To display the ADMIN menu, see "1.ENTERING TO - IBM 4530-N01 | User Guide - Page 139
Scan to E-mail operation. The [E-MAIL] button in the [ADMIN] menu will be available only when the Scanner Kit is installed, or when the Printer/Scanner Kit is installed. 1 Press the [E-MAIL] button. 4 • The E-MAIL screen is displayed. To display the ADMIN menu, see "1.ENTERING TO ADMIN MENU". P.82 - IBM 4530-N01 | User Guide - Page 140
size you specified. This can reduce the transmission errors caused by the network traffic problems. The [E-MAIL] button in the [ADMIN] menu will be available only when the Scanner Kit is installed, or when the Printer/Scanner Kit is installed. 1 Press the [E-MAIL] button in the ADMIN menu. 4 • The - IBM 4530-N01 | User Guide - Page 141
by Internet Fax transmission. The [INTERNET FAX] button in the [ADMIN] menu will be available only when the Scanner Kit is installed, or when the Printer/Scanner Kit is installed. 1 Press the [INTERNET FAX] button in the ADMIN menu. 4 • The INTERNET FAX screen is displayed. To display the ADMIN menu - IBM 4530-N01 | User Guide - Page 142
you specified. This can reduce the transmission errors caused by the network traffic problems. The [INTERNET FAX] button in the [ADMIN] menu will be available only when the Scanner Kit is installed, or when the Printer/Scanner Kit is installed. 1 Press the [INTERNET FAX] button in the ADMIN menu - IBM 4530-N01 | User Guide - Page 143
be transmitted or not. The [INTERNET FAX] button in the [ADMIN] menu will be available only when the Scanner Kit is installed, or when the Printer/Scanner Kit is installed. 1 Press the [INTERNET FAX] button in the ADMIN menu. 4 • The INTERNET FAX screen is displayed. To display the ADMIN menu, see - IBM 4530-N01 | User Guide - Page 144
available on this equipment. Journals can be printed either automatically or manually. This function allows you to set the auto-print for the Journal settings will be available only when the Printer Kit and Scanner Kit is installed, when the Printer/Scanner Kit is installed, or when the optional - IBM 4530-N01 | User Guide - Page 145
3 Press the [JOURNAL] button. • The JOURNAL screen is displayed. 4 Specify the following items as required. 4 • AUTO - Press the [ON] button to enable printing the transmission and reception journals automatically. When you enable this, the transmission and reception journals will be printed - IBM 4530-N01 | User Guide - Page 146
print the communication report for each transmission type separately. The Communication Report setting will be available only when the Printer Kit and Scanner Kit is installed, when the Printer/Scanner Kit is installed, or when the optional Fax unit is installed. 1 Press the [LIST/REPORT] button in - IBM 4530-N01 | User Guide - Page 147
3 Press the [COMM. REPORT] button. • The COMM. REPORT screen is displayed. 4 Specify the condition for each transmission type. 4 • [OFF] - Press this to disable printing the communication report. • [ALWAYS] - Press this to print the communication report every transmission. • [ON ERROR] - Press - IBM 4530-N01 | User Guide - Page 148
9.SETTING LIST/REPORT (Cont.) 6 Press the [Next] button to display the next screen and specify the condition for each transmission type. 4 "RELAY ORIGINATOR" is available only when the optional Fax unit is installed. 7 When you press the [ALWAYS] or [ON ERROR] button for each transmission type, the - IBM 4530-N01 | User Guide - Page 149
Setting the Reception List The Reception List allows you to print a reception list after receiving a document to a mailbox on this equipment. This function allows you to enable or disable printing a reception list for the following mailbox transmissions: Relay Station - Receiving a relay - IBM 4530-N01 | User Guide - Page 150
9.SETTING LIST/REPORT (Cont.) 4 Specify whether the reception list will be printed for each transmission. • RELAY STATION - Select the [ON] button to print the reception list when receiving a relay transmission from 4 an originator. • LOCAL - Select the [ON] button to print the reception list - IBM 4530-N01 | User Guide - Page 151
list format are described in Appendix. P.153 The NIC configuration page, PS3 font list, and PCL font list can be printed only when the Printer Kit, the Printer/Scanner Kit, or optional Fax unit is installed. 1 Press the [LIST/REPORT] button in the ADMIN menu. 4 • The LIST screen is displayed. To - IBM 4530-N01 | User Guide - Page 152
e-Filing functions that will apply to the print jobs or e-Filing jobs. 1 Press the [PRINTER/E-FILING] button in the ADMIN menu. 4 • The PRINTER/E-FILING screen is displayed. To display the ADMIN menu, see "1.ENTERING TO ADMIN MENU". P.82 2 Specify the following items as you require. • AUTOMATIC - IBM 4530-N01 | User Guide - Page 153
menu. This button will be available only when the optional Wireless LAN Module is installed. For the instructions on how to operate the WIRELESS SETTINGS, please refer to the cm4530300 Operator's Manual for Wireless LAN. • There is also the [Bluetooth SETTINGS] button in the ADMIN menu. This button - IBM 4530-N01 | User Guide - Page 154
4 152 4.SETTING ITEMS (ADMIN) - IBM 4530-N01 | User Guide - Page 155
5. APPENDIX 1. LIST PRINT FORMAT...154 • Total Counter List ...154 • Department Code List ...155 • Address Book List ...156 • Function List (User)...158 • NIC Configuration Page ...159 • Function List (Administrator) ...160 • PS3 Font List...175 • PCL Font List ...176 5 153 - IBM 4530-N01 | User Guide - Page 156
COUNTER LIST PRINT COUNTER COPY SMALL LARGE 99999 99999 TOTAL 199998 FAX 99999 99999 199998 TIME : 10-09-'05 20:47 S/N : 0987654321 PRINTER 99999 99999 199998 LIST 99999 99999 199998 TOTAL 399996 399996 799992 SCAN COUNTER COPY FAX NETWORK 99999 99999 99999 5 TOTAL 299997 154 - IBM 4530-N01 | User Guide - Page 157
Department Code List An output example of the Department Code List DEPARTMENT CODE LIST TIME : 10-09-'05 20:47 DEPT NO. D 1 DEPARTMENT 00001 PRINT COUNTER COPY SMALL 99999 LARGE 99999 199998 FAX 99999 99999 199998 PRINT 99999 99999 199998 LIST 99999 99999 199998 TOTAL 399996 399996 799992 - IBM 4530-N01 | User Guide - Page 158
1.LIST PRINT FORMAT (Cont.) Address Book List An output example of the Address Book List ADDRESS BOOK INFORMATION TIME FAX NO.1 FAX NO.2 NAME : 10-09-'05 20:47 : 99999999999 : 99999999990 : MFP_00000236 NO. NAME FAX NUMBER/E-MAIL ADDRESS QUALITY TX TX TYPE LINE ECM ATT 001 USER01 002 - IBM 4530-N01 | User Guide - Page 159
Group Numbers List An output example of the Group Numbers List GROUP NUMBER INFORMATION TIME FAX NO.1 FAX NO.2 NAME : 10-09-'05 20:47 : 99999999999 : 99999999990 : MFP_00000236 NO. NAME ADDRESS BOOK 001 GROUP01 002 GROUP02 003 GROUP03 001 001 002 003 004 005 005 006 006 007 007 008 008 - IBM 4530-N01 | User Guide - Page 160
1.LIST PRINT FORMAT (Cont.) Function List (User) An output example of the Function List (User) FUNCTION LIST S/N F/W Ver. M-ROM Ver. S-ROM Ver. : 0987654321 : T410SY0U010 : 410M-003 : 410S-00 TIME FAX NO.1 FAX NO.2 NAME : 10-09-'05 20:47 : 99999999999 : 99999999990 : MFP_00000183 GENERAL - IBM 4530-N01 | User Guide - Page 161
Defined : No Search Root : NWSRV Directory Services Tree : ORG Directory Services Context : dept1.org Scan Rate : 5 ://169.254.204.215:443/Print AppleTalk Network Information enabled AppleTalk Printer Name: MFP_00C67861 AppleTalk Zone : * AppleTalk Type : LaserWriter AppleTalk - IBM 4530-N01 | User Guide - Page 162
1.LIST PRINT FORMAT (Cont.) Function List (Administrator) An output example of the Function List (Administrator) FUNCTION LIST S/N F/W Ver. M-ROM Ver. S-ROM Ver. : 0987654321 : T410SY0U010 : 410M-003 : 410S-00 TIME FAX NO.1 FAX NO.2 NAME : 10-09-'05 20:47 : 99999999999 : 99999999990 : - IBM 4530-N01 | User Guide - Page 163
GENERAL Function Description User DRAWER - DRAWER 3*1 Shows the paper size of the drawer 3. YES DRAWER - DRAWER 4*2 Shows the paper size of the drawer 4. YES DRAWER - LARGE CAPACITY FEEDER*3 Shows the paper size of the large capacity feeder YES AUTO CLEAR Shows the time (in second) - IBM 4530-N01 | User Guide - Page 164
1.LIST PRINT FORMAT (Cont.) COPY Function Description User AUTOMATIC CHANGE OF PAPER SOURCE Shows whether the Automatic Change of Paper Source function is enabled or dis- NO abled. PAPER OF DIFFERENT DIRECTION Shows whether the Paper of Different Direction function is enabled or disabled. - IBM 4530-N01 | User Guide - Page 165
FAX Function Description User INITIAL SETUP - MONITOR VOLUME*1 Shows the monitor volume setting. NO INITIAL SETUP - COMPLETION TONE VOLUME*1 Shows the complete volume setting. NO INITIAL SETUP - RX MODE*1 Shows the default RX mode. NO INITIAL SETUP - DIAL TYPE*1 Shows the dial type of - IBM 4530-N01 | User Guide - Page 166
1.LIST PRINT FORMAT (Cont.) FILE Function STORAGE MAINTENANCE E-MAIL Function FRAGMENT MESSAGE SIZE (KB) FROM ADDRESS FROM NAME 5 INTERNET FAX Function FRAGMENT PAGE SIZE (KB) BODY STRING TRANSMISSION FROM ADDRESS FROM NAME INTERNET FAX RECEIVED FORWARD AGENT1 INTERNET FAX RECEIVED - IBM 4530-N01 | User Guide - Page 167
receiving a relay trans- NO mission from an originator as a relay hub. *1. These are printed only when the optional Fax unit is installed. PRINTER/E-FILING Function Description User AUTOMATIC CHANGE OF PAPER SOURCE Shows whether the Automatic Change of Paper Source function is enabled or dis - IBM 4530-N01 | User Guide - Page 168
1.LIST PRINT FORMAT (Cont.) WIRELESS SETTINGS Function SSID SECURITY 802.1x AUTHENTICATION USER CERTIFICATE CA CERTIFICATE EAP USER NAME 5 TRANSMIT RATE (Mbps) TRANSMIT POWER Description Shows the SSID. Shows the security mode. Shows the protocol for WPA/WPA2/802.1x authentication when WPA/WPA2/ - IBM 4530-N01 | User Guide - Page 169
BLUETOOTH SETTINGS are printed only when the optional Bluetooth Module is installed. NETWORK SETTING - GENERAL PRODUCT Function Description User GENERAL - ETHER SPEED/DUPLEX MODE Shows the Ethernet speed setting. NO NETWORK SETTING - NETWORK - TCP/IP Function Description User ADDRESS MODE - IBM 4530-N01 | User Guide - Page 170
1.LIST PRINT FORMAT (Cont.) NETWORK SETTING - SESSION - DNS SESSION Function Description User PRIMARY DNS SERVER ADDRESS Shows the primary DNS server address if it has been set. NO SECONDARY DNS SERVER ADDRESS Shows the secondary DNS server address if it has been set. NO NETWORK SETTING - - IBM 4530-N01 | User Guide - Page 171
is enabled or disabled. NO SSL PORT NUMBER Shows the SSL port number for the HTTP network service. NO NETWORK SETTING - NETWORK SERVICE - SMTP CLIENT NETWORK SERVICE Function Description User ENABLE SMTP CLIENT Shows whether the SMTP client is enabled or disabled. NO AUTHENTICATION - IBM 4530-N01 | User Guide - Page 172
Shows the E-mail address of this equipment if the SMTP server is enabled and it has NO been set. NETWORK SETTING - NETWORK SERVICE - POP3 NETWORK SERVICE Function Description User ENABLE POP3 CLIENT Shows whether the POP3 client is enabled or disabled. NO POP3 SERVER ADDRESS Shows the IP - IBM 4530-N01 | User Guide - Page 173
POP3 server. NO ENABLE SSL Shows whether the SSL for the POP3 network service is enabled or disabled. NO SSL PORT NUMBER Shows the SSL port number . NO ENABLE SSL Shows whether the SSL for the FTP server network service is enabled or disabled. NO SSL PORT NUMBER Shows the SSL port number - IBM 4530-N01 | User Guide - Page 174
be used for LPR printing. NO BANNERS Shows whether the banner will be printed for each LPR print job. NO NETWORK SETTING - PRINT SERVICE SETTING - IPP PRINT Function Description User ENABLE IPP Shows whether IPP printing is enabled or disabled. NO ENABLE PORT80 Shows whether the Port80 - IBM 4530-N01 | User Guide - Page 175
the SSL port number to be used for IPP printing. NO 5 SSL URL Shows the SSL URL for IPP printing. NO NETWORK SETTING - PRINT SERVICE SETTING - FTP PRINT Function Description User ENABLE FTP PRINT Shows whether FTP printing is enabled or disabled. NO PRINT USER NAME Shows the user name - IBM 4530-N01 | User Guide - Page 176
1.LIST PRINT FORMAT (Cont.) NETWORK SETTINGS - PRINT AND NOTIFICATION SERVICE - E-MAIL PRINT Function Description User ENABLE PRINT MESSAGE BODY Shows whether the message body will be printed or not for E-mail printing. NO MAXIMUM E-MAIL - IBM 4530-N01 | User Guide - Page 177
PS3 Font List An output example of the PS3 Font List im4530 Series 5 175 - IBM 4530-N01 | User Guide - Page 178
1.LIST PRINT FORMAT (Cont.) PCL Font List An output example of the PCL Font List im4530 Series 5 176 5.APPENDIX - IBM 4530-N01 | User Guide - Page 179
INDEX Numerics 2ND TEL 8 A ADDRESS BOOK 73 ADDRESS BOOK EDIT 10 Address Book List 73, 156 ADDRESS BOOK REGISTRATION 7 ADDRESS MENU 5 ADDRESS MODE 101, 102, 104 ADMIN 82 COPY 120 E-MAIL 137 FAX 122 FILE 136 GENERAL 84 INTERNET FAX 139 LIST/REPORT 142 NETWORK 100 ADMIN. MESSAGE 84 - IBM 4530-N01 | User Guide - Page 180
143 K KEYWORD 8 KNOWN ID 14, 25, 30 L LAST NAME 8 LDAP Network Service 118 LDAP PROTOCOL 119 LINE SELECT 9 LINE-2 MODE 128 Line-2 Mode 127 LINE2 36, 40 PRINT OUT DEPARTMENT CODES 47 PRINT OUT TOTAL COUNTER 38 PRINTER/E-FILING 150 PS3 FONT LIST 149 PS3 Font List 175 PWD 9 - IBM 4530-N01 | User Guide - Page 181
130 S SCAN COUNTER 37, 42 Scan to E-mail 137 SEARCH ADDRESS 15, 26 SEARCH GROUP 31 SEARCH ROOT 108 SECONDARY PORT NUMBER 115 SEP 9 SERVICE PHONE NUMBER 84 SID 9 SINGLE/2-SIDE SCAN 71 SLEEP / AUTO SHUT OFF 97 SMB 109 SMB PROTOCOL 110 SNMP READ COMMUNITY 119 SORT MODE - IBM 4530-N01 | User Guide - Page 182
INDEX (Cont.) 180 - IBM 4530-N01 | User Guide - Page 183
Printed in China im4530/3530 - IBM 4530-N01 | User Guide - Page 184
Printing for Professionals Océ Imagistics Inc. 100 Oakview Drive, Trumbull, CT 06611 ©Océ Imagistics Inc. 2006 Printed in China
-
 1
1 -
 2
2 -
 3
3 -
 4
4 -
 5
5 -
 6
6 -
 7
7 -
8
-
9
-
10
-
11
-
12
-
13
-
14
-
15
-
16
-
17
-
18
-
19
-
20
-
21
-
22
-
23
-
24
-
25
-
26
-
27
-
28
-
29
-
30
-
31
-
32
-
33
-
34
-
35
-
36
-
37
-
38
-
39
-
40
-
41
-
42
-
43
-
44
-
45
-
46
-
47
-
48
-
49
-
50
-
51
-
52
-
53
-
54
-
55
-
56
-
57
-
58
-
59
-
60
-
61
-
62
-
63
-
64
-
65
-
66
-
67
-
68
-
69
-
70
-
71
-
72
-
73
-
74
-
75
-
76
-
77
-
78
-
79
-
80
-
81
-
82
-
83
-
84
-
85
-
86
-
87
-
88
-
89
-
90
-
91
-
92
-
93
-
94
-
95
-
96
-
97
-
98
-
99
-
100
-
101
-
102
-
103
-
104
-
105
-
106
-
107
-
108
-
109
-
110
-
111
-
112
-
113
-
114
-
115
-
116
-
117
-
118
-
119
-
120
-
121
-
122
-
123
-
124
-
125
-
126
-
127
-
128
-
129
-
130
-
131
-
132
-
133
-
134
-
135
-
136
-
137
-
138
-
139
-
140
-
141
-
142
-
143
-
144
-
145
-
146
-
147
-
148
-
149
-
150
-
151
-
152
-
153
-
154
-
155
-
156
-
157
-
158
-
159
-
160
-
161
-
162
-
163
-
164
-
165
-
166
-
167
-
168
-
169
-
170
-
171
-
172
-
173
-
174
-
175
-
176
-
177
-
178
-
179
-
180
-
181
-
182
-
183
-
184
 |
 |
User Functions Guide
Océ
im4530 / im3530
User’s Guide