Intel D845GVFN English Product Guide - Page 47
A series of continuous beeps indicates a failed BIOS recovery.
 |
View all Intel D845GVFN manuals
Add to My Manuals
Save this manual to your list of manuals |
Page 47 highlights
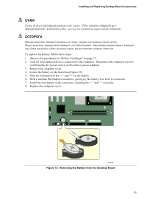
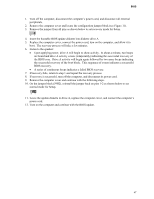
BIOS 1. Turn off the computer, disconnect the computer's power cord, and disconnect all external peripherals. 2. Remove the computer cover and locate the configuration jumper block (see Figure 11). 3. Remove the jumper from all pins as shown below to set recovery mode for Setup. 31 4. Insert the bootable BIOS update diskette into diskette drive A. 5. Replace the computer cover, connect the power cord, turn on the computer, and allow it to boot. The recovery process will take a few minutes. 6. Listen to the speaker: • Upon applying power, drive A will begin to show activity. In about a minute, two beeps are heard and drive A activity ceases (temporarily) indicating the successful recovery of the BIOS core. Drive A activity will begin again followed by two more beeps indicating the successful recovery of the boot block. This sequence of events indicates a successful BIOS recovery. • A series of continuous beeps indicates a failed BIOS recovery. 7. If recovery fails, return to step 1 and repeat the recovery process. 8. If recovery is successful, turn off the computer, and disconnect its power cord. 9. Remove the computer cover and continue with the following steps. 10. On the jumper block (J9H2), reinstall the jumper back on pins 1-2 as shown below to set normal mode for Setup. 31 11. Leave the update diskette in drive A, replace the computer cover, and connect the computer's power cord. 12. Turn on the computer and continue with the BIOS update. 47
-
 1
1 -
2
-
3
-
4
-
5
-
6
-
7
-
8
-
9
-
10
-
11
-
12
-
13
-
14
-
15
-
16
-
17
-
18
-
19
-
20
-
21
-
22
-
23
-
24
-
25
-
26
-
27
-
28
-
29
-
30
-
31
-
32
-
33
-
34
-
35
-
36
-
37
-
38
-
39
-
40
-
41
-
 42
42 -
 43
43 -
 44
44 -
 45
45 -
 46
46 -
 47
47 -
 48
48 -
 49
49 -
 50
50 -
 51
51 -
 52
52 -
53
-
54
-
55
-
56
-
57
-
58
 |
 |
