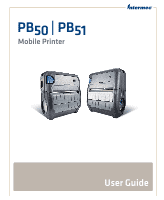
Intermec PB51 PB50 and PB51 Mobile Printer User Guide
Intermec PB51 Manual
 |
View all Intermec PB51 manuals
Add to My Manuals
Save this manual to your list of manuals |
Intermec PB51 manual content summary:
- Intermec PB51 | PB50 and PB51 Mobile Printer User Guide - Page 1
PB50 | PB51 Mobile Printer User Guide - Intermec PB51 | PB50 and PB51 Mobile Printer User Guide - Page 2
trademarks of Intermec Technologies Corporation. There are U.S. and foreign patents as well as U.S. and foreign patents pending. Wi-Fi is a registered certification mark of the Wi-Fi Alliance. Bluetooth is a trademark of Bluetooth SIG, Inc., U.S.A. ii PB50 and PB51 Mobile Printer User Guide - Intermec PB51 | PB50 and PB51 Mobile Printer User Guide - Page 3
radioless PB50 printer. • Change to the Ready-to-Work indicator behavior. • Added linerless media support. • New icons for Bluetooth radio and addition of printhead lifted error message. • Added of power management options Sleep Timer and Standby Timer. PB50 and PB51 Mobile Printer User Guide iii - Intermec PB51 | PB50 and PB51 Mobile Printer User Guide - Page 4
iv PB50 and PB51 Mobile Printer User Guide - Intermec PB51 | PB50 and PB51 Mobile Printer User Guide - Page 5
Printer Modes 21 Understanding Ready Mode 21 Understanding Information Mode 21 Understanding Pause Mode 22 Understanding Setup Mode 23 Understanding Error Mode 24 Understanding Dump Mode 24 Understanding Extended Test Mode 25 Printing a Test Page 26 PB50 and PB51 Mobile Printer User Guide - Intermec PB51 | PB50 and PB51 Mobile Printer User Guide - Page 6
the Printer Through the USB Interface 30 Connecting the Printer Through the Serial Port 31 Connecting the Printer to Your Network 32 Setting Up Bluetooth Communications 32 Setting Up 802.11 Radio Communications 34 Configuring Wireless Printing Using IPL 37 Configuring Wireless Printing Using - Intermec PB51 | PB50 and PB51 Mobile Printer User Guide - Page 7
Compartment 68 A Specifications 69 Specifications 70 Interfaces 74 RS-232 Serial Interface 74 USB Interface 75 Accessories for the Mobile Printer 76 B IPL and Fingerprint Setup Menus 79 IPL Setup Menu 80 Fingerprint Setup Menu 81 I Index 83 PB50 and PB51 Mobile Printer User Guide vii - Intermec PB51 | PB50 and PB51 Mobile Printer User Guide - Page 8
Contents viii PB50 and PB51 Mobile Printer User Guide - Intermec PB51 | PB50 and PB51 Mobile Printer User Guide - Page 9
click Support > Returns and Repairs > Warranty. Web Support Visit the Intermec website at www.intermec.com to download our current manuals (in PDF). To order printed versions of the Intermec manuals, contact your local Intermec representative or distributor. PB50 and PB51 Mobile Printer User Guide - Intermec PB51 | PB50 and PB51 Mobile Printer User Guide - Page 10
Intermec Fingerprint Command Reference Manual • Intermec Fingerprint Developer's Guide • Intermec Printer Language (IPL) Command Reference Manual • ESC/P Programmer's Reference Manual • ZSim Programmer's Guide • CSim Programmer's Guide • DSim Programmer's Guide x PB50 and PB51 Mobile Printer User - Intermec PB51 | PB50 and PB51 Mobile Printer User Guide - Page 11
the Intermec website at www.intermec.com. 2 Click the Products tab. 3 Use the Products menu, navigate to your product page. For example, to find the PB50 mobile printer page, click Printers and Media > Mobile Printers > PB50. 4 Click the Manuals tab. PB50 and PB51 Mobile Printer User Guide xi - Intermec PB51 | PB50 and PB51 Mobile Printer User Guide - Page 12
Before You Begin xii PB50 and PB51 Mobile Printer User Guide - Intermec PB51 | PB50 and PB51 Mobile Printer User Guide - Page 13
1 Using the Mobile Printer Use this chapter to familiarize yourself with your mobile printer. This chapter contains these sections: • Introducing the Mobile Printer • Features of the Printer • Using the Batteries • Loading Media • Understanding the Printer Modes • Printing a Test Page 1 - Intermec PB51 | PB50 and PB51 Mobile Printer User Guide - Page 14
to both the PB50 and PB51 printers. The printer provides: • print resolution of 203 dpi. • print speeds of up to 100 mm per second (4 ips). • 802.11 radio, Bluetooth radio, or no radio options. What's New? This version of the printer manual contains these changes: • Updated the user guide to include - Intermec PB51 | PB50 and PB51 Mobile Printer User Guide - Page 15
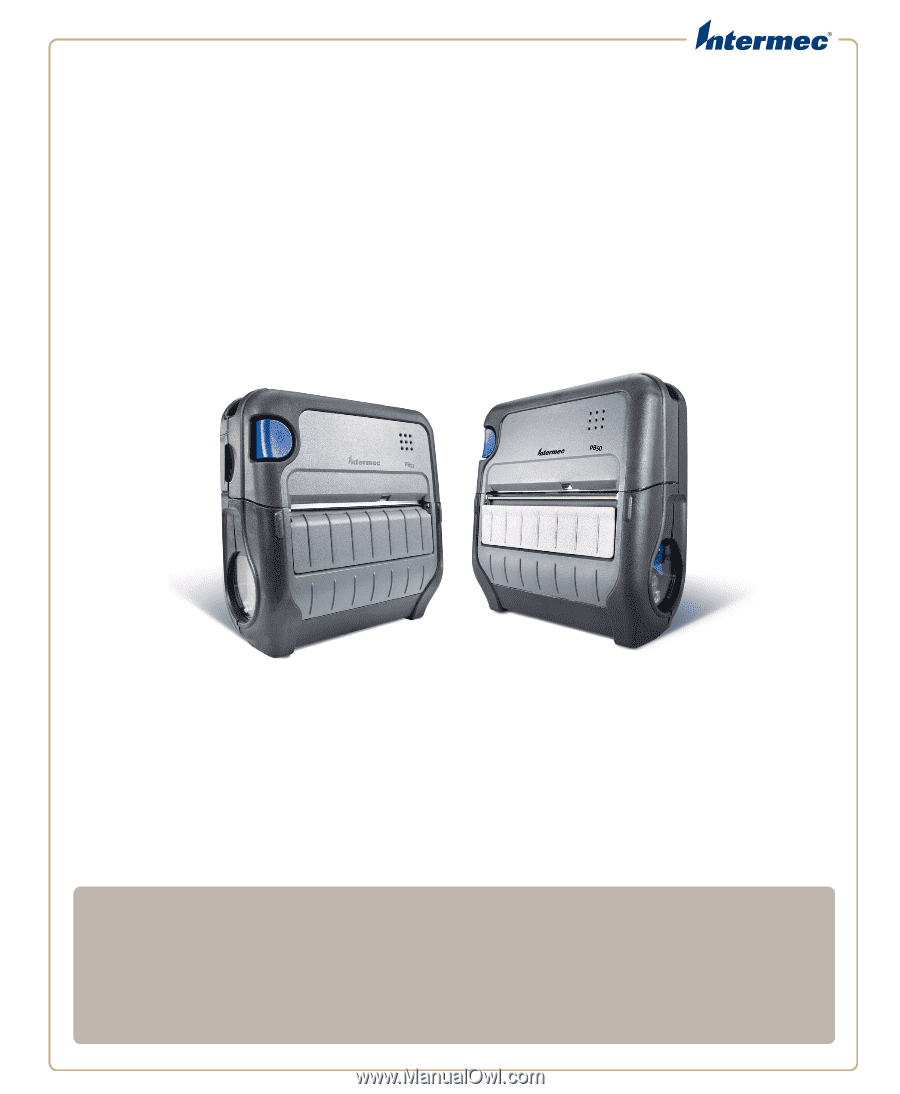
panel Ready-to-Work indicator Communications port PB50 and PB51 Mobile Printer: This illustration shows the important features of the printer. A weather-resistant flap protects the communications port and the external power connector. Note: Only the PB50 has a self-strip door. Understanding the - Intermec PB51 | PB50 and PB51 Mobile Printer User Guide - Page 16
error conditions (Fingerprint and IPL only). Each information message appears on the screen for five seconds. Press in Pause mode to cancel the print job (Fingerprint and IPL only). The button does not have a unique function when using the ESC/P language. 4 PB50 and PB51 Mobile Printer User Guide - Intermec PB51 | PB50 and PB51 Mobile Printer User Guide - Page 17
the Ready-to-Work Indicator Indicator State Off On Description When the light is off, it means one of the following: • The printer is in Standby mode. • The printer is in Info mode. • The printer is in Setup mode. The printer is powered on and operating. PB50 and PB51 Mobile Printer User Guide 5 - Intermec PB51 | PB50 and PB51 Mobile Printer User Guide - Page 18
• Intermec Printer Language (IPL) • ESC/P • ZSim • CSim • DSim The first time you start your printer after you upgrade your firmware, you are prompted to select a printer language. The language you select automatically runs each time you turn on your printer. 6 PB50 and PB51 Mobile Printer User - Intermec PB51 | PB50 and PB51 Mobile Printer User Guide - Page 19
, see the DSim Programmer's Guide. The current printer language and firmware version appear on the screen when the printer is in Ready mode. IPL 12.0.0 The Screen of a Printer Running IPL Firmware To select your printer language 1 Turn on your printer. PB50 and PB51 Mobile Printer User Guide 7 - Intermec PB51 | PB50 and PB51 Mobile Printer User Guide - Page 20
or Direct Protocol ZSim, DSim, or CSim • Go to SETUP > TEST/SERVICE > CMD LANGUAGE. • Go to SETUP > PRINT DEFS > CMD LANGUAGE. 1 Press Setup button. 2 Enter the Fingerprint password: 8311. 3 Press Setup button. 4 Go to SETUP > PRINT DEFS > CMD LANGUAGE. 8 PB50 and PB51 Mobile Printer User Guide - Intermec PB51 | PB50 and PB51 Mobile Printer User Guide - Page 21
. Use Intermec Model AB13 battery only. Use of another battery may present a risk of fire or explosion. The Model AB13 battery may present a fire or chemical burn hazard if mistreated. Do not disassemble, heat above 100 °C (212 °F), or incinerate. PB50 and PB51 Mobile Printer User Guide 9 - Intermec PB51 | PB50 and PB51 Mobile Printer User Guide - Page 22
battery 1 Lay the printer upside-down on a flat surface. 2 Insert the battery with the tab facing away from the front control panel. 3 Insert the edge of the battery under the lip of the printer and then push down until you hear the battery latch click. 10 PB50 and PB51 Mobile Printer User Guide - Intermec PB51 | PB50 and PB51 Mobile Printer User Guide - Page 23
to work for several more hours before charging or replacing the battery. Battery is low. You need to replace the battery soon. Battery is critically low. You need to replace the battery now. Battery charging error. You may need to replace the battery. PB50 and PB51 Mobile Printer User Guide 11 - Intermec PB51 | PB50 and PB51 Mobile Printer User Guide - Page 24
Standby Timer option to turn off power to the radio, the display, and the backlight. The Standby Timer option has the same effect on the printer as pressing the Standby button. 12 PB50 and PB51 Mobile Printer User Guide - Intermec PB51 | PB50 and PB51 Mobile Printer User Guide - Page 25
. Using the printer in temperatures below 0 °C (32 °F) reduces the overall battery life. Over time, rechargeable batteries lose the ability to maintain a charge. You can only recharge a battery a finite number of times before you must replace it. PB50 and PB51 Mobile Printer User Guide 13 - Intermec PB51 | PB50 and PB51 Mobile Printer User Guide - Page 26
Using the Mobile Printer Loading Media You can use roll or fanfold receipt media with both the PB50 and PB51 printers. Your printer ships with a small amount of media loaded, and a test page printed to make sure that the printer works. The PB50 printer supports self-strip printing applications. For - Intermec PB51 | PB50 and PB51 Mobile Printer User Guide - Page 27
load the media clockwise so that it pulls off the core from the bottom of the printer. 5 Pull out approximately 8 cm (3 inches) of the media. 6 Close the media cover. The printer emits the hardware sound to tell you that the media door closed correctly. PB50 and PB51 Mobile Printer User Guide 15 - Intermec PB51 | PB50 and PB51 Mobile Printer User Guide - Page 28
sure the media cover is completely latched. Note: The PB51 does not have a self-strip door. Instead, the self-strip door is molded plastic and part of the media cover. 8 Press and hold the Feed button for more than two seconds to calibrate the media. 16 PB50 and PB51 Mobile Printer User Guide - Intermec PB51 | PB50 and PB51 Mobile Printer User Guide - Page 29
off or in Standby mode, press the Standby button. • If the printer is on, press the soft key (usually the Setup button) to return to Ready mode. 2 Press the blue media cover release button until the cover releases. 3 Slide the two media supports apart. PB50 and PB51 Mobile Printer User Guide 17 - Intermec PB51 | PB50 and PB51 Mobile Printer User Guide - Page 30
Chapter 1 - Using the Mobile Printer 4 Insert a dummy core and press the media adjust guide until the dummy core is held firmly in place. 5 Load the fanfold media from the bottom of the printer. 6 Pull out approximately 8 cm (3 inches) of the media. 18 PB50 and PB51 Mobile Printer User Guide - Intermec PB51 | PB50 and PB51 Mobile Printer User Guide - Page 31
correctly. To load media for self-strip printing (PB50 only) 1 Complete Steps 1 through 5 in the previous procedure. 2 Open the self-strip door in the media cover. 3 Remove a label from the roll of media so that you have several inches of label liner. PB50 and PB51 Mobile Printer User Guide 19 - Intermec PB51 | PB50 and PB51 Mobile Printer User Guide - Page 32
Chapter 1 - Using the Mobile Printer 4 Feed the label liner over the self-strip bar and out the back of the self-strip door. 5 Close the media cover the liner to tighten it. 7 Press and hold the Feed button for more than two seconds to calibrate the media. 20 PB50 and PB51 Mobile Printer User Guide - Intermec PB51 | PB50 and PB51 Mobile Printer User Guide - Page 33
it shows a subset of network information about the printer. If there is an error, the error message appears first, followed by the printer information. Each message appears for five seconds. Note: You must use IPL or Fingerprint to start Information mode. PB50 and PB51 Mobile Printer User Guide 21 - Intermec PB51 | PB50 and PB51 Mobile Printer User Guide - Page 34
To cancel the current print job with Fingerprint or IPL 1 Press the Feed button to pause printing. 2 Press the Information button (or soft key) to cancel the current print job. To cancel the current print job with ESC/P • Press and hold the Setup button. 22 PB50 and PB51 Mobile Printer User Guide - Intermec PB51 | PB50 and PB51 Mobile Printer User Guide - Page 35
the Mobile Printer Understanding Setup Mode Use Setup mode to change settings on the printer. Note: You must use IPL or Fingerprint to start Setup mode. For more information on how to change printer settings, see "Configuring the Printer Settings" on page 42. Sample Setup Mode Screen To start or - Intermec PB51 | PB50 and PB51 Mobile Printer User Guide - Page 36
Mobile Printer + IP ADDRESS: 130.42.240.102 Enhanced Editing Mode: In enhanced editing mode, you see a plus sign (+) and a right arrow to change the value of numeric settings. Understanding Error Mode The printer starts Error mode when it detects an error condition, such as a low battery or a paper - Intermec PB51 | PB50 and PB51 Mobile Printer User Guide - Page 37
with IPL, see "Troubleshooting Communication Problems" on page 62. Understanding Extended Test Mode Use Extended Test mode to run additional diagnostic tests or resolve more difficult problems, including printing specific test labels, starting Dump mode, and resetting the printer to factory default - Intermec PB51 | PB50 and PB51 Mobile Printer User Guide - Page 38
to print test labels one at a time. Press to print the next label. This option starts Dump mode. For more information on Dump mode, see "Troubleshooting Communication Problems" on page 62. This option restores the factory default settings. Press to select this option, then follow the instructions on - Intermec PB51 | PB50 and PB51 Mobile Printer User Guide - Page 39
/P 1 Press and hold the Feed and Power buttons for approximately five seconds. 2 Release the buttons when the printer shows the SELECT MEDIA message, or a message stating the type of media loaded in the printer. 3 Press the Feed button to stop Dump Mode. PB50 and PB51 Mobile Printer User Guide 27 - Intermec PB51 | PB50 and PB51 Mobile Printer User Guide - Page 40
Chapter 1 - Using the Mobile Printer 28 PB50 and PB51 Mobile Printer User Guide - Intermec PB51 | PB50 and PB51 Mobile Printer User Guide - Page 41
2 Configuring the Mobile Printer This chapter contains these sections: • Connecting the Printer to Your PC • Connecting the Printer to Your Network • Configuring the Printer Settings • Upgrading the Firmware • Downloading Fonts and Graphics 29 - Intermec PB51 | PB50 and PB51 Mobile Printer User Guide - Page 42
the Mobile Printer Connecting the Printer to Your PC You can easily connect the printer to your PC using one of these ports: • USB port • RS-232 serial interface port Connecting the Printer Through the USB Interface To connect the printer to your PC through the USB port, you need to install Intermec - Intermec PB51 | PB50 and PB51 Mobile Printer User Guide - Page 43
. 3 If necessary, configure the PC port settings as follows: Parameter Baud rate Data bits Parity Stop bits Default Setting 115200 8 None 1 4 If you are using HyperTerminal a Click the Settings tab. b Click ASCII Setup. The ASCII Setup window appears. PB50 and PB51 Mobile Printer User Guide 31 - Intermec PB51 | PB50 and PB51 Mobile Printer User Guide - Page 44
sends the data to print. The printer has two ways to communicate with a network: • Bluetooth radio communications • 802.11 b/g wireless radio communications Setting Up Bluetooth Communications Your mobile printer contains a Bluetooth radio that allows wireless communications with a remote device - Intermec PB51 | PB50 and PB51 Mobile Printer User Guide - Page 45
. 2 Create the following bar code labels using EasySet: • Administrator reset factory defaults • Bluetooth parameters - security - not active • Bluetooth parameters - connect/disconnect - compose BT address • Bluetooth parameters - security - compose PIN: PB50 and PB51 Mobile Printer User Guide 33 - Intermec PB51 | PB50 and PB51 Mobile Printer User Guide - Page 46
the serial cable to a serial port on your PC. 2 On your PC, start PrintSet. 3 Select your printer from the My Printers list. 4 In the Printer Tasks list, click Wireless Setup Wizard. If you are prompted for the administrator username and password, type them and click Next. 34 PB50 and PB51 Mobile - Intermec PB51 | PB50 and PB51 Mobile Printer User Guide - Page 47
or to a serial adapter on your mobile computer. 3 Open a communications program such as HyperTerminal on your PC and configure the following parameters for the serial port: Parameter Baud rate Data bits Parity Stop bits Default Setting 115200 8 None 1 PB50 and PB51 Mobile Printer User Guide 35 - Intermec PB51 | PB50 and PB51 Mobile Printer User Guide - Page 48
printer can accept .pfx, .pem, and .der certificates. 7 Verify that the printer is connected to the access point and make sure it can get an IP address. Understanding the 802.11 Radio Icons Icon Description Excellent signal Strong signal Good signal 36 PB50 and PB51 Mobile Printer User Guide - Intermec PB51 | PB50 and PB51 Mobile Printer User Guide - Page 49
Command Reference Manual or the IPL Command Reference Manual. You can download both documents from the Intermec website at www.intermec.com. Configuring Wireless Printing Using IPL Use the following procedures to configure your printer with IPL for wireless printing. To configure the printer to use - Intermec PB51 | PB50 and PB51 Mobile Printer User Guide - Page 50
,WPA,ON ws,WPA2,ON ws,WPA_PSK, 3 Send these commands to configure the EAP_TYPE: ws,EAP_TYPE,xxxx where xxxx can be OFF, LEAP, PEAP, or TTLS. ws,.EAP_USER,xxxx ws,.EAP_PASS,xxxx 38 PB50 and PB51 Mobile Printer User Guide - Intermec PB51 | PB50 and PB51 Mobile Printer User Guide - Page 51
are returned with the exception of EAP_PASS, which always returns "****" if configured, and CA_CERT, which transmits the name of the last certificate authority following command several times for the wireless station to connect: ws,ACTIVE,1 PB50 and PB51 Mobile Printer User Guide 39 - Intermec PB51 | PB50 and PB51 Mobile Printer User Guide - Page 52
Configuring Wireless Printing Using Fingerprint Use the following procedures to configure your printer with Fingerprint for wireless printing. To configure the printer to use WEP authentication 1 Send the following commands to login as an administrator and set the SSID: run"su -p pass admin" setup - Intermec PB51 | PB50 and PB51 Mobile Printer User Guide - Page 53
Chapter 2 - Configuring the Mobile Printer To configure the Printer to use WPA or WPA2 Enterprise mode 1 Send the following commands to login as an administrator and set the SSID: run"su-p pass admin" setup write "wlan","uart1:" setup "wlan","SSID","xxxxx" where xxxxx can be from 0 to 32 - Intermec PB51 | PB50 and PB51 Mobile Printer User Guide - Page 54
on starting Setup mode and navigating through the settings, see "Understanding Setup Mode" on page 23. The top levels of the Setup menu are organized in a one-way loop. Each level has several sub-levels. Note: The Setup menu is not available when using ESC/P. 42 PB50 and PB51 Mobile Printer User - Intermec PB51 | PB50 and PB51 Mobile Printer User Guide - Page 55
PRINT DEFS SETUP: MEDIA SETUP: FEEDADJ The Main Levels of the Setup Menu in Fingerprint Starting point SETUP: DISPLAY SETUP: POWER SETUP: SER-COM SETUP: NETWORK SETUP: TEST/SERVICE SETUP: CONFIGURATION SETUP: MEDIA The Main Levels of the Setup Menu in IPL PB50 and PB51 Mobile Printer User - Intermec PB51 | PB50 and PB51 Mobile Printer User Guide - Page 56
locally. 4 Click OK twice. For more information on changing configuration settings, see either the Fingerprint Command Reference Manual or the IPL Command Reference Manual. You can download these documents from the Intermec website at www.intermec.com. 44 PB50 and PB51 Mobile Printer User Guide - Intermec PB51 | PB50 and PB51 Mobile Printer User Guide - Page 57
communications program to find the IP address. a Start a communications program. b In the communications program window, type: ESC{QST:NW} and press Enter. The IP address of the printer appears in the communications program window. 5 Start a web browser. PB50 and PB51 Mobile Printer User Guide 45 - Intermec PB51 | PB50 and PB51 Mobile Printer User Guide - Page 58
. The printer ships with the SmartSystems client preloaded. The console is part of SmartSystems Foundation, and is available from the Intermec website. To download SmartSystems Foundation, go to www.intermec.com/products/smrtsysfoundation/index.aspx. 46 PB50 and PB51 Mobile Printer User Guide - Intermec PB51 | PB50 and PB51 Mobile Printer User Guide - Page 59
, see "Connecting the Printer Through the Serial Port" on page 31. 2 Download and save the firmware (.bin) file you want to use. a Go to www.intermec.com. b Select Products > Printers and Media > Printer Family > Printer Model. c Click the Downloads tab. PB50 and PB51 Mobile Printer User Guide 47 - Intermec PB51 | PB50 and PB51 Mobile Printer User Guide - Page 60
, select Firmware Upgrade. You should only select Bootloader Upgrade if you are told to do so by Intermec Product Support. Upgrading the bootloader unnecessarily may damage your printer. 7 Follow the onscreen instructions to upgrade your firmware. 48 PB50 and PB51 Mobile Printer User Guide - Intermec PB51 | PB50 and PB51 Mobile Printer User Guide - Page 61
the printer. a Press the Setup button. b Press until Network appears. c Press to select the Network menu. d Press until you reach IP Address. e Press to select and view the IP Address. f Press the Setup button to return to Ready mode. 5 Start a web browser. PB50 and PB51 Mobile Printer User Guide - Intermec PB51 | PB50 and PB51 Mobile Printer User Guide - Page 62
Chapter 2 - Configuring the Mobile Printer 6 In the Address text box, type the IP address of your printer and press Enter. = 7 Click Maintenance. The Maintenance page appears. 50 PB50 and PB51 Mobile Printer User Guide - Intermec PB51 | PB50 and PB51 Mobile Printer User Guide - Page 63
2 - Configuring the Mobile Printer 8 When prompted, type your user name and password. The default user name is "admin" and the default password is "pass." 9 Browse to the (.bin) file you want to upgrade to and select it. 10 Click Upgrade. Wait approximately five minutes for the firmware upgrade to - Intermec PB51 | PB50 and PB51 Mobile Printer User Guide - Page 64
2 - Configuring the Mobile Printer 3 Download the firmware (.bin) file you want to upgrade to your PC. a Go to www.intermec.com. b Click Support > Downloads. c Use the Product Category, Product Family, and Product fields, to select the printer model. d Click Submit. The latest available software - Intermec PB51 | PB50 and PB51 Mobile Printer User Guide - Page 65
PC using a serial cable. For help, see "Connecting the Printer Through the Serial Port" on page 31. 2 Download the firmware (.bin) file you want to upgrade to your PC. a Go to www.intermec.com. b Click Support > Downloads. c Use the Product Category, Product Family, and Product fields, to select - Intermec PB51 | PB50 and PB51 Mobile Printer User Guide - Page 66
PC using a serial cable. For help, see "Connecting the Printer Through the Serial Port" on page 31. 2 Download the firmware (.bin) file you want to upgrade to your PC. a Go to www.intermec.com. b Click Support > Downloads. c Use the Product Category, Product Family, and Product fields, to select - Intermec PB51 | PB50 and PB51 Mobile Printer User Guide - Page 67
printer. For help with commands and information, see the Fingerprint Command Reference Manual, the IPL Command Reference Manual, or the ESC/P Programmer's Reference Manual. You can download these documents from the Intermec website at www.intermec.com. PB50 and PB51 Mobile Printer User Guide 55 - Intermec PB51 | PB50 and PB51 Mobile Printer User Guide - Page 68
Chapter 2 - Configuring the Mobile Printer 56 PB50 and PB51 Mobile Printer User Guide - Intermec PB51 | PB50 and PB51 Mobile Printer User Guide - Page 69
the Mobile Printer Use this chapter to solve problems you may encounter while using the printer. You will also find information on booting the printer and routine maintenance. This chapter contains these sections: • Troubleshooting the Mobile Printer • Restarting the Mobile Printer • Cleaning - Intermec PB51 | PB50 and PB51 Mobile Printer User Guide - Page 70
Intermec Product Support, make sure you have the following information ready: • Printer serial number • Firmware type and version • Bluetooth, wireless, or serial port settings You can find all of the information listed above in the printer menu system or on a testprint page. Understanding Error - Intermec PB51 | PB50 and PB51 Mobile Printer User Guide - Page 71
on page 25), and select the appropriate media type. IP configuration The printer does not have a network IP error address. Wait for the printer to acquire an IP address before continuing. IP link error The printer does not have a network connection. PB50 and PB51 Mobile Printer User Guide 59 - Intermec PB51 | PB50 and PB51 Mobile Printer User Guide - Page 72
3 - Troubleshooting and Maintaining the Mobile Printer Possible Printer Error Icons and Messages (continued) Error Icon Error Message Description Field out of label You are attempting to print in an area that extends beyond the print window. See the command reference manual for your type of firmware - Intermec PB51 | PB50 and PB51 Mobile Printer User Guide - Page 73
Chapter 3 - Troubleshooting and Maintaining the Mobile Printer Printer Problems and Solutions (continued) Problem Possible Solution The printer is not • Verify that the wireless settings are correct. For printing with an 802.11 help, see "Setting Up 802.11 Radio wireless connection. - Intermec PB51 | PB50 and PB51 Mobile Printer User Guide - Page 74
Batteries" on page 11. • Check the quality of the media. Use only Intermec media to ensure superior print quality and product performance. • Check that the printer is set to the appropriate Constant/Factory or sensitivity number for the media you are using. • Make sure that the serial or USB cable - Intermec PB51 | PB50 and PB51 Mobile Printer User Guide - Page 75
62. • using the Control Panel buttons. Characters are printed on a continuous line along with their corresponding hexadecimal numbers. For information on how to start Dump mode from Extended Test mode, see "Understanding Extended Test Mode" on page 25. PB50 and PB51 Mobile Printer User Guide 63 - Intermec PB51 | PB50 and PB51 Mobile Printer User Guide - Page 76
Chapter 3 - Troubleshooting and Maintaining the Mobile Printer To start Dump mode from Ready mode with IPL • Press and hold the Feed and Standby buttons until the printer starts feeding out media. The printer feeds several labels (or inches of media), prints the test labels, and then starts Dump - Intermec PB51 | PB50 and PB51 Mobile Printer User Guide - Page 77
Chapter 3 - Troubleshooting and Maintaining the Mobile Printer Cleaning the Printer To properly maintain your printer, you must clean it at the recommended interval. Make sure to clean the following parts: • Printhead • Platen roller • Paper sensors • Tear bar • Printer exterior • Media compartment - Intermec PB51 | PB50 and PB51 Mobile Printer User Guide - Page 78
Paper sensor Label taken sensor Printhead Label gap sensor Platen roller PB50 and PB51 Mobile Label and Receipt Printer: Identifying the parts of the printer to clean regularly Cleaning the Printhead Clean the printhead after printing five rolls of media to prolong the life of the printhead - Intermec PB51 | PB50 and PB51 Mobile Printer User Guide - Page 79
other problems. To clean the printer exterior 1 Close the media cover. 2 Using a soft cloth, wipe the printer exterior. You can also use a small amount of water or mild detergent. Intermec recommends that you keep the surface surrounding the printer clean. PB50 and PB51 Mobile Printer User Guide - Intermec PB51 | PB50 and PB51 Mobile Printer User Guide - Page 80
Chapter 3 - Troubleshooting and Maintaining the Mobile Printer Cleaning the Printer Media Compartment 1 Open the media cover. 2 Remove the media and ribbon. 3 Use a brush or air blow the compartment. 4 Make sure the paper sensors are free of dust. 68 PB50 and PB51 Mobile Printer User Guide - Intermec PB51 | PB50 and PB51 Mobile Printer User Guide - Page 81
A Specifications 69 - Intermec PB51 | PB50 and PB51 Mobile Printer User Guide - Page 82
) with battery Power Specifications AC power adapter voltage: Printer voltage: paper path and slots are excluded from IP54. Memory RAM: Flash: 16 MB 64 MB Print Speed and Resolution Print speed: up to 4 ips (100 mm/s) Resolution: 203 dpi (8 dots/mm) 70 PB50 and PB51 Mobile Printer User Guide - Intermec PB51 | PB50 and PB51 Mobile Printer User Guide - Page 83
as a continuous roll. Label, tag, and fanfold media use repeat indicators for non-continuous media. Gap, notch, and black marks are used as repeat indicators: • Gap: Label and fanfold media • Notch: Tag media • Black mark: Label, tag, and fanfold media PB50 and PB51 Mobile Printer User Guide 71 - Intermec PB51 | PB50 and PB51 Mobile Printer User Guide - Page 84
. Receipt media is supported in both top coated and uncoated paper in continuous roll stock only. The default media sensitivity is 180. The default media sensitivity for linerless media is 103. Use the following table as a guide when setting sensitivity. 72 PB50 and PB51 Mobile Printer User Guide - Intermec PB51 | PB50 and PB51 Mobile Printer User Guide - Page 85
30 40 European Label Media 440 47 30 140 70 40 Duratherm TC Duratherm NTC - 2 Duratherm NTC Thermal Eco Thermal Top Max Print Speed 4 ips 4 ips 2 ips 4 ips 4 ips 4 ips 4 ips 2 ips Dependent on format and environment 2 ips 2 ips 2 ips 2 ips 4 ips PB50 and PB51 Mobile Printer User Guide 73 - Intermec PB51 | PB50 and PB51 Mobile Printer User Guide - Page 86
This section describes the standard interfaces available on the PB50 and PB51 printers. RS-232 Serial Interface Use the following tables and graphics to understand serial port default settings Serial Port Default Settings Parameter Baud rate Character Length or Data Bits Parity Stop Bits - Intermec PB51 | PB50 and PB51 Mobile Printer User Guide - Page 87
Interface" on page 30. The USB cable that ships with the printer has a USB Type A connector on one end to connect to the PC, and a USB Type B connector on the other end to connect to the printer. You do not need to configure communications for the USB port. PB50 and PB51 Mobile Printer User Guide - Intermec PB51 | PB50 and PB51 Mobile Printer User Guide - Page 88
. Cart Dock Use the cart dock to easily attach the printer to a movable cart or a flat surface. Cleaning Pen Use the cleaning pen to clean the printhead. Cleaning Swab Use cleaning swabs to clean the platen roller, paper sensor, tear bar, and printhead. 76 PB50 and PB51 Mobile Printer User Guide - Intermec PB51 | PB50 and PB51 Mobile Printer User Guide - Page 89
from www.intermec.com. Power Supply (Model AE19) Provides power to the mobile printer and the 4-bay battery charger (Model AC18). Printhead Cleaning Pen Use the cleaning pen to clean the printhead. Protective Case Use the protective case to transport and store your printer. The protective case keeps - Intermec PB51 | PB50 and PB51 Mobile Printer User Guide - Page 90
Appendix A - Specifications 78 PB50 and PB51 Mobile Printer User Guide - Intermec PB51 | PB50 and PB51 Mobile Printer User Guide - Page 91
B IPL and Fingerprint Setup Menus 79 - Intermec PB51 | PB50 and PB51 Mobile Printer User Guide - Page 92
MODE LBL LENGTH DOTS LBL WIDTH DOTS SENSITIVITY DARKNESS LBL REST POINT FORM ADJ DOTS FORM ADJ DOTS X Y CONFIGURATION PWRUP EMULATION PRINT SPEED POWER LTS CALIBRATION LOW BATTERY SLEEP TIMER STANDBY TIMER DISPLAY ORIENTATION CONTRAST 80 PB50 and PB51 Mobile Printer User Guide - Intermec PB51 | PB50 and PB51 Mobile Printer User Guide - Page 93
TESTFEED HEAD RESIST POWER LOW BATTERY TESTPRINT PRINT SPEED SLEEP TIMER STANDBY TIMER LSS TEST CLIP DEFAULT LESS AUTO LSS MANUAL DISPLAY ORIENTATION CONTRAST TESTFEED MODE LEN (SLOW MODE) LTS CMD LANGUAGE LTS VALUE LTS ADJUST LTS TEST PB50 and PB51 Mobile Printer User Guide 81 - Intermec PB51 | PB50 and PB51 Mobile Printer User Guide - Page 94
Appendix B - IPL and Fingerprint Setup Menus 82 PB50 and PB51 Mobile Printer User Guide - Intermec PB51 | PB50 and PB51 Mobile Printer User Guide - Page 95
I Index 83 - Intermec PB51 | PB50 and PB51 Mobile Printer User Guide - Page 96
802.11 wireless 34-42 using Bluetooth 32-34 connect printer to PC using a serial connection 31-32 using USB 30-31 Control Panel backlight 12, 13 buttons 4 illustrated 3 layout 3-4 soft keys 5 D default password 37, 38, 40 default settings. See factory default settings. differences between PB50 and - Intermec PB51 | PB50 and PB51 Mobile Printer User Guide - Page 97
key 5, 22 Information mode about 21-22 starting 22 stopping 5, 22 InterDriver software 30 interfaces about 74 RS-232 serial 74-75 USB 75-76 IP address 45, 49 IP configuration error 59 IP link error 59 IPL setup menu 80 K Knowledge Central 58 L label gap sensor 60 languages changing 8 described 7 LED - Intermec PB51 | PB50 and PB51 Mobile Printer User Guide - Page 98
. serial connection cable part number 31, 34, 47 connecting to a PC 31-32 finding current settings 58 illustrated 74-75 pins and descriptions 74-75 port communication settings 31, 31-32, 35 troubleshooting 62 See also connect printer to PC. serial number 58 PB50 and PB51 Mobile Printer User Guide - Intermec PB51 | PB50 and PB51 Mobile Printer User Guide - Page 99
labels 61 stop printing 60 test page 62 USB connection 62 using Dump mode 62-64 See also error. typefaces, downloading 55 U upgrade firmware. See firmware, upgrade information. USB. See connecting printer to PC. W warranty ix wireless. See 802.11 wireless. PB50 and PB51 Mobile Printer User Guide - Intermec PB51 | PB50 and PB51 Mobile Printer User Guide - Page 100
Index 88 PB50 and PB51 Mobile Printer User Guide - Intermec PB51 | PB50 and PB51 Mobile Printer User Guide - Page 101
- Intermec PB51 | PB50 and PB51 Mobile Printer User Guide - Page 102
Worldwide Headquarters 6001 36th Avenue West Everett, Washington 98203 U.S.A. tel 425.348.2600 fax 425.355.9551 www.intermec.com © 2012 Intermec Technologies Corporation. All rights reserved. PB50 and PB51 Mobile Printer User Guide *934-012-008* P/N 934-012-008
-
 1
1 -
 2
2 -
 3
3 -
 4
4 -
 5
5 -
 6
6 -
 7
7 -
8
-
9
-
10
-
11
-
12
-
13
-
14
-
15
-
16
-
17
-
18
-
19
-
20
-
21
-
22
-
23
-
24
-
25
-
26
-
27
-
28
-
29
-
30
-
31
-
32
-
33
-
34
-
35
-
36
-
37
-
38
-
39
-
40
-
41
-
42
-
43
-
44
-
45
-
46
-
47
-
48
-
49
-
50
-
51
-
52
-
53
-
54
-
55
-
56
-
57
-
58
-
59
-
60
-
61
-
62
-
63
-
64
-
65
-
66
-
67
-
68
-
69
-
70
-
71
-
72
-
73
-
74
-
75
-
76
-
77
-
78
-
79
-
80
-
81
-
82
-
83
-
84
-
85
-
86
-
87
-
88
-
89
-
90
-
91
-
92
-
93
-
94
-
95
-
96
-
97
-
98
-
99
-
100
-
101
-
102
 |
 |
PB
50
| PB
51
Mobile Printer
User Guide