Invacare M91 Owners Manual - Page 29
Troubleshooting - Electrical
 |
View all Invacare M91 manuals
Add to My Manuals
Save this manual to your list of manuals |
Page 29 highlights
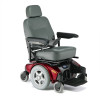
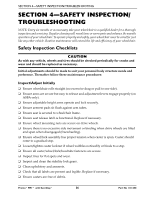
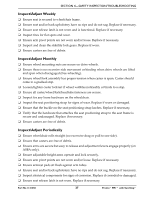
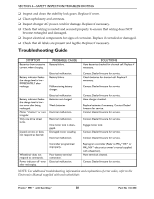
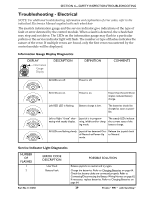
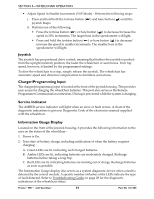
SECTION 4-SAFETY INSPECTION/TROUBLESHOOTING Troubleshooting - Electrical NOTE: For additional troubleshooting information and explanation of error codes, refer to the individual Electronics Manual supplied with each wheelchair The joystick information gauge and the service indicator give indications of the type of fault or error detected by the control module. When a fault is detected, the wheelchair may stop and not drive. The LEDs on the information gauge may flash in a particular pattern or the service indicator light will flash. The number or type of flashes indicates the nature of the error. If multiple errors are found, only the first error encountered by the control module will be displayed. Information Gauge Display Diagnostics DISPLAY Information Gauge Display DESCRIPTION DEFINITION COMMENTS All LEDs are off. Power is off. All LEDs are on. Power is on. Fewer than three LEDs on implies reduced battery charge. Left RED LED is flashing. Battery charge is low. The batteries should be charged as soon as possible. Left to Right "chase" alter- Joystick is in program- The steady LEDs indicate nating with steady display. ming, inhibit and/or charg- the current state of the ing mode. battery charge. All LEDs are flashing slowly. Joystick has detected Out- Release the joystick back of-Neutral-at-Power-Up to Neutral. mode. Service Indicator Light Diagnostics NUMBER OF FLASHES 1 2 ERROR CODE DESCRIPTION User Fault Battery Fault POSSIBLE SOLUTION Release joystick to neutral and try again. Charge the batteries. Refer to Charging Batteries on page 64. Check that battery cables are connected properly. Refer to Connecting/Disconnecting the Battery Wiring Harness on page 62. If necessary, replace batteries. Refer to Charging Batteries on page 64. Part No 1141450 29 Pronto® M91™ with SureStep®
-
 1
1 -
2
-
3
-
4
-
5
-
6
-
7
-
8
-
9
-
10
-
11
-
12
-
13
-
14
-
15
-
16
-
17
-
18
-
19
-
20
-
21
-
22
-
23
-
 24
24 -
 25
25 -
 26
26 -
 27
27 -
 28
28 -
 29
29 -
 30
30 -
 31
31 -
 32
32 -
 33
33 -
 34
34 -
35
-
36
-
37
-
38
-
39
-
40
-
41
-
42
-
43
-
44
-
45
-
46
-
47
-
48
-
49
-
50
-
51
-
52
-
53
-
54
-
55
-
56
-
57
-
58
-
59
-
60
-
61
-
62
-
63
-
64
-
65
-
66
-
67
-
68
-
69
-
70
-
71
-
72
 |
 |