JVC GRSXM37U Instructions - Page 11
TBC Time Base Corrector, Connections To A TV/VCR, Tape Dubbing, Connections To A TV/VCR. Set - tapes
 |
UPC - 046838017216
View all JVC GRSXM37U manuals
Add to My Manuals
Save this manual to your list of manuals |
Page 11 highlights
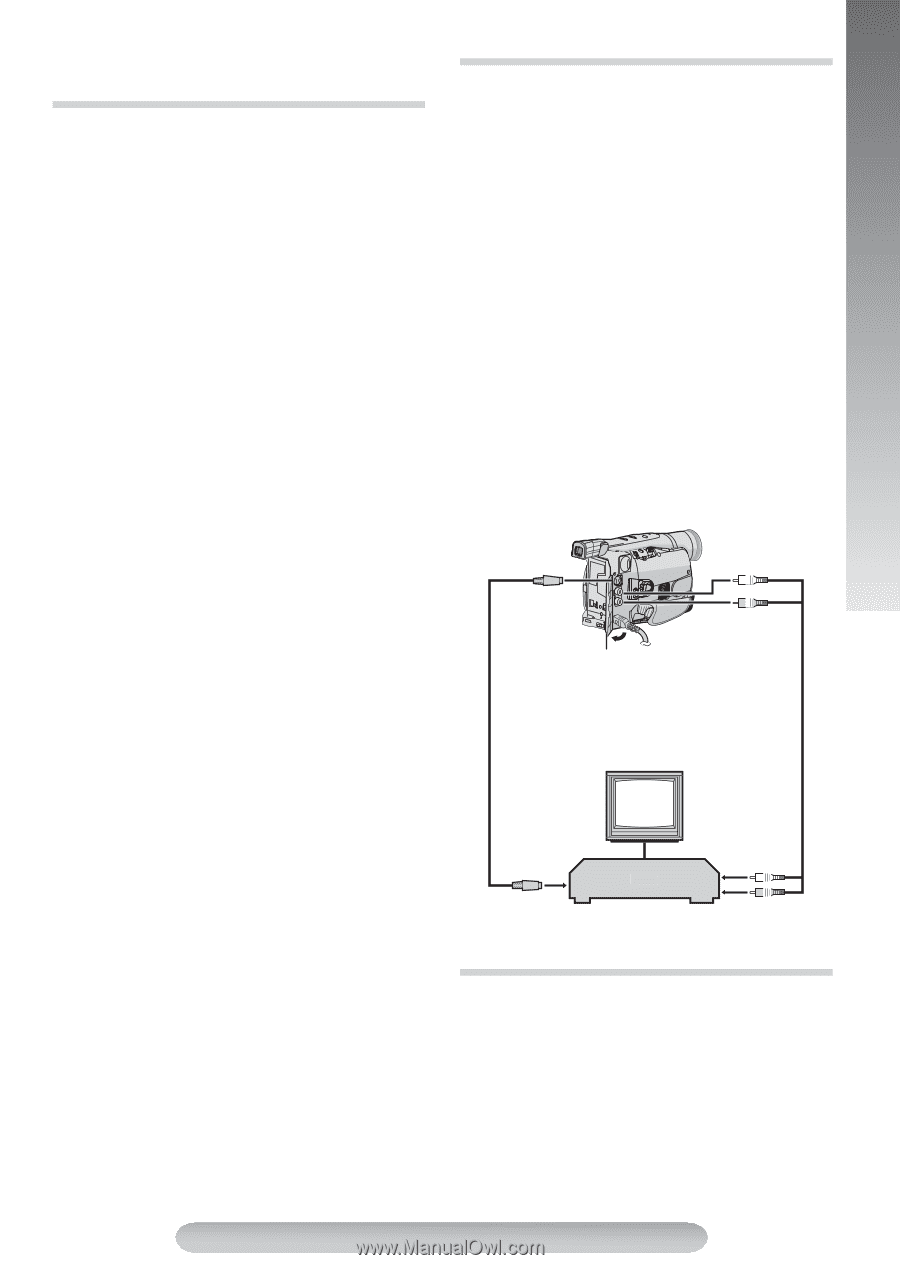
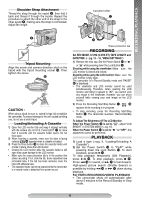
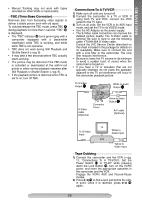
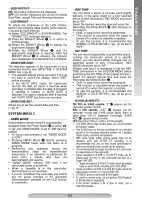
BASIC FEATURES • Manual Tracking may not work with tapes recorded on other VCRs or camcorders. TBC (Time Base Corrector) Removes jitter from fluctuating video signals to deliver a stable picture even with old tapes. To activate/release the TBC mode, press TBC 4 during playback for more than 1 second. "TBC" 5 is displayed. • The "TBC" indicator 5 turns green (grey with a camcorder equipped with a black/white viewfinder) while TBC is working, and white while TBC is not operative. • TBC does not work during Still Playback and Shuttle Search (੬pg. 9). • It may take a few seconds before TBC actually starts working. • The picture may be distorted if the TBC mode is activated or deactivated at the edit-in/-out points or when normal playback resumes after Still Playback or Shuttle Search (੬pg. 9). • If the playback picture is distorted when TBC is set to on, turn off TBC. Connections To A TV/VCR 1) Make sure all units are turned off. 2) Connect the camcorder to a TV or VCR. If using both TV and VCR, connect the VCR output to the TV input. 3) Turn on all units. Set the VCR to its AUX input mode, and set the TV to its VIDEO mode. • Use the AC Adapter as the power supply. • The S-Video cable connection can improve the dubbed picture quality. The S-Video cable is optional. Be sure to sure to use the following cable: YTU94146A S-Video cable. Consult the JVC Service Center described on the sheet included in the package for details on its availability. Make sure to connect the end with a core filter to the camcorder. The core filter reduces interference. • Be sure to lower the TV volume to its minimum to avoid a sudden burst of sound when the camcorder is turned on. • If you have a TV or speakers that are not specially shielded, do not place the speakers adjacent to the TV as interference will occur in the camcorder playback picture. To S-Video Output 6 White to Audio Output 7 S-Video cable (Optional) Connector Cover Yellow to Video Output 8 A/V cable (Optional) To S-Video Input TV White to Audio Input VCR Yellow to Video Input Tape Dubbing 1) Connect the camcorder and the VCR (੬pg. 11, "Connections To A TV/VCR"). Set the Power Switch $ to "PLAY" while pressing down the Lock Button #, turn on the VCR's power, and insert the appropriate cassettes in the camcorder and the VCR. Engage the VCR's AUX and Record-Pause modes. 2) Press 3/8 ( to find a spot just before the editin point. Once it is reached, press 3/8 ( again. 11
-
 1
1 -
2
-
3
-
4
-
5
-
 6
6 -
 7
7 -
 8
8 -
 9
9 -
 10
10 -
 11
11 -
 12
12 -
 13
13 -
 14
14 -
 15
15 -
 16
16 -
17
-
18
-
19
-
20
-
21
-
22
-
23
-
24
 |
 |