JVC GRSXM37U Instructions - Page 13
TOP MENU, EXPOSURE, LIGHT Video Light, P. AE Program AE with special effects, DIGIFECT Digital Effects - sepia
 |
UPC - 046838017216
View all JVC GRSXM37U manuals
Add to My Manuals
Save this manual to your list of manuals |
Page 13 highlights
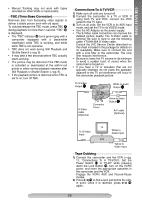
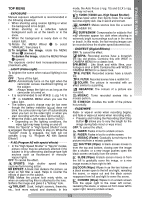
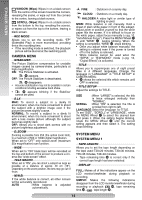
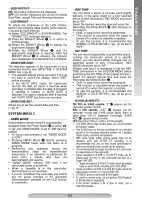
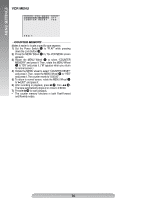
MENU SETTINGS TOP MENU EXPOSURE Manual exposure adjustment is recommended in the following situations: • When shooting using reverse lighting or when the background is too bright. • When shooting on a reflective natural background such as at the beach or in the snow. • When the background is overly dark or the subject light. 1) Rotate the MENU Wheel 1 to select "MANUAL", then press it. 2) To brighten the image, rotate the MENU Wheel 1 downward. To darken the image, rotate the MENU Wheel 1 upward. The exposure control level increases/decreases (maximum ±06). LIGHT (Video Light) To brighten the scene when natural lighting is too dim. OFF : Turns off the light. AUTO: Automatically turns on the light when the camcorder senses insufficient lighting on the subject. ON : Always keeps the light on as long as the camcorder is turned on. • It is recommended to set M.W.B. (੬pg. 14) to in CAMERA MENU when you use the video light. • The battery pack's charge may be low even though the battery indicator ( ) does not blink, the camcorder may turn off automatically when you turn on the video light, or when you start recording with the video light turned on. • When the Video Light mode is set to "AUTO": • Depending on the lighting conditions, the video light may keep turning on and off. While the "Sports" or "High Speed Shutter" mode is engaged, the light is likely to stay on. While the "Twilight" mode is engaged, the light will not activate. (੬pg. 13, "Program AE with Special Effects") P. AE (Program AE with special effects) • In the "High Speed Shutter" or "Sports" modes, picture colour may be adversely affected if the subject is lit by alternating discharge-type light sources such as flourescent or mercuryvapour lights. OFF: To cancel the effect. SPORTS: High shutter speed clearly captures fast-moving action. ND EFFECT: A black mist darkens the picture, as when an ND filter is used. Helps to counter the effects of glare on the subject. FOG: Makes the picture look misty white, as when an external fog filter is attached to the lens. Softens the image and gives it a "fantasy" look. TWILIGHT: Dusk, twilight scenery, fireworks, etc., look more natural and dramatic. In this mode, the Auto Focus (੬pg. 10) and S.LX (੬pg. 14) may not work. 1/2000 (1/2000 sec. High Speed Shutter): Captures faster action than Sports mode. The screen becomes slightly dark. Use in well-lit environment. SUNSET: Makes scenes look like a sunset with reddish tint. SURF&SNOW: Compensates for subjects that may otherwise appear too dark when shooting in extremely bright surroundings such as in the snow or beach. In this mode, the fast-moving images can be recorded since the shutter speed becomes fast. DIGIFECT (Digital Effects) OFF: To cancel the effect. SEPIA: Recorded scenes have a brownish tint like old photos. Combine this with WIDE in CAMERA MENU for a classic look. B/W:MONO : Like black and white films, your footage is shot in B/W. Combine this with WIDE in CAMERA MENU for a classic look. B. FILTER: Recorded scenes have a bluish tint. R. FILTER: Recorded scenes have a reddish tint. SOLARI: The picture is recorded with an effect similar to a painting. NEGAPOSI: The colours of a picture are reversed. MOSAIC: Turns recorded scenes into a mosaic pattern. STRETCH: Doubles the width of the picture horizontally. FADE/WIPE Fade- or wipe-in works when recording begins, and fade-or wipe-out works when recording ends. • Pressing and holding the Recording Start/Stop Button " allows you to vary the length for the image during fade in/out or wipe in/out. OFF: To cancel the effect. FADER: Fades in/out to a black screen. FADER: Fades in/out to a white screen. MOSAIC (Fader): Gradually turns/returns the picture into/from a mosaic pattern. SHUTTER (Wipe): A black screen moves in from the top and bottom, closing over the image like a shutter, or a new image pushes open the black screen vertically from the centre. SLIDE (Wipe): A black screen moves in from the left to gradually cover the image, or a new image moves in from right to left. DOOR (Wipe): Wipes in as the two halves of a black screen open to the left and right, revealing the scene, or wipes out and the black screen reappears from left and right to cover the scene. CORNER (Wipe): Wipes in on a black screen from the upper right to the lower left corner, revealing the scene, or wipes out from lower left to upper right, leaving a black screen. 13
-
 1
1 -
2
-
3
-
4
-
5
-
6
-
7
-
 8
8 -
 9
9 -
 10
10 -
 11
11 -
 12
12 -
 13
13 -
 14
14 -
 15
15 -
 16
16 -
 17
17 -
 18
18 -
19
-
20
-
21
-
22
-
23
-
24
 |
 |