JVC LT32A200 Instructions - Page 19
Channel List, Manual Register, SETUP], Cursor, ENTER], CHANNEL, the Number buttons]
 |
UPC - 046838037139
View all JVC LT32A200 manuals
Add to My Manuals
Save this manual to your list of manuals |
Page 19 highlights
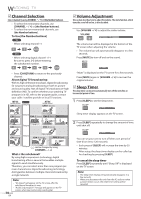
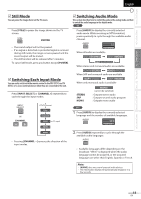
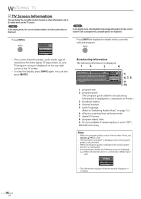
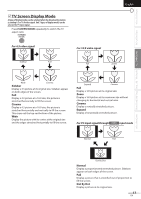
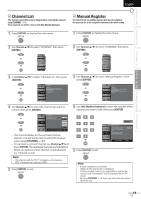
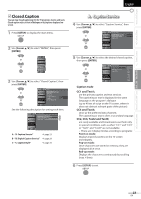
INTRODUCTION PREPARATION WATCHING TV OPTIONAL SETTING TROUBLESHOOTING INFORMATION English 5 Channel List The channels selected here can be skipped when selecting the channels using [CHANNEL -/ +]. Those channels can still be selected with [the Number buttons]. 1 Press [SETUP] to display the main menu. 5 Manual Register This function lets you add the channels that were not added by the autoscan due to the receptible condition at the initial setting. 1 Press [SETUP] to display the main menu. 2 Use [Cursor K/L] to select "CHANNEL", then press [ENTER]. 2 Use [Cursor K/L] to select "CHANNEL", then press [ENTER]. PICTURE SOUND CHANNEL DETAIL LANGUAGE PICTURE SOUND CHANNEL DETAIL LANGUAGE 3 Use [Cursor K/L] to select "Channel List", then press [ENTER]. PICTURE SOUND CHANNEL Channel Autoscan Channel List Manual Register Antenna DETAIL LANGUAGE 3 Use [Cursor K/L] to select "Manual Register", then press [ENTER]. PICTURE SOUND CHANNEL Channel Autoscan Channel List Manual Register Antenna DETAIL LANGUAGE 4 Use [Cursor K/L] to select the channel you want to remove, then press [ENTER]. 4 Use [the Number buttons] to enter the number of the channel you want to add, then press [ENTER]. PICTURE SOUND CHANNEL DETAIL LANGUAGE Channel List Highlight channe s for Ch Up/Down key selection DTV 6 27 DTV 8 9 DTV 48 58 DTV 67 BACK Ch Select E TER Watch/Skip Back • The channel display for the removed channel darkens. You will not be able to select the channel again using [CHANNEL / ]. • To reactivate a removed channel, use [Cursor K/L] and press [ENTER]. The registered channels are highlighted. • When you remove a main channel, its subchannels are removed as well. Note: • The channel with the "DTV" indicated on the display is ATSC. Otherwise the channel is NTSC. 5 Press [SETUP] to exit. 11 PICTURE SOUND CHANNEL DETAIL Manual Register For analog channels select a channel to register using number keys For digital channe s you must perform Autoscan function Reg ster LANGUAGE Ch Change BACK Back 5 Press [SETUP] to exit. Note: • If setup completes successfully, "Added to the channel list" is displayed. • If external input is used, it is not possible to register the channel and "Unavailable" will be displayed on the TV screen. • By using [CHANNEL - / + ], you can select the memorized channels only. 19 EN
-
 1
1 -
2
-
3
-
4
-
5
-
6
-
7
-
8
-
9
-
10
-
11
-
12
-
13
-
 14
14 -
 15
15 -
 16
16 -
 17
17 -
 18
18 -
 19
19 -
 20
20 -
 21
21 -
 22
22 -
 23
23 -
 24
24 -
25
-
26
-
27
-
28
-
29
-
30
-
31
-
32
-
33
-
34
-
35
-
36
-
37
-
38
-
39
-
40
 |
 |
