JVC LT32A200 Instructions - Page 7
Remote Control Function, Installing the Batteries, PREPARATION, WATCHING TV, OPTIONAL SETTING - troubleshooting
 |
UPC - 046838037139
View all JVC LT32A200 manuals
Add to My Manuals
Save this manual to your list of manuals |
Page 7 highlights
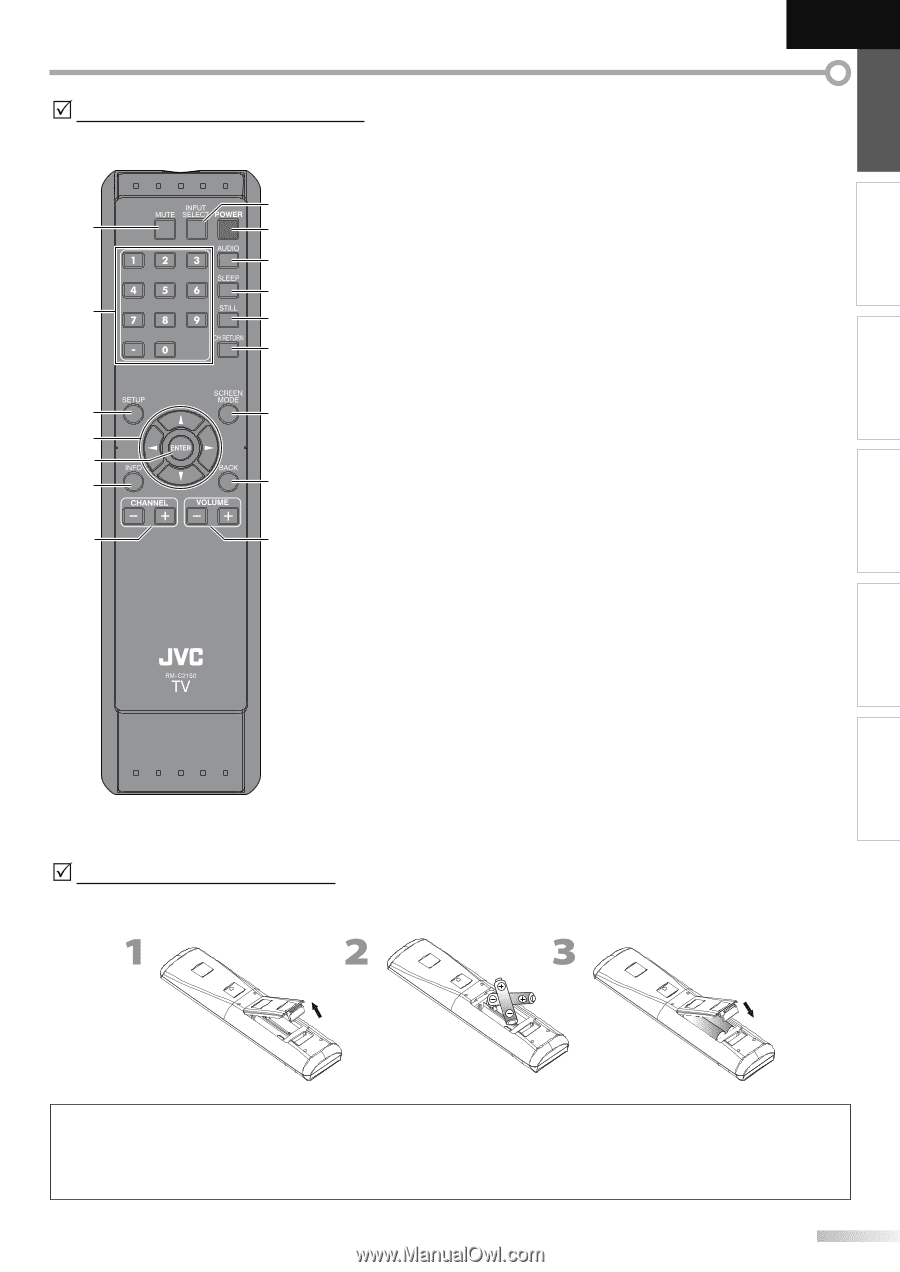
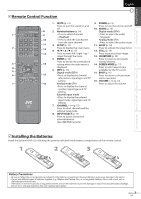
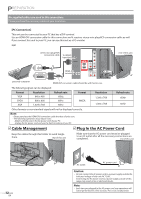
INTRODUCTION PREPARATION WATCHING TV OPTIONAL SETTING TROUBLESHOOTING INFORMATION English 5 Remote Control Function 1. MUTE (p. 14) 9. POWER (p. 13) Press to turn the sound on and Press to turn the unit on and off. off. 10. AUDIO (p. 15) 8 2. Number buttons (p. 14) Digital mode (DTV) 1 9 • Press to select channels. • Press to select the audio - (hyphen) language. 10 • Press to shift the subchannel Analog mode (TV) from the main channel. 11 3. SETUP (p. 13) • Press to select the audio mode. 11. SLEEP (p. 14) 2 12 Press to display the main menu. Press to activate the sleep timer. 4. s / B / K / L (p. 13) 12. STILL (p. 15) 13 Press to move left / right / up / Press to pause screen image. down through the items. 13. CH RETURN (p. 14) 5. ENTER (p. 13) Press to return to previously Press to decide the command of viewed channel. 3 14 setting when the main menu is 14. SCREEN MODE (p. 17) 4 displayed. Press to select aspect ratio 5 6. INFO (p. 16) Digital mode (DTV) available for the TV screen. 15. BACK (p. 16) 6 15 • Press to display the channel Press to return to the previous information, signal type and TV menu operation. setting. 16. VOLUME - / + (p. 14) 7 16 Analog mode (TV) Press to adjust the volume. • Press to display the channel number, signal type and TV setting. External input mode • Press to display the external input mode, signal type and TV setting. 7. CHANNEL - / + (p. 15) Press to select channels and the external input mode. 8. INPUT SELECT (p. 15) Press to access connected external devices like a BD/DVD recorder. 5 Installing the Batteries Install the batteries (AA x 2) matching the polarity indicated inside battery compartment of the remote control. Battery Precautions: • Be sure to follow the correct polarity as indicated in the battery compartment. Reversed batteries may cause damage to the device. • Do not mix different types of batteries together (e.g., Alkaline and Carbon-Zinc, or rechargeable batteries like ni-cad, ni-mh, etc) or old batteries with fresh ones. • If the device is not to be used for a long period of time, remove the batteries to prevent damage or injury from possible battery leakage. • Do not try to recharge batteries; they can overheat and rupture. 7 EN
-
 1
1 -
 2
2 -
 3
3 -
 4
4 -
 5
5 -
 6
6 -
 7
7 -
 8
8 -
 9
9 -
 10
10 -
 11
11 -
 12
12 -
13
-
14
-
15
-
16
-
17
-
18
-
19
-
20
-
21
-
22
-
23
-
24
-
25
-
26
-
27
-
28
-
29
-
30
-
31
-
32
-
33
-
34
-
35
-
36
-
37
-
38
-
39
-
40
 |
 |