JVC VN-C655U Instructions - Page 13
Preparation Procedure - vn setup tool
 |
UPC - 046838016547
View all JVC VN-C655U manuals
Add to My Manuals
Save this manual to your list of manuals |
Page 13 highlights
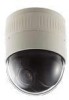
Preparation Procedure Set the camera in the following procedure. Step 1 Connection and Installation Firstly, make a hole on the ceiling and connect the power cable, LAN cable, alarm and others to the terminal of the ceiling-mounting bracket of this unit. Then, install the camera to a Ceiling Mount Fix a wire securely for preventing the camera from falling off. ☞ Page 14 Step 2 Setting the Network Install the software [V.Networks Controller], and set the network for the PC and VN-C655. Also perform the setting with [V.Networks Setup Tool] and registration of the connected camera with [V.Networks Controller]. ☞ Page 23 ❈ In a system where more than one VN-C655 are used, turn on the power for a VN- C655 first and then setting the camera (☞Page 28, Setting the IP Adress for VN- C655 with V.Networks Setup tool). Only then turn on the power for a second one and go on to same setting. Repeat the procedure for the other cameras. (☞ Page 15) Step 3 Setting with V.Networks Controller Use the installed V.Networks Controller to perform the settings for Auto Pan, Auto Patrol, Auto Trace, Picture Quality, Preset Position, Alarm and others. ☞ Page 31 Step 4 Operations with V.Networks Controller With V.Networks Controller, Preset Position can be selected as well as starting and stopping Auto Pan, Auto Trace and Auto Patrol. ☞ Page 34 13
-
 1
1 -
2
-
3
-
4
-
5
-
6
-
7
-
 8
8 -
 9
9 -
 10
10 -
 11
11 -
 12
12 -
 13
13 -
 14
14 -
 15
15 -
 16
16 -
 17
17 -
 18
18 -
19
-
20
-
21
-
22
-
23
-
24
-
25
-
26
-
27
-
28
-
29
-
30
-
31
-
32
-
33
-
34
-
35
-
36
-
37
-
38
-
39
-
40
 |
 |
