Kenmore 4689 Installation Instructions - Page 9
if therange
 |
View all Kenmore 4689 manuals
Add to My Manuals
Save this manual to your list of manuals |
Page 9 highlights
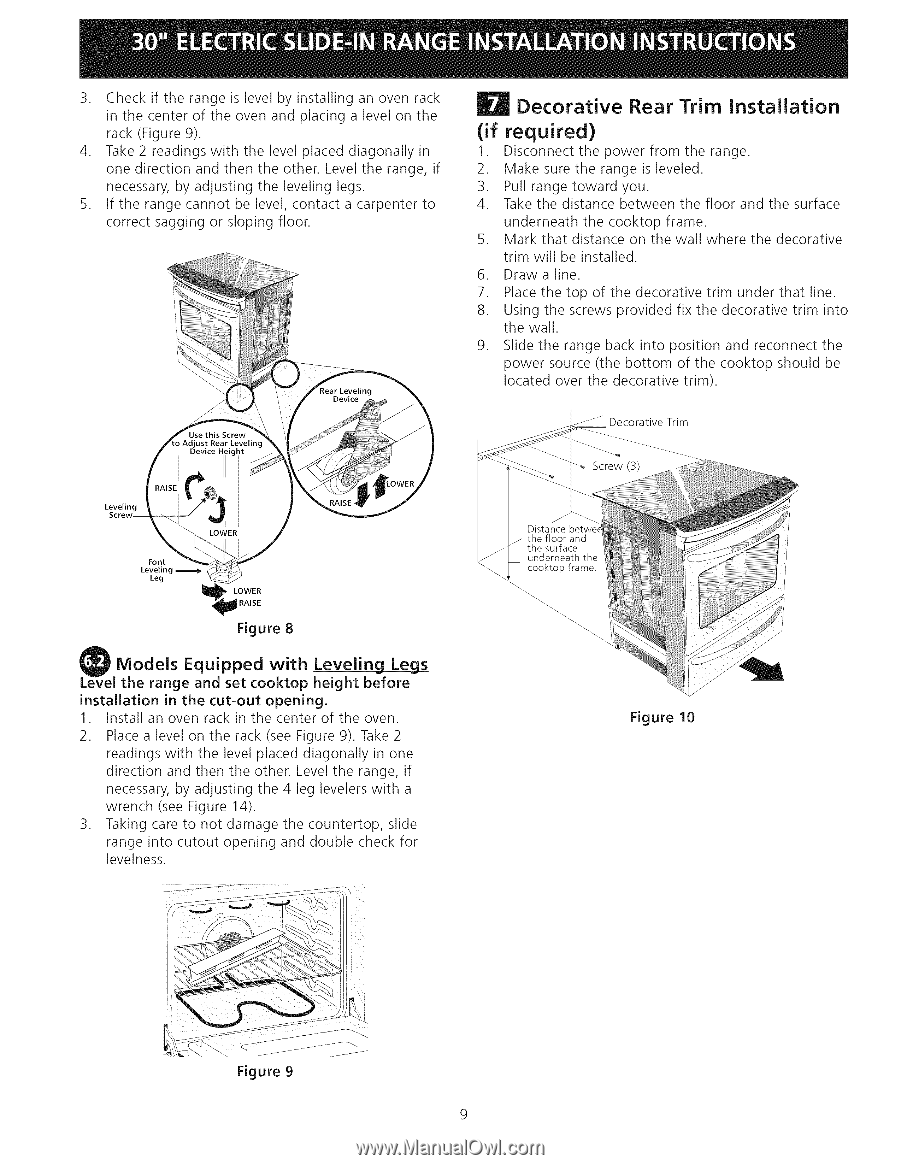
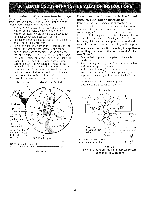
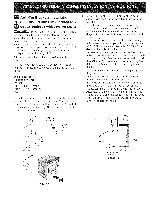
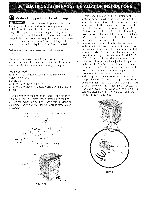
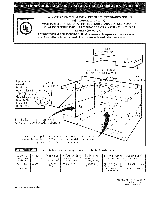
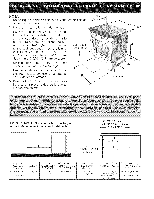
3. Checkif therangeis levebl y installinganovenrack in thecenterof theovenandplacinga levelonthe rack(Figure9). 4. Take2 readingws iththe levepl laceddiagonalliyn onedirectionandthentheother.Levetlhe range,if necessarbyy, adjustingthelevelinglegs. 5. If the rangecannotbelevel,contacta carpentetro correcst aggingor slopingfloor. | Decorative Rear Trim Installation (if required) 1. Disconnect the power from the range. 2. Make sure the range is leveled. 3. Pull range toward you. 4. Take the distance between the floor and the surface underneath the cooktop frame. , Mark that distance on the wall where the decorative trim will be installed. , Draw a line. 7. Place the top of the decorative trim under that line. 8. Using the screws provided fix the decorative trim into the wall. , Slide the range back into position and reconnect the power source (the bottom of the cooktop should be located over the decorative trim). -- ..... " Decorative Trim Leveling Font Leveling Leg _ LOWER _ RAISE Figure 8 Models Equipped with Leveling Leg_s the range and set cooktop height before installation in the cut-out opening. 1. Install an oven rack in the center of the oven. 2. Place a level on the rack (see Figure 9). Take 2 readings with the level placed diagonally in one direction and then the other. Level the range, if necessary, by adjusting the 4 leg levelers with a wrench (see Figure 14). 3. Taking care to not damage the countertop, slide range into cutout opening and double check for levelness. Screw (3) Distance betwei the floor and the surface underneath the cooktop frame, Figure 10 Figure 9 9
-
 1
1 -
2
-
3
-
 4
4 -
 5
5 -
 6
6 -
 7
7 -
 8
8 -
 9
9 -
 10
10 -
 11
11 -
 12
12 -
 13
13 -
 14
14 -
15
-
16
-
17
-
18
-
19
-
20
-
21
-
22
-
23
-
24
 |
 |