Kenmore 5736 Use and Care Guide - Page 13
The Dispenser Light, DISPENSER
 |
View all Kenmore 5736 manuals
Add to My Manuals
Save this manual to your list of manuals |
Page 13 highlights
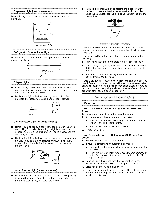
2. Press button for the desired type of ice. Cut Hazard Use a sturdy glass when dispensing ice. Failure to do so can result in cuts. 3. Press a sturdy glass against the ice dispenser lever. Hold the glass close to the dispenser opening so ice does not fall outside of the glass. IMPORTANT: You do not need to apply a lot of pressure to the lever in order to activate the ice dispenser. Pressing hard will not make the ice dispense faster or in greater quantities. 4= Remove the glass to stop dispensing. NOTE: The first few batches of ice may have an off-flavor from new plumbing and parts. Throw the ice away. Also, take large amounts of ice from the ice bin, not through the dispenser. The Dispenser Light The dispenser area has a light. It can be turned on manually by pressing the ON button (touchpad or rocker switch). On some models: Whenever you use the dispenser, the lever will automatically turn the light on. LIGHT OFF ON NOTE: See "Changing the Light Bulbs" for information on changing the dispenser light bulb. The Dispenser Lock (on some models} The dispenser can be turned off for easy cleaning or to avoid unintentional dispensing by small children and pets. NOTE: The lock feature does not shut off power to the refrigerator, to the ice maker, or to the dispenser light. It simply deactivates the dispenser levers. To turn off the dispenser, press the LOCK button. The indicator will appear above the LOCK button and the ice and water dispensers will not work. To unlock the dispenser, press the UNLOCK button until the indicator appears. Then continue to dispense ice or water as usual. DISPENSER LOCK UNLOCK The water filter status light will help you know when to change your water filter. When the status light changes from green to yellow, this tells you that it is almost time to change the water filter. It is recommended that you replace the filter when the status light changes to red OR when water flow to your water dispenser or ice maker decreases noticeably. The filter should be replaced at least every 6 months. To change the filter, see "Changing the Water Filter" later in this section. INDICATOR: STATUS: GOOD (green) ORDER (yellow) REPLACE (red) OR when water flow decreases New filter installed Order filter Replace water filter After changing the water filter, reset the status light by pressing and holding the RESET button for 2 seconds. The status light will change from Replace (red) to Good (green) when the system is reset. WATER FILTER eo0g • REP_CEO Do not use with water that is microbiologically unsafe or of unknown quality without adequate disinfection before or after the system. Systems certified for cyst reduction may be used on disinfected waters that may contain filterable cysts. Changing the Water Filter The water filter is located in the base grille below the freezer compartment door. It is not necessary to remove the base grille to remove the filter. 1. Remove the filter by pressing the eject button and pulling straight out on the filter cap. NOTES: • Avoid twisting the cap when removing the filter because this could cause the cap to come off. If this occurs, replace the cap and pull the filter straight out. • There will be water in the filter. Some spilling may occur. A. Eject button B. Filter cap B 13
-
 1
1 -
2
-
3
-
4
-
5
-
6
-
7
-
 8
8 -
 9
9 -
 10
10 -
 11
11 -
 12
12 -
 13
13 -
 14
14 -
 15
15 -
 16
16 -
 17
17 -
 18
18 -
19
-
20
-
21
-
22
-
23
-
24
-
25
-
26
-
27
-
28
-
29
-
30
-
31
-
32
-
33
-
34
-
35
-
36
-
37
-
38
-
39
-
40
-
41
-
42
-
43
-
44
-
45
-
46
-
47
-
48
-
49
-
50
-
51
-
52
-
53
-
54
-
55
-
56
-
57
-
58
-
59
-
60
-
61
-
62
-
63
-
64
-
65
-
66
-
67
-
68
-
69
-
70
-
71
-
72
 |
 |
