Kenmore 5736 Use and Care Guide - Page 14
Using the Dispenser Without the Water Filter Cartridge, Flushing the Water System After Changing
 |
View all Kenmore 5736 manuals
Add to My Manuals
Save this manual to your list of manuals |
Page 14 highlights
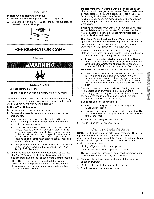
2= Remove the cap by turning it counterclockwise until it stops. IMPORTANT: Do not discard the cap. It is part of your refrigerator. Keep the cap to use with the replacement filter. 3= Take the new cartridge out of its packaging and remove the protective cover from O-rings. A. Protective cover B. O-rings 4. Place the cap (removed in Step 2) on the new filter. Align the ridge on the cap with the arrow on the filter. Turn the cap clockwise until it snaps into place. Using the Dispenser Without the Water Filter Cartridge You can run the dispenser without a water filter cartridge. Your water will not be filtered. 1. Remove the filter by pressing the eject button and pulling on the cap. See "Changing the Water Filter" earlier in this section. 2. Remove the cap by turning it counterclockwise until it stops. IMPORTANT: Do not discard the cap. It is part of your refrigerator. Keep the cap to use with the replacement filter. 3. With the cap in a horizontal position, insert the cap into the base grille until it stops. 4. Turn the cap counterclockwise until the cap slips into the attachment slot. Then, turn the cap clockwise until it is in a horizontal position. NOTE: The cap will not be even with the base grille. A. Eject button B. Arrow on filter C. Ridge on cap 5. Push the new filter into the opening in the base grille. As the filter is inserted, the eject button will depress. The eject button will pop back out when the filter is fully engaged. 6. Pull gently on the cap to check that the filter is securely in place. 7. Flush the water system. See "Flushing the Water System After Changing Filter." Flushing the Water System After Changing Filter After connecting the refrigerator to a water source, flush the water system. Use a sturdy container to depress and hold the water dispenser lever for 5 seconds, then release it for 5 seconds. Repeat until water begins to flow. Once water begins to flow, continue depressing and releasing the dispenser lever (5 seconds on, 5 seconds off) for an additional 2 minutes. This will flush air from the filter and water dispensing system. Additional flushing may be required in some households. NOTE: As air is cleared from the system, water may spurt out of the dispenser. Turning the Ice Maker On/Off NOTE: Do not force the wire shutoff arm up or down. The On/Off switch for the ice maker is a wire shutoff arm located on the side of the ice maker. 1. To turn the ice maker on, simply lower the wire shutoff arm. NOTE: Your ice maker has an automatic shutoff. As ice is made, the ice cubes will fill the ice storage bin and the ice cubes will raise the wire shutoff arm to the OFF (arm up) position. 2. To manually turn the ice maker off, lift the wire shutoff arm to the OFF (arm up) position and listen for the click to make sure the ice maker will not continue to operate. Increasing Ice Production Rate The ice maker should produce approximately 7 to 9 batches of ice in a 24-hour period. If ice is not being made fast enough, turn the Freezer Control toward a higher (colder) number in half number steps. (For example, if the control is at 3, move it to between 3 and 4.) Wait 24 hours between each increase. 14
-
 1
1 -
2
-
3
-
4
-
5
-
6
-
7
-
8
-
 9
9 -
 10
10 -
 11
11 -
 12
12 -
 13
13 -
 14
14 -
 15
15 -
 16
16 -
 17
17 -
 18
18 -
 19
19 -
20
-
21
-
22
-
23
-
24
-
25
-
26
-
27
-
28
-
29
-
30
-
31
-
32
-
33
-
34
-
35
-
36
-
37
-
38
-
39
-
40
-
41
-
42
-
43
-
44
-
45
-
46
-
47
-
48
-
49
-
50
-
51
-
52
-
53
-
54
-
55
-
56
-
57
-
58
-
59
-
60
-
61
-
62
-
63
-
64
-
65
-
66
-
67
-
68
-
69
-
70
-
71
-
72
 |
 |
