Kenmore 6703 Use and Care Guide - Page 16
NOTE: Door strike
 |
View all Kenmore 6703 manuals
Add to My Manuals
Save this manual to your list of manuals |
Page 16 highlights
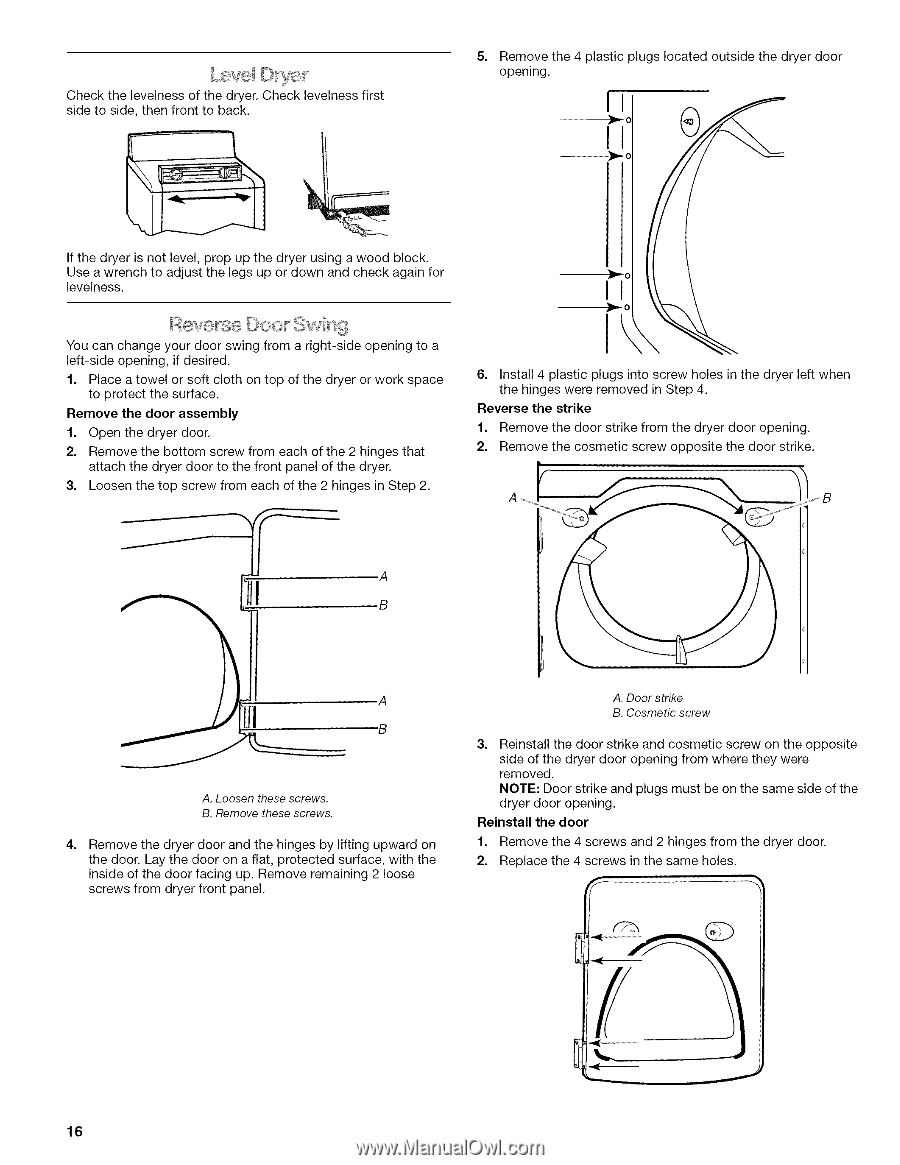
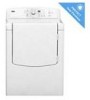
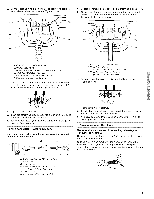
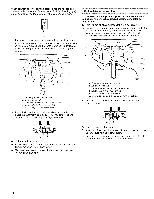
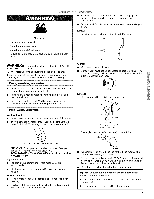
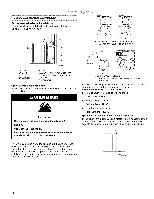
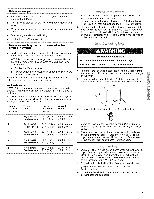
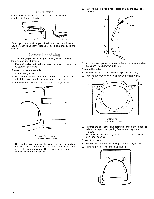
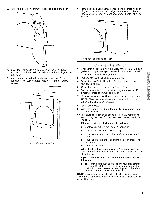
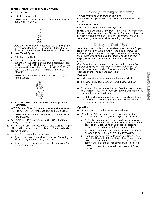
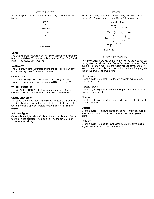
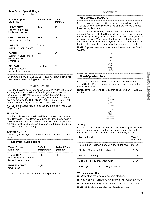
Check the levelness of the dryer. Check levelness first side to side, then front to back. 5= Remove the 4 plastic plugs located outside the dryer door opening. If the dryer is not level, prop up the dryer using a wood block. Use a wrench to adjust the legs up or down and check again for levelness. You can change your door swing from a right-side opening to a left-side opening, if desired. 1. Place a towel or soft cloth on top of the dryer or work space to protect the surface. Remove the door assembly 1. Open the dryer door. 2. Remove the bottom screw from each of the 2 hinges that attach the dryer door to the front panel of the dryer. 3. Loosen the top screw from each of the 2 hinges in Step 2. It I ---}P_ o 6. Install 4 plastic plugs into screw holes in the dryer left when the hinges were removed in Step 4. Reverse the strike 1. Remove the door strike from the dryer door opening. 2. Remove the cosmetic screw opposite the door strike. .A .B .A "B A. Loosen these screws. B. Remove these screws. 4= Remove the dryer door and the hinges by lifting upward on the door. Lay the door on a flat, protected surface, with the inside of the door facing up. Remove remaining 2 loose screws from dryer front panel. A. Door strike B. Cosmetic screw 3. Reinstall the door strike and cosmetic screw on the opposite side of the dryer door opening from where they were removed. NOTE: Door strike and plugs must be on the same side of the dryer door opening. Reinstall the door 1. Remove the 4 screws and 2 hinges from the dryer door. 2. Replace the 4 screws in the same holes. 16
-
 1
1 -
2
-
3
-
4
-
5
-
6
-
7
-
8
-
9
-
10
-
 11
11 -
 12
12 -
 13
13 -
 14
14 -
 15
15 -
 16
16 -
 17
17 -
 18
18 -
 19
19 -
 20
20 -
 21
21 -
22
-
23
-
24
-
25
-
26
-
27
-
28
-
29
-
30
-
31
-
32
-
33
-
34
-
35
-
36
-
37
-
38
-
39
-
40
-
41
-
42
-
43
-
44
-
45
-
46
-
47
-
48
-
49
-
50
-
51
-
52
-
53
-
54
-
55
-
56
 |
 |