Kenwood DRV-410 Instruction Manual - Page 8
How to Install
 |
View all Kenwood DRV-410 manuals
Add to My Manuals
Save this manual to your list of manuals |
Page 8 highlights
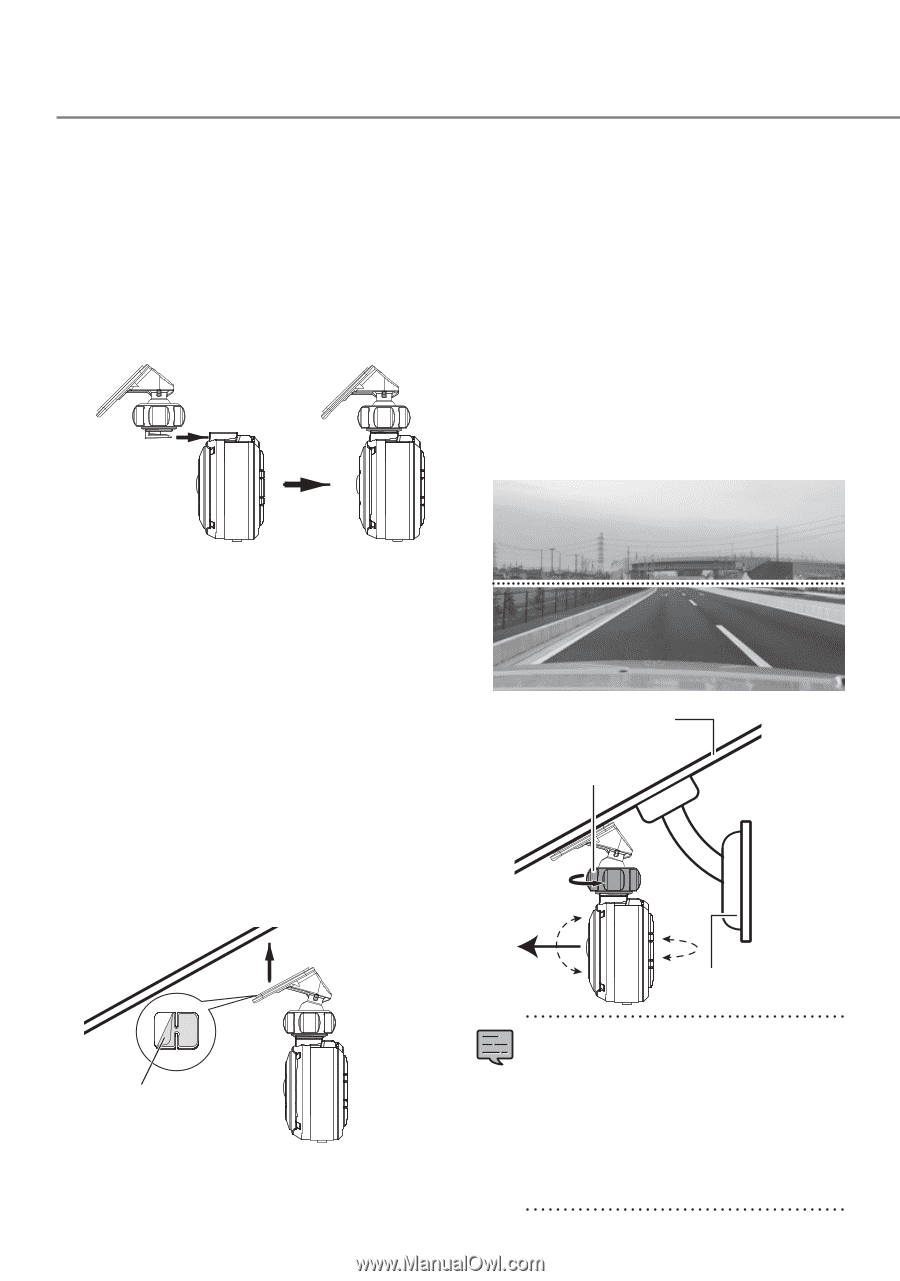
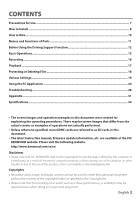
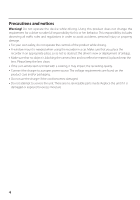
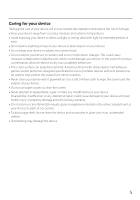
How to Install Installation Procedure Check that the vehicle is parked on a level surface. 1. Attach the device to the mount bracket. (accessory) Insert the mount bracket into the bracket attachment part of the device and attach it to the device. Mount bracket Camera lens side 4. Perform the cord wiring work. Refer to "How to Wire" and then perform the wiring work. (ÁP.10) 5. Adjust the installation angle of the device and then fix the device in place. Turn the angle adjustment knob clockwise before adjustment. When adjusting the installation angle, check that the camera field of view is parallel to a level ground surface and that the ratio of the sky and ground are the same. After adjusting the installation angle, turn the angle adjustment knob of the adjustment bracket counterclockwise to fix the device in place. Adjustment example 2. Determine where to mount the device. Determine the mounting position in reference to "Recommended installation position." 3. Clean the mounting surface and then affix the device to the windshield. Use a commercially available cleaning cloth or the like to wipe off all dirt and grease on the mounting surface. Peel off the release paper of the double-sided tape on the mount bracket and push the bracket against the windscreen to affix it in place. Leave the device for 24 hours before use to enable the mounting strength of the mount bracket to improve. Windshield Angle adjustment knob Release paper 8 Rear-view mirror • If you will use the driving support function, you need to make the adjustments described in "Adjusting the Settings to Match the Vehicle." (ÁP.12) • Make the adjustments described in "Adjusting the Settings to Match the Vehicle" in a location with a level surface and a sight distance of about 200 m. (ÁP.12)
-
 1
1 -
2
-
 3
3 -
 4
4 -
 5
5 -
 6
6 -
 7
7 -
 8
8 -
 9
9 -
 10
10 -
 11
11 -
 12
12 -
 13
13 -
14
-
15
-
16
-
17
-
18
-
19
-
20
-
21
-
22
-
23
-
24
-
25
-
26
-
27
-
28
-
29
-
30
-
31
-
32
-
33
-
34
-
35
-
36
-
37
-
38
-
39
-
40
-
41
-
42
-
43
-
44
-
45
-
46
-
47
-
48
-
49
-
50
-
51
-
52
-
53
-
54
-
55
-
56
-
57
-
58
-
59
-
60
-
61
-
62
-
63
-
64
-
65
-
66
-
67
-
68
-
69
-
70
-
71
-
72
-
73
-
74
-
75
-
76
-
77
-
78
-
79
-
80
-
81
-
82
-
83
-
84
-
85
-
86
-
87
-
88
-
89
-
90
-
91
-
92
-
93
-
94
-
95
-
96
-
97
-
98
-
99
-
100
 |
 |