Kenwood DRV-A100 Operation Manual - Page 23
Photo Menu
 |
View all Kenwood DRV-A100 manuals
Add to My Manuals
Save this manual to your list of manuals |
Page 23 highlights
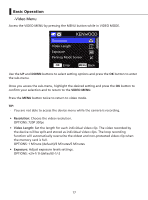
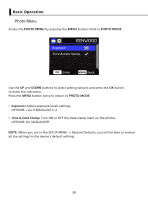
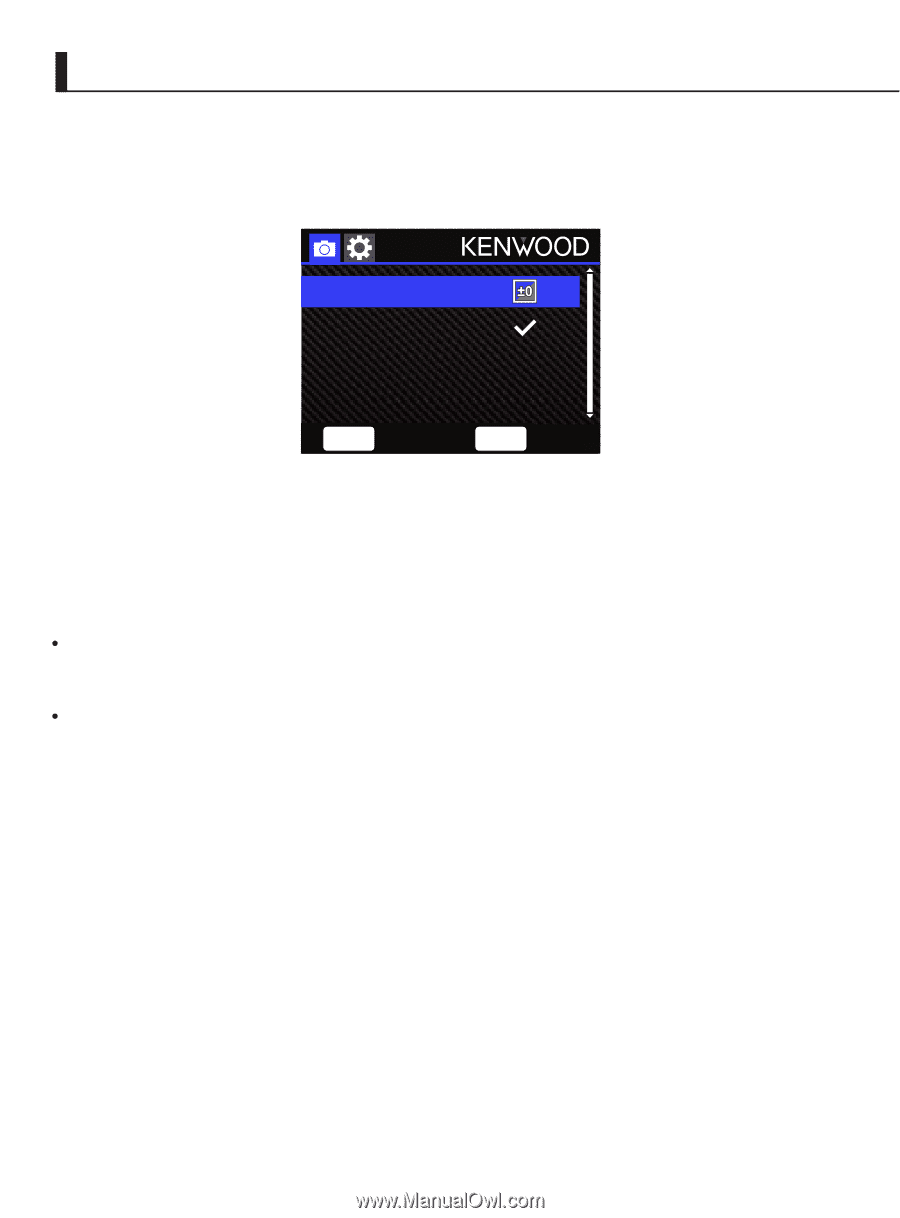
Basic Operation -Photo Menu Access the PHOTO MENU by pressing the MENU button while in PHOTO MODE. Exposure Time & Date Stamp OK Enter MENU Back Use the UP and DOWN buttons to select setting options and press the OK button to enter the sub-menu. Press the MENU button twice to return to PHOTO MODE. Exposure: Adjust exposure levels settings. OPTIONS: +2/+1/ 0(default)/-1/-2 Time & Date Stamp: Turn ON or OFF the date stamp mark on the photos. OPTIONS: On (default)/Off NOTE: When you are in the SETUP MENU -> Restore Defaults, you will be able to restore all the settings to the device's default settings. 20
-
 1
1 -
2
-
3
-
4
-
5
-
6
-
7
-
8
-
9
-
10
-
11
-
12
-
13
-
14
-
15
-
16
-
17
-
 18
18 -
 19
19 -
 20
20 -
 21
21 -
 22
22 -
 23
23 -
 24
24 -
 25
25 -
 26
26 -
 27
27 -
 28
28 -
29
-
30
-
31
-
32
-
33
-
34
-
35
-
36
-
37
-
38
-
39
-
40
-
41
-
42
-
43
-
44
-
45
-
46
-
47
-
48
 |
 |
20
Access the
PHOTO MENU
by pressing the
MENU
button while in
PHOTO MODE
.
Use the
UP
and
DOWN
buttons to select setting options and press the
OK
button
to enter the sub-menu.
Press the
MENU
button twice to return to
PHOTO MODE
.
Exposure:
Adjust exposure levels settings.
OPTIONS: +2/+1/ 0(default)/-1/-2
Time & Date Stamp:
Turn ON or OFF the date stamp mark on the photos.
OPTIONS: On (default)/Off
NOTE:
When you are in the SETUP MENU -> Restore Defaults, you will be able to restore
all the settings to the device’s default settings.
-Photo Menu
Basic Operation
Exposure
Time & Date Stamp
OK
Enter
MENU
Back