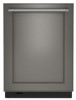
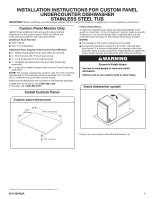
KitchenAid KDTE304LPA Installation Instructions - Page 2
Attach handle, Panel template, Predrill custom panel holes, Attach plastic studs
 |
View all KitchenAid KDTE304LPA manuals
Add to My Manuals
Save this manual to your list of manuals |
Page 2 highlights
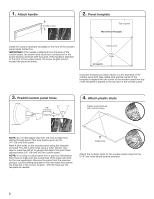
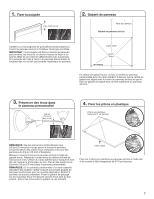
1. Attach handle 6" (152.4 mm) 2. Panel template Top of panel Wood Panel Template Install the custom hardware handle(s) on the front of the wooden panel inside dotted line. IMPORTANT: If the handle is attached from the back of the custom panel, the screw holes should be countersunk for the screw heads to be flush with the panel. If the handle is attached to the front of the custom panel, the screw lengths cannot exceed the panel thickness. Center Line Pilot holes W11460372 Using the template provided, attach it to the backside of the custom panel with tape. Make sure that the center of the template is aligned with the center of the wooden panel and top of the template is aligned to the top face of the wooden panel. 3. Predrill custom panel holes 5/8" (16 mm) 3/32" 4. Attach plastic studs Plastic studs attached with 4 short screws NOTE: Do not drill deeper then 5/8" (16 mm) to keep from drilling through panel. Pilot hole depths given are for 3/4" (19 mm) thick panel. Mark 4 pilot holes on the wooden panel using the template provided. Pre-drill 4 pilot holes using a 3/32" drill bit. Use tape to mark the drill bit to gauge hole depth. Drill pilot holes approximately 5/8" (16 mm) into the custom panel. NOTE: If re-using a custom panel from a previous dishwasher, first check to make sure the overall size of the panel will work for the new application. Remove the panel from the previous product. Lay the drilling template on the new holes and ensure the holes are in the correct location. Drill the holes per the template as needed. Visible side Attach the 4 plastic studs to the wooden panel using the four 5/16" hex-head (short) screws provided. 2
-
 1
1 -
 2
2 -
 3
3 -
 4
4 -
 5
5 -
 6
6 -
 7
7 -
 8
8 -
9
-
10
-
11
-
12
-
13
-
14
-
15
 |
 |
