KitchenAid KDTE304LPA Installation Instructions - Page 5
Three spring adjustment, Adjusting the spring tension
 |
View all KitchenAid KDTE304LPA manuals
Add to My Manuals
Save this manual to your list of manuals |
Page 5 highlights
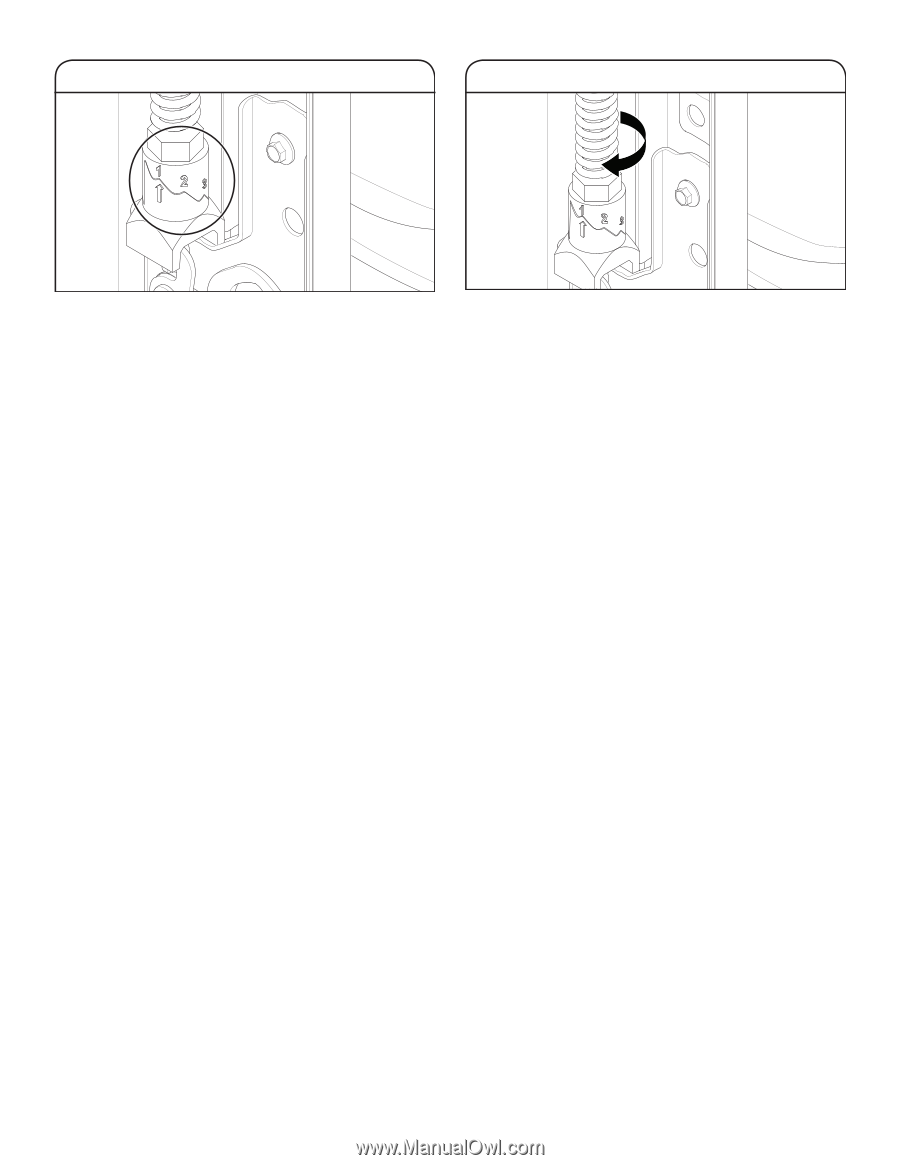
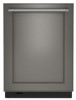
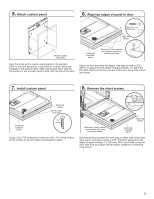
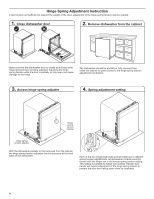
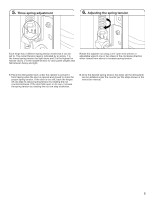
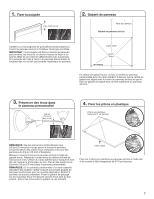
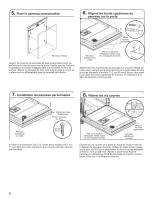
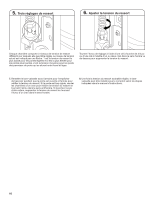
5. Three spring adjustment 6. Adjusting the spring tension Each hinge has 3 different spring tension levels that it can be set to. The current tension level is indicated by an arrow. 1 is the lowest spring tension for light doors and 3 is the highest for heavier doors. 2 is the middle tension for door panel weights that fall between heavy and light. Rotate the adjuster nut using a 3/4" open end wrench or adjustable wrench one or two steps in the clockwise direction when viewed from above to increase spring tension. 7. Place the dishwasher back under the cabinet to prevent it from tipping while the door is opened and closed to check for proper spring tension. If the door is too stiff, back the hinges off one step to reduce spring tension by rotating the nut counterclockwise. If the door falls open on its own, increase the spring tension by rotating the nut one step clockwise. 8. Once the desired spring tension has been set the dishwasher can be installed under the counter per the steps shown in the instruction manual. 5
-
 1
1 -
 2
2 -
 3
3 -
 4
4 -
 5
5 -
 6
6 -
 7
7 -
 8
8 -
 9
9 -
 10
10 -
 11
11 -
12
-
13
-
14
-
15
 |
 |