Kodak Z915 User Manual - Page 46
Printing pictures, Direct printing with a KODAK All-in-One Printer - usb cable
 |
UPC - 041771699765
View all Kodak Z915 manuals
Add to My Manuals
Save this manual to your list of manuals |
Page 46 highlights
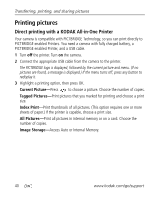
Transferring, printing, and sharing pictures Printing pictures Direct printing with a KODAK All-in-One Printer Your camera is compatible with PICTBRIDGE Technology, so you can print directly to PICTBRIDGE enabled Printers. You need a camera with fully charged battery, a PICTBRIDGE enabled Printer, and a USB cable. 1 Turn off the printer. Turn on the camera. 2 Connect the appropriate USB cable from the camera to the printer. The PICTBRIDGE logo is displayed, followed by the current picture and menu. (If no pictures are found, a message is displayed.) If the menu turns off, press any button to redisplay it. 3 Highlight a printing option, then press OK. Current Picture-Press to choose a picture. Choose the number of copies. Tagged Pictures-Print pictures that you marked for printing and choose a print size. Index Print-Print thumbnails of all pictures. (This option requires one or more sheets of paper.) If the printer is capable, choose a print size. All Pictures-Print all pictures in internal memory or on a card. Choose the number of copies. Image Storage-Access Auto or Internal Memory. 40 www.kodak.com/go/support
-
 1
1 -
2
-
3
-
4
-
5
-
6
-
7
-
8
-
9
-
10
-
11
-
12
-
13
-
14
-
15
-
16
-
17
-
18
-
19
-
20
-
21
-
22
-
23
-
24
-
25
-
26
-
27
-
28
-
29
-
30
-
31
-
32
-
33
-
34
-
35
-
36
-
37
-
38
-
39
-
40
-
 41
41 -
 42
42 -
 43
43 -
 44
44 -
 45
45 -
 46
46 -
 47
47 -
 48
48 -
 49
49 -
 50
50 -
 51
51 -
52
-
53
-
54
-
55
-
56
-
57
-
58
-
59
-
60
-
61
-
62
-
63
-
64
-
65
-
66
-
67
-
68
-
69
-
70
-
71
-
72
-
73
-
74
 |
 |