Konica Minolta 3D Cube Printer Cube3 User Guide - Page 27
MENU OVERVIEW, Touchscreen Display, Print / Setup, Navigation, Materials, Print Plate Calibration
 |
View all Konica Minolta 3D Cube Printer manuals
Add to My Manuals
Save this manual to your list of manuals |
Page 27 highlights
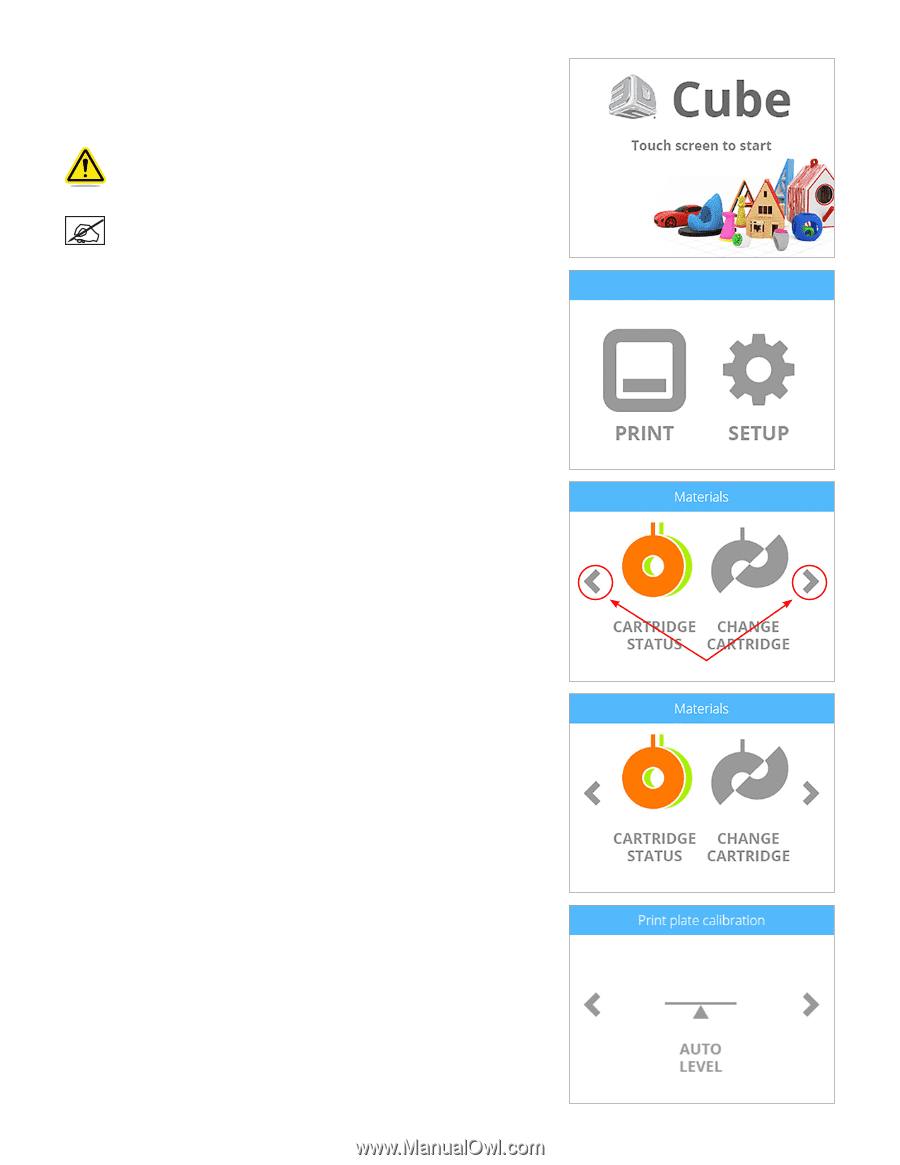
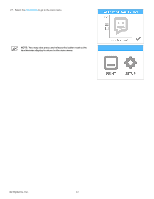
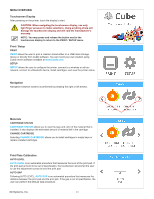
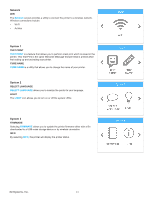
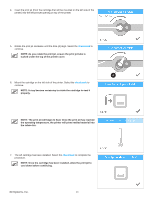
MENU OVERVIEW Touchscreen Display After powering on the printer, touch the display to start. CAUTION: When navigating the touchscreen display, use only light finger pressure to make selections. Using anything sharp will damage the touchscreen display and will void the manufacturer's warranty. NOTE: You may press and release the button next to the touchscreen display to return to the PRINT / SETUP menu. Print / Setup PRINT PRINT allows the user to print a creation stored either on a USB mass storage device or directly from Cubify software. You can invent your own creation using Cubify Invent software available at www.Cubify.com. SETUP SETUP allows the user to configure the printer, connect to a wireless or ad hoc network, connect to a Bluetooth device, install cartridges, and view the printer status. Navigation Navigation between screens is performed by pressing the right or left arrows. Materials CARTRIDGE STATUS CARTRIDGE STATUS allows you to view the type and color of the material that is installed. It also displays the estimated amount of material left in the cartridge. CHANGE CARTRIDGE Selecting CHANGE CARTRIDGE allows you to install cartridges in empty bays or replace installed cartridges. Print Plate Calibration AUTO LEVEL AUTO LEVEL is an automated procedure that measures the level of the print pad. If the print pad is found to be out of specification, the touchscreen will prompt the user to use the adjustment screws to level the print pad. AUTO GAP Following AUTO LEVEL, AUTO GAP is an automated procedure that measures the distance between the print pad and the print jets. If the gap is out of specification, the user can perform the Manual Gap procedure. 3D Systems, Inc. 23
-
 1
1 -
2
-
3
-
4
-
5
-
6
-
7
-
8
-
9
-
10
-
11
-
12
-
13
-
14
-
15
-
16
-
17
-
18
-
19
-
20
-
21
-
 22
22 -
 23
23 -
 24
24 -
 25
25 -
 26
26 -
 27
27 -
 28
28 -
 29
29 -
 30
30 -
 31
31 -
 32
32 -
33
-
34
-
35
-
36
-
37
-
38
-
39
-
40
-
41
-
42
-
43
-
44
-
45
-
46
-
47
-
48
-
49
-
50
-
51
-
52
-
53
-
54
-
55
-
56
-
57
-
58
-
59
-
60
-
61
-
62
-
63
-
64
-
65
-
66
-
67
-
68
-
69
-
70
-
71
-
72
-
73
-
74
-
75
-
76
-
77
-
78
-
79
-
80
-
81
-
82
-
83
-
84
-
85
-
86
-
87
-
88
-
89
-
90
-
91
-
92
-
93
-
94
-
95
-
96
-
97
-
98
-
99
-
100
-
101
-
102
 |
 |