Konica Minolta 3D Cube Printer Cube3 User Guide - Page 95
RETRY, CANCEL, power button, Print Pad, Calibration
 |
View all Konica Minolta 3D Cube Printer manuals
Add to My Manuals
Save this manual to your list of manuals |
Page 95 highlights
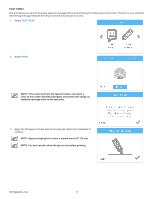
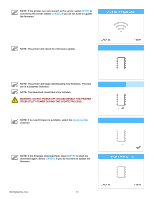
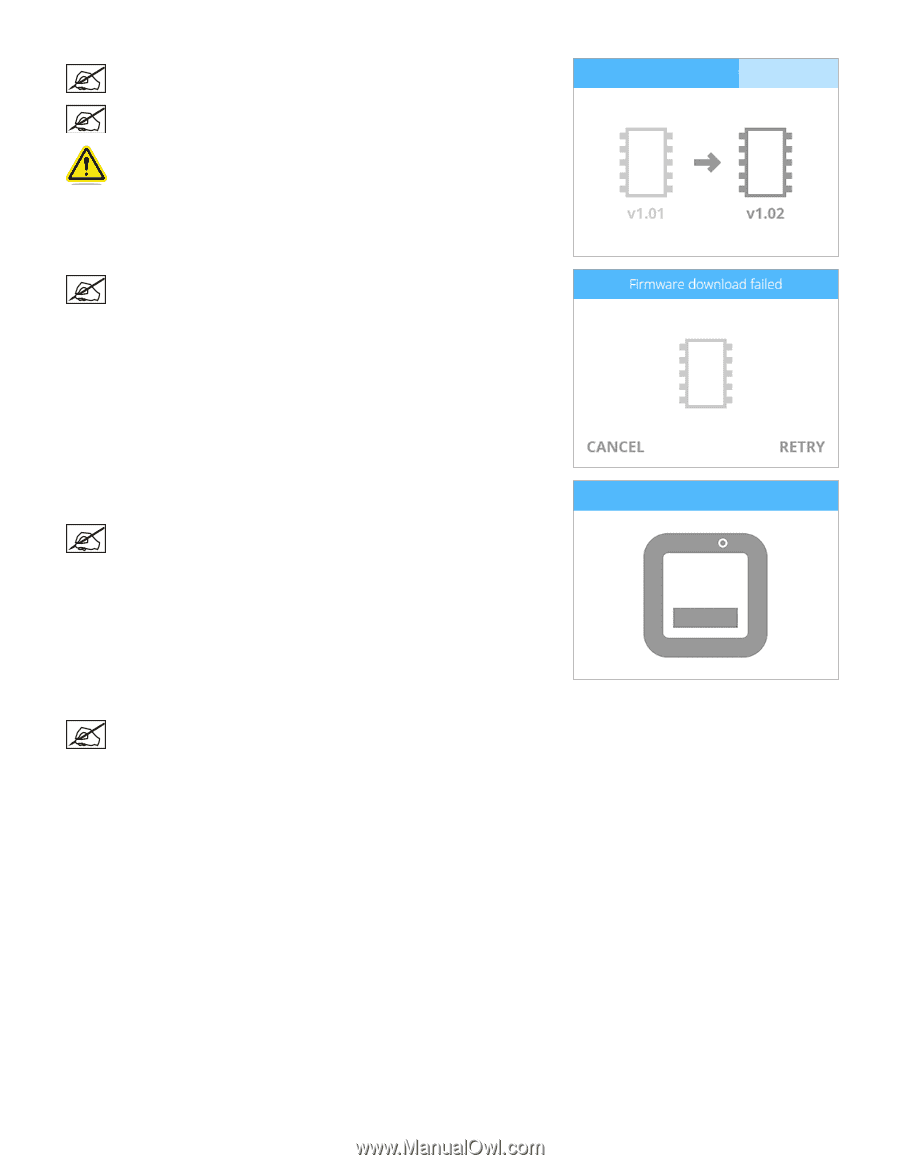
NOTE: The firmware will begin to install. The blue bar is a progress indicator. NOTE: The installation could take a few minutes. WARNING: DO NOT POWER OFF OR DISCONNECT THE PRINTER FROM UTILITY POWER DURING THE UPDATE PROCESS. NOTE: If the firmware update fails. Select RETRY to attempt to install the firmware again. Select CANCEL to stop the firmware update. 4. When prompted, press and release the power button and wait until the display turns on. NOTE: It may take a minute for the display to turn on. 5. Perform the Auto Level and Auto Gap procedures. NOTE: For more information, refer to the section titled Print Pad Calibration. 3D Systems, Inc. 91
-
 1
1 -
2
-
3
-
4
-
5
-
6
-
7
-
8
-
9
-
10
-
11
-
12
-
13
-
14
-
15
-
16
-
17
-
18
-
19
-
20
-
21
-
22
-
23
-
24
-
25
-
26
-
27
-
28
-
29
-
30
-
31
-
32
-
33
-
34
-
35
-
36
-
37
-
38
-
39
-
40
-
41
-
42
-
43
-
44
-
45
-
46
-
47
-
48
-
49
-
50
-
51
-
52
-
53
-
54
-
55
-
56
-
57
-
58
-
59
-
60
-
61
-
62
-
63
-
64
-
65
-
66
-
67
-
68
-
69
-
70
-
71
-
72
-
73
-
74
-
75
-
76
-
77
-
78
-
79
-
80
-
81
-
82
-
83
-
84
-
85
-
86
-
87
-
88
-
89
-
 90
90 -
 91
91 -
 92
92 -
 93
93 -
 94
94 -
 95
95 -
 96
96 -
 97
97 -
 98
98 -
 99
99 -
 100
100 -
101
-
102
 |
 |
91
3D Systems, Inc
.
NOTE: The firmware will begin to install. The blue bar is a progress
indicator°
NOTE: The installation could take a few minutes°
WARNING: DO NOT POWER OFF OR DISCONNECT THE PRINTER
FROM UTILITY POWER DURING THE UPDATE PROCESS°
NOTE: If the firmware update fails. Select
RETRY
to attempt to install
the firmware again. Select
CANCEL
to stop the firmware update.
4°
When prompted, press and release the
power button
and wait until the display
turns on°
NOTE: It may take a minute for the display to turn on°
5°
Perform the Auto Level and Auto Gap procedures°
NOTE: For more information, refer to the section titled
Print Pad
Calibration
°