Konica Minolta bizhub C3100P bizhub C3100P Print Functions User Guide - Page 85
Useful printing functions, 3.4.1 Changing the paper size or type
 |
View all Konica Minolta bizhub C3100P manuals
Add to My Manuals
Save this manual to your list of manuals |
Page 85 highlights
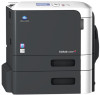
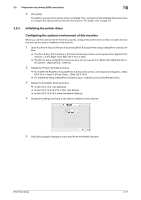
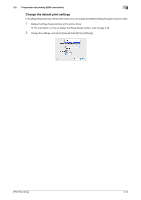
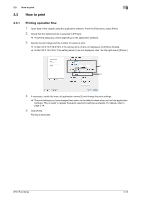
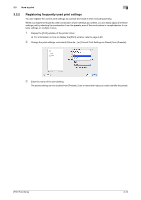
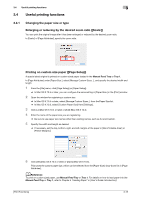
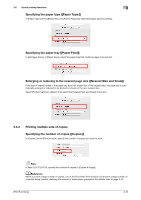
3.4 Useful printing functions 3 3.4 Useful printing functions 3.4.1 Changing the paper size or type Enlarging or reducing by the desired zoom ratio ([Scale:]) You can print the original image after it has been enlarged or reduced by the desired zoom ratio. In [Scale:] of [Page Attributes], specify the zoom ratio. Printing on custom size paper ([Page Setup]) A special sized original is printed on custom sized paper loaded in the Manual Feed Tray or Tray 1. In [Page Attributes] under [Paper Size:], select [Manage Custom Sizes...], and specify the desired width and length. 1 From the [File] menu, click [Page Setup] (or [Paper Setup]). % In Mac OS X 10.5 or later, you can configure the same setting in [Paper Size:] in the [Print] window. 2 Open the window for registering a custom size. % In Mac OS X 10.4 or later, select [Manage Custom Sizes...] from the Paper Size list. % In Mac OS X 10.3, select [Custom Paper Size] from [Settings:]. 3 Click [+] (Mac OS X 10.4 or later) or [Add] (Mac OS X 10.3). 4 Enter the name of the paper size you are registering. % Be sure to use paper size names other than existing names, such as A4 and Custom. 5 Specify the width and length as desired. % If necessary, set the top, bottom, right, and left margins of the paper in [Non-Printable Area:] or [Printer Margins:]. 6 Click [OK] (Mac OS X 10.4 or later) or [Save] (Mac OS X 10.3). This saves the custom paper size, which can be selected from the [Paper Size:] drop-down list in [Page Attributes]. dReference To print on custom sized paper, use Manual Feed Tray or Tray 1. For details on how to load paper into the Manual Feed Tray or Tray 1, refer to Chapter 5 "Loading Paper" in [User's Guide: Introduction]. [Print Functions] 3-15
-
 1
1 -
2
-
3
-
4
-
5
-
6
-
7
-
8
-
9
-
10
-
11
-
12
-
13
-
14
-
15
-
16
-
17
-
18
-
19
-
20
-
21
-
22
-
23
-
24
-
25
-
26
-
27
-
28
-
29
-
30
-
31
-
32
-
33
-
34
-
35
-
36
-
37
-
38
-
39
-
40
-
41
-
42
-
43
-
44
-
45
-
46
-
47
-
48
-
49
-
50
-
51
-
52
-
53
-
54
-
55
-
56
-
57
-
58
-
59
-
60
-
61
-
62
-
63
-
64
-
65
-
66
-
67
-
68
-
69
-
70
-
71
-
72
-
73
-
74
-
75
-
76
-
77
-
78
-
79
-
 80
80 -
 81
81 -
 82
82 -
 83
83 -
 84
84 -
 85
85 -
 86
86 -
 87
87 -
 88
88 -
 89
89 -
 90
90 -
91
-
92
-
93
-
94
-
95
-
96
-
97
-
98
-
99
-
100
-
101
-
102
-
103
-
104
-
105
-
106
-
107
-
108
-
109
-
110
-
111
-
112
-
113
-
114
 |
 |