Kyocera ECOSYS FS-1370DN FS-1370DN Operation Guide (Basic) - Page 53
Printing, About KX Driver, Printing from Application Software
 |
View all Kyocera ECOSYS FS-1370DN manuals
Add to My Manuals
Save this manual to your list of manuals |
Page 53 highlights
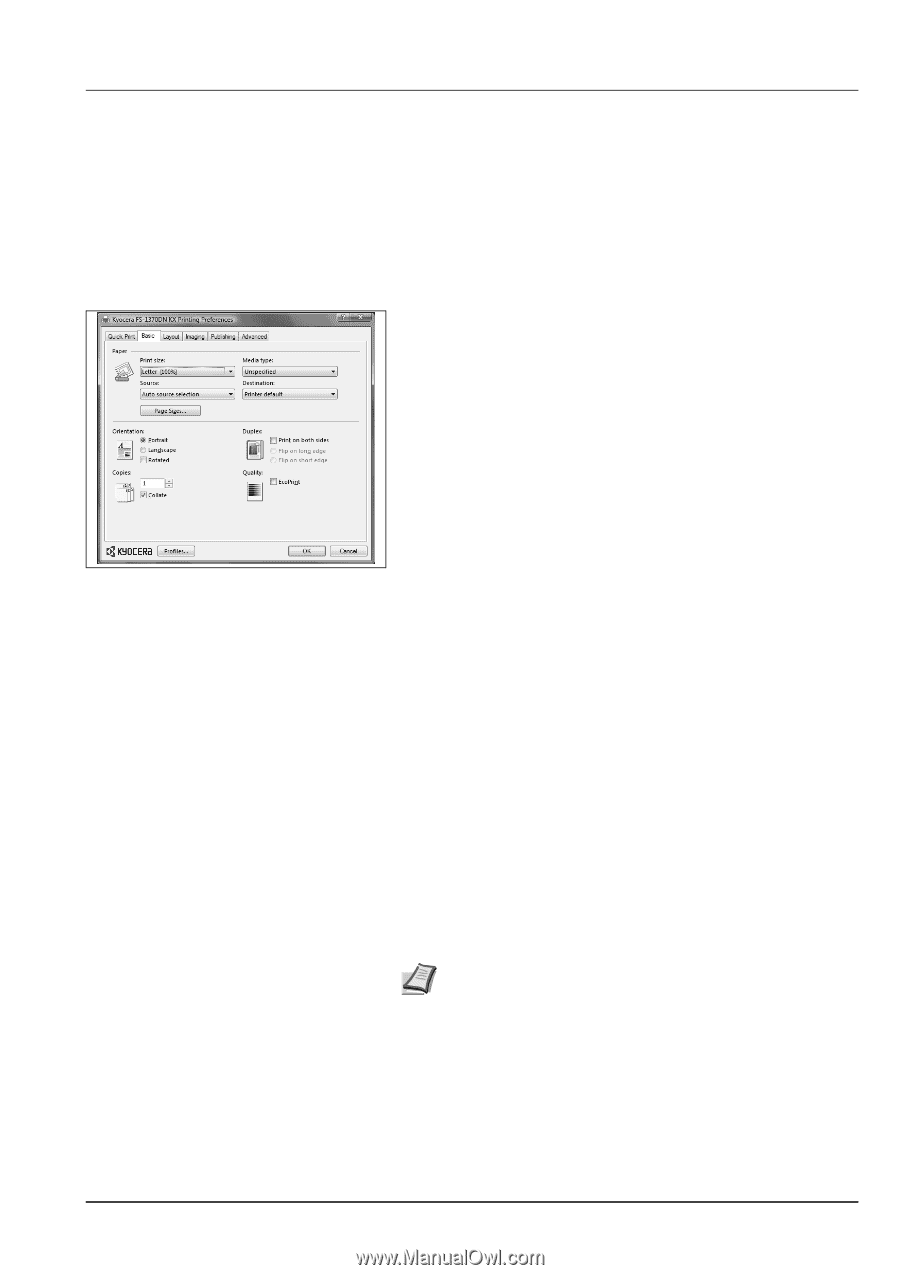
Connecting and Printing Printing This section explains the printing procedure from an application software. You can specify the printing settings from each tab on KX Driver. KX Driver is stored in the CD-ROM (Product Library). For more information, refer to the Printer Driver User Guide in the CD-ROM. About KX Driver KX Driver consists of the following tabs. Quick Print Use this tab to define basic print options into group profiles that can be accessed quickly and easily. Basic Use this tab to select the page size and orientation. The paper source and duplex printing are also selected. Layout Use to create multiple pages on a single sheet of paper. Also contains the scaling option. Imaging Select this tab to change the print quality, and the font or graphic settings. Publishing Use to add covers or page inserts to your output. You can also produce a set of transparencies with a blank or printed sheet interleaved using Transparency Interleaving. Advanced Use to set up and add watermarks to your output. This tab incorporates the PRESCRIBE commands into the output using the Prologue/Epilogue feature. Printing from Application Software The steps required to print a document created with an application are explained below. You can select the printing paper size. Note You can also select the various settings by clicking Properties to open the Properties dialog box. 1 Load the paper required into the paper cassette. 2 From the application File menu, select Print. The Print dialog box appears. 3 Click the drop-down list of printer names. All the installed printers are listed. Click the name of the printer. 3-19
-
 1
1 -
2
-
3
-
4
-
5
-
6
-
7
-
8
-
9
-
10
-
11
-
12
-
13
-
14
-
15
-
16
-
17
-
18
-
19
-
20
-
21
-
22
-
23
-
24
-
25
-
26
-
27
-
28
-
29
-
30
-
31
-
32
-
33
-
34
-
35
-
36
-
37
-
38
-
39
-
40
-
41
-
42
-
43
-
44
-
45
-
46
-
47
-
 48
48 -
 49
49 -
 50
50 -
 51
51 -
 52
52 -
 53
53 -
 54
54 -
 55
55 -
 56
56 -
 57
57 -
 58
58 -
59
-
60
-
61
-
62
-
63
-
64
-
65
-
66
-
67
-
68
-
69
-
70
-
71
-
72
-
73
-
74
-
75
-
76
-
77
-
78
-
79
-
80
-
81
-
82
-
83
-
84
-
85
-
86
-
87
-
88
-
89
-
90
-
91
-
92
-
93
-
94
-
95
-
96
 |
 |