Lenovo C320 Lenovo C225\C320\C325 Hardware Maintenance Manual - Page 34
Remove the 4 screws that secure the hard disk drive to the disk bay and slide the defective hard
 |
View all Lenovo C320 manuals
Add to My Manuals
Save this manual to your list of manuals |
Page 34 highlights
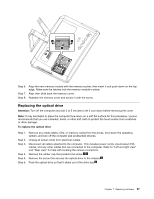
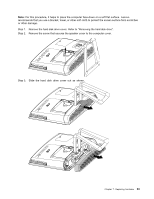
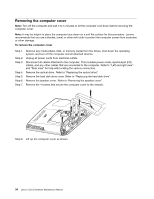
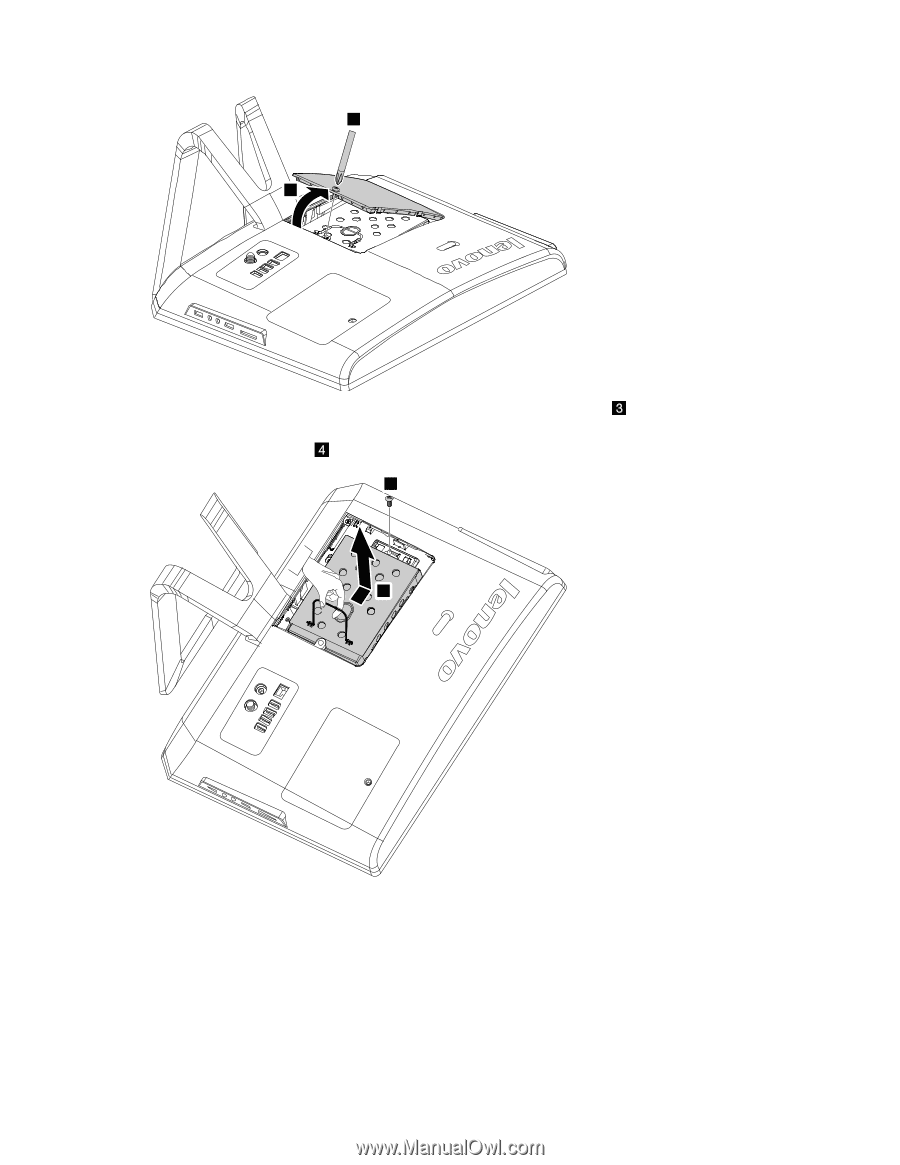
1 2 Step 5. Remove the screw that secures the hard disk drive bay to the chassis. Step 6. Spring up the handle on the hard disk drive bay, then slide and lift the hard disk drive bay out of the chassis as shown. 3 4 Step 7. Remove the 4 screws that secure the hard disk drive to the disk bay and slide the defective hard disk drive out of the bay. 30 Lenovo C2/C3 Hardware Maintenance Manual
-
 1
1 -
2
-
3
-
4
-
5
-
6
-
7
-
8
-
9
-
10
-
11
-
12
-
13
-
14
-
15
-
16
-
17
-
18
-
19
-
20
-
21
-
22
-
23
-
24
-
25
-
26
-
27
-
28
-
 29
29 -
 30
30 -
 31
31 -
 32
32 -
 33
33 -
 34
34 -
 35
35 -
 36
36 -
 37
37 -
 38
38 -
 39
39 -
40
-
41
-
42
-
43
-
44
-
45
-
46
-
47
-
48
-
49
-
50
-
51
-
52
-
53
-
54
-
55
-
56
-
57
-
58
-
59
-
60
-
61
 |
 |
1
2
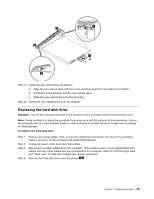
Step 5.
Remove the screw that secures the hard disk drive bay to the chassis.
Step 6.
Spring up the handle on the hard disk drive bay, then slide and lift the hard disk drive bay out
of the chassis as shown.
3
4
Step 7.
Remove the 4 screws that secure the hard disk drive to the disk bay and slide the defective hard
disk drive out of the bay.
30
Lenovo C2/C3 Hardware Maintenance Manual