Lenovo Erazer X510 Lenovo Erazer X510 Hardware Maintenance Manual - Page 35
Replacing the hard disk drive, Unplug all power cords from electrical outlets.
 |
View all Lenovo Erazer X510 manuals
Add to My Manuals
Save this manual to your list of manuals |
Page 35 highlights
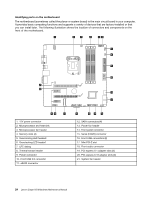
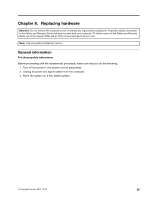
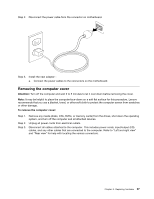
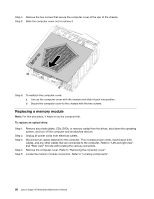
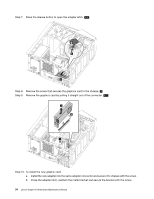
Step 6. Remove the memory module being replaced by opening the retaining clips as shown. Step 7. Position the new memory module over the memory connector. Make sure the notch 1 on the memory module is correctly aligned with the connector key 2 on the system board. Push the memory module straight down into the connector until the retaining clips close. Step 8. Reattach the computer cover. Replacing the hard disk drive Note: For this procedure, it helps to lay the computer flat. To replace the hard disk drive: Step 1. Step 2. Step 3. Step 4. Remove any media (disks, CDs, DVDs, or memory cards) from the drives, shut down the operating system, and turn off the computer and all attached devices. Unplug all power cords from electrical outlets. Disconnect all cables attached to the computer. This includes power cords, input/output (I/O) cables, and any other cables that are connected to the computer. Refer to "Left and right view" and "Rear view" for help with locating the various connectors. Remove the computer cover. Refer to "Removing the computer cover". Chapter 8. Replacing hardware 29
-
 1
1 -
2
-
3
-
4
-
5
-
6
-
7
-
8
-
9
-
10
-
11
-
12
-
13
-
14
-
15
-
16
-
17
-
18
-
19
-
20
-
21
-
22
-
23
-
24
-
25
-
26
-
27
-
28
-
29
-
 30
30 -
 31
31 -
 32
32 -
 33
33 -
 34
34 -
 35
35 -
 36
36 -
 37
37 -
 38
38 -
 39
39 -
 40
40 -
41
-
42
-
43
-
44
-
45
-
46
-
47
-
48
-
49
-
50
-
51
-
52
-
53
-
54
-
55
-
56
-
57
-
58
-
59
 |
 |
