Lenovo Erazer X700 Lenovo Erazer X7 Series User Guide - Page 45
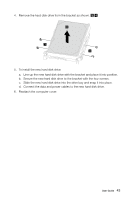
b. Secure the computer cover to the chassis with the two screws., Lift up the computer cover
 |
View all Lenovo Erazer X700 manuals
Add to My Manuals
Save this manual to your list of manuals |
Page 45 highlights
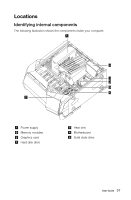
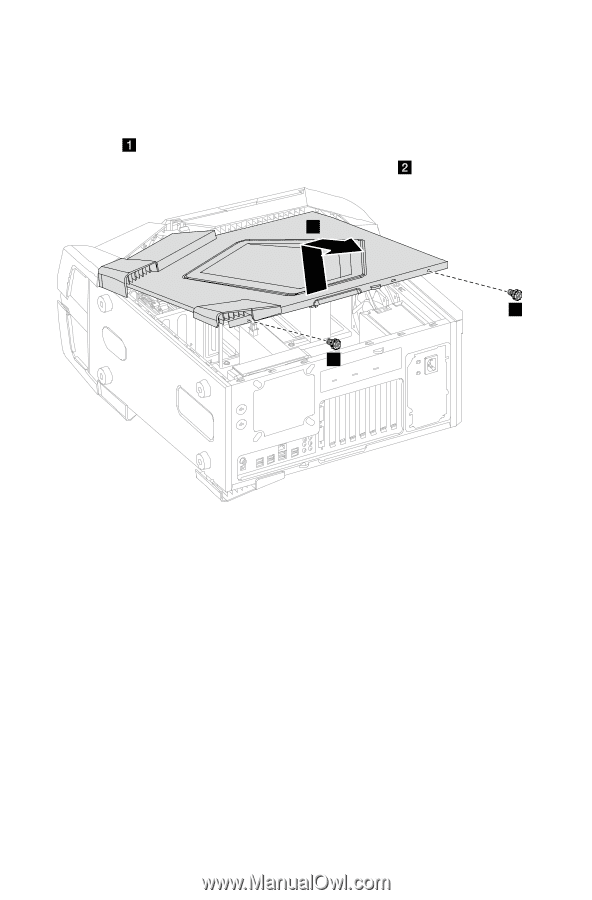
3. Disconnect all cables attached to the computer. This includes power cords, input/output (I/O) cables, and any other cables that are connected to the computer. Refer to "Locating connectors on the rear of the computer". 4. Remove the two screws that secure the computer cover at the rear of the chassis. 5. Lift up the computer cover, then slide it out to remove it. 2 1 1 6. To reattach the computer cover: a. Line up the computer cover with the chassis and place it into position. b. Secure the computer cover to the chassis with the two screws. * Both covers can be removed using the same method. 40 User Guide
-
 1
1 -
2
-
3
-
4
-
5
-
6
-
7
-
8
-
9
-
10
-
11
-
12
-
13
-
14
-
15
-
16
-
17
-
18
-
19
-
20
-
21
-
22
-
23
-
24
-
25
-
26
-
27
-
28
-
29
-
30
-
31
-
32
-
33
-
34
-
35
-
36
-
37
-
38
-
39
-
 40
40 -
 41
41 -
 42
42 -
 43
43 -
 44
44 -
 45
45 -
 46
46 -
 47
47 -
 48
48 -
 49
49 -
 50
50 -
51
-
52
-
53
-
54
-
55
-
56
-
57
-
58
-
59
 |
 |
40
User Guide
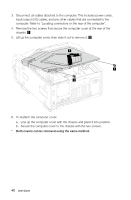
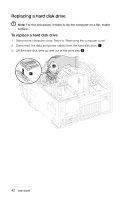
3.
Disconnect all cables attached to the computer. This includes power cords,
input/output (I/O) cables, and any other cables that are connected to the
computer. Refer to “Locating connectors on the rear of the computer”.
4.
Remove the two screws that secure the computer cover at the rear of the
chassis.
5.
Lift up the computer cover, then slide it out to remove it.
1
2
1
6. To reattach the computer cover:
a.
Line up the computer cover with the chassis and place it into position.
b. Secure the computer cover to the chassis with the two screws.
*
Both covers can be removed using the same method.