Lenovo Erazer X700 Lenovo Erazer X7 Series User Guide - Page 51
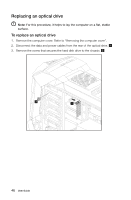
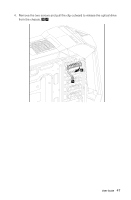
Replacing an optical drive
 |
View all Lenovo Erazer X700 manuals
Add to My Manuals
Save this manual to your list of manuals |
Page 51 highlights
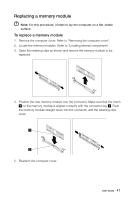
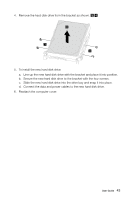
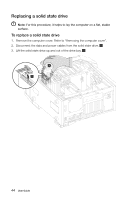
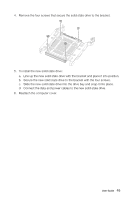
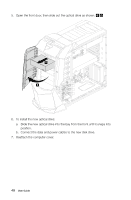
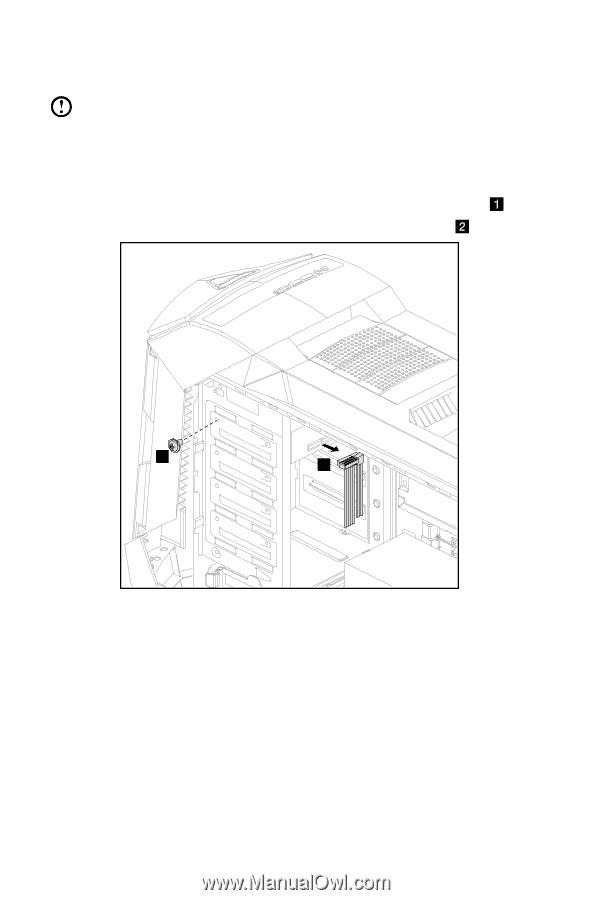
Replacing an optical drive Note: For this procedure, it helps to lay the computer on a flat, stable surface. To replace an optical drive 1. Remove the computer cover. Refer to "Removing the computer cover". 2. Disconnect the data and power cables from the rear of the optical drive. 3. Remove the screw that secures the hard disk drive to the chassis. 2 1 46 User Guide
-
 1
1 -
2
-
3
-
4
-
5
-
6
-
7
-
8
-
9
-
10
-
11
-
12
-
13
-
14
-
15
-
16
-
17
-
18
-
19
-
20
-
21
-
22
-
23
-
24
-
25
-
26
-
27
-
28
-
29
-
30
-
31
-
32
-
33
-
34
-
35
-
36
-
37
-
38
-
39
-
40
-
41
-
42
-
43
-
44
-
45
-
 46
46 -
 47
47 -
 48
48 -
 49
49 -
 50
50 -
 51
51 -
 52
52 -
 53
53 -
 54
54 -
 55
55 -
 56
56 -
57
-
58
-
59
 |
 |
46
User Guide
Replacing an optical drive
Note:
For this procedure, it helps to lay the computer on a flat, stable
surface.
To replace an optical drive
1.
Remove the computer cover. Refer to “Removing the computer cover”.
2.
Disconnect the data and power cables from the rear of the optical drive.
3.
Remove the screw that secures the hard disk drive to the chassis.
1
2