Lenovo Flex 2-14 User Guide - Lenovo Flex 2-14, 2-14D, 2-15, 2-15D - Page 45
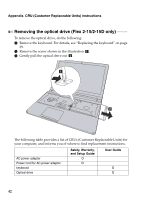
Place the keyboard into the keyboard bezel, close the computer display., Turn the computer over
 |
View all Lenovo Flex 2-14 manuals
Add to My Manuals
Save this manual to your list of manuals |
Page 45 highlights
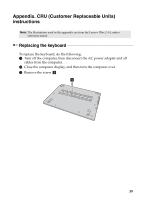
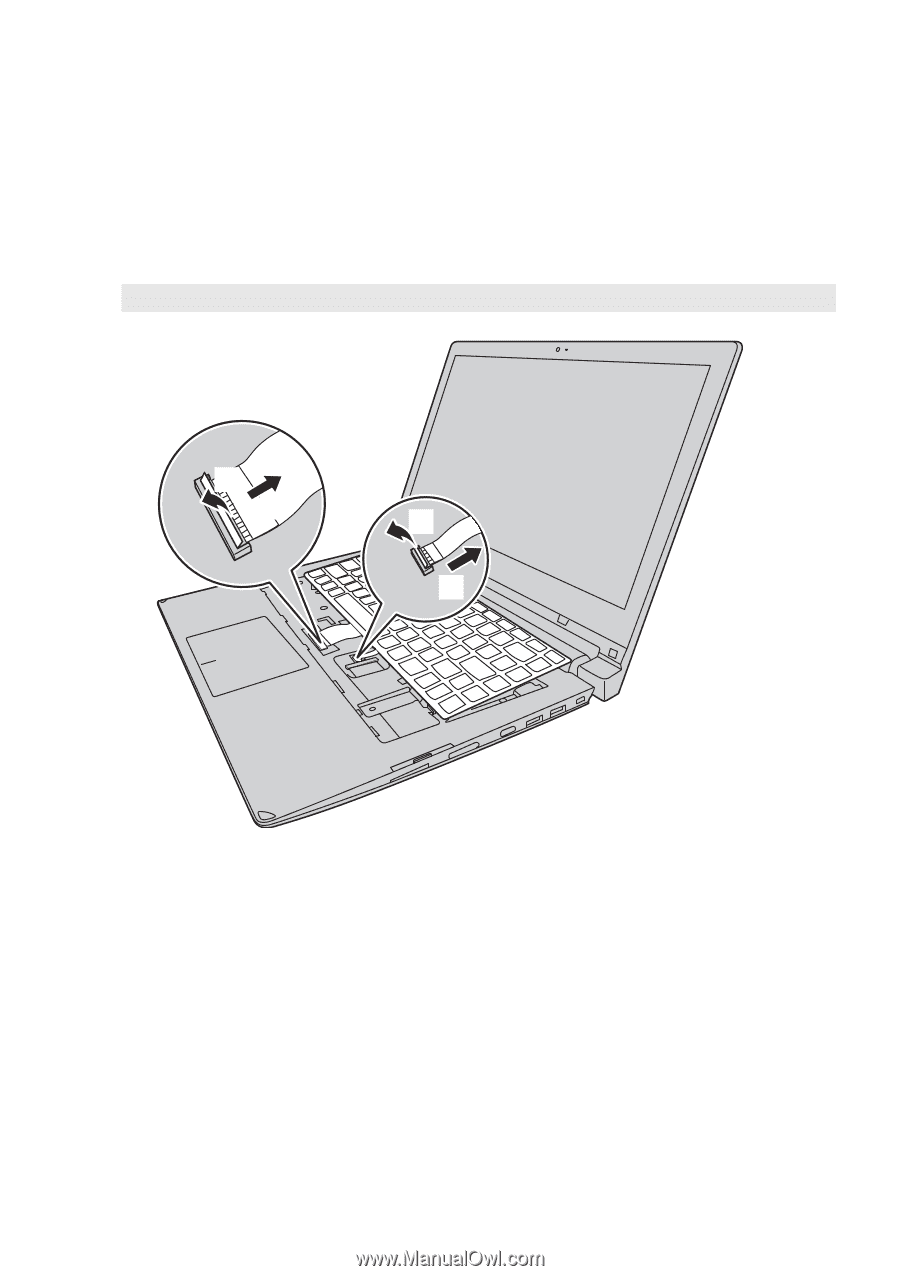
Appendix. CRU (Customer Replaceable Units) instructions 6 Pull the keyboard connector slot cover upward as shown by arrow c , detach the keyboard cable from the keyboard connector in the direction shown by arrow d. Note: A shown in the figure is only applicable to the models with keyboard backlight. c d c Ad 7 Install a new keyboard. 8 Connect the keyboard cable to the keyboard connector. 9 Press the keyboard connector slot cover downward. 0 Place the keyboard into the keyboard bezel, close the computer display. A Turn the computer over, reinsert and tighten the screw. B Turn the computer over again. C Connect the AC power adapter and the cables to the computer. 41
-
 1
1 -
2
-
3
-
4
-
5
-
6
-
7
-
8
-
9
-
10
-
11
-
12
-
13
-
14
-
15
-
16
-
17
-
18
-
19
-
20
-
21
-
22
-
23
-
24
-
25
-
26
-
27
-
28
-
29
-
30
-
31
-
32
-
33
-
34
-
35
-
36
-
37
-
38
-
39
-
 40
40 -
 41
41 -
 42
42 -
 43
43 -
 44
44 -
 45
45 -
 46
46 -
 47
47 -
 48
48
 |
 |
Appendix. CRU (Customer Replaceable Units) instructions
41
6
Pull the keyboard connector slot cover upward as shown by arrow
,
detach the keyboard cable from the keyboard connector in the direction
shown by arrow
.
7
Install a new keyboard.
8
Connect the keyboard cable to the keyboard connector.
9
Press the keyboard connector slot cover downward.
0
Place the keyboard into the keyboard bezel, close the computer display.
A
Turn the computer over, reinsert and tighten the screw.
B
Turn the computer over again.
C
Connect the AC power adapter and the cables to the computer.
Note:
A shown in the figure is only applicable to the models with keyboard backlight.
c
d
d
c
d
c
A