Lenovo Flex 2-14 User Guide - Lenovo Flex 2-14, 2-14D, 2-15, 2-15D - Page 46
Removing the optical drive (Flex 2-15/2-15D only), Oa Ob Oa Ob
 |
View all Lenovo Flex 2-14 manuals
Add to My Manuals
Save this manual to your list of manuals |
Page 46 highlights
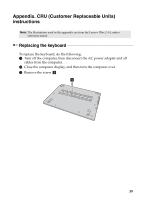
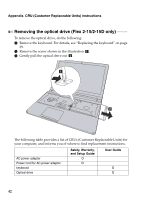
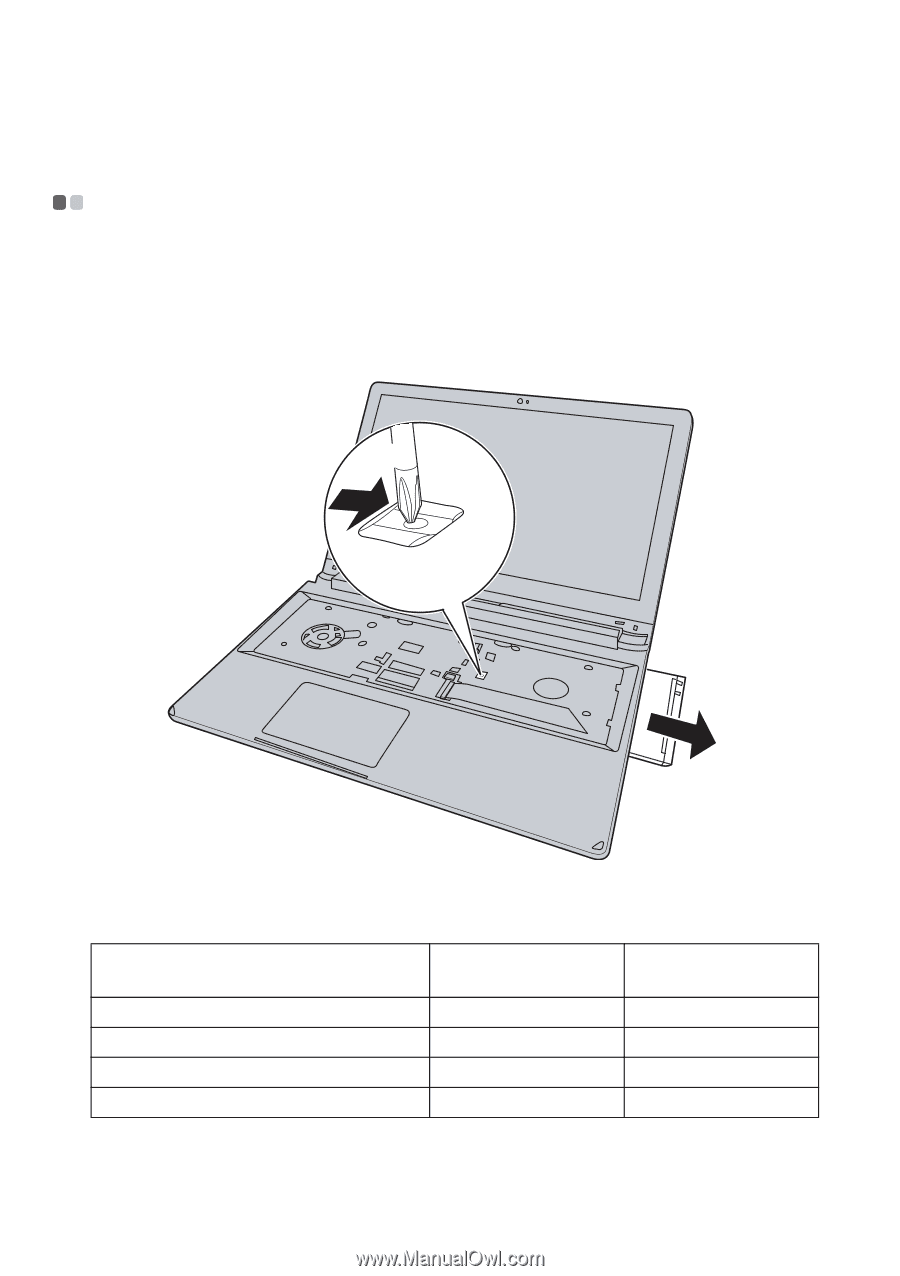
Appendix. CRU (Customer Replaceable Units) instructions Removing the optical drive (Flex 2-15/2-15D only To remove the optical drive, do the following: 1 Remove the keyboard. For details, see "Replacing the keyboard" on page 39. 2 Remove the screw shown in the illustration a . 3 Gently pull the optical drive out b . a b The following table provides a list of CRUs (Customer Replaceable Units) for your computer, and informs you of where to find replacement instructions. AC power adapter Power cord for AC power adapter keyborad Optical drive Safety, Warranty, and Setup Guide O O User Guide O O 42
-
 1
1 -
2
-
3
-
4
-
5
-
6
-
7
-
8
-
9
-
10
-
11
-
12
-
13
-
14
-
15
-
16
-
17
-
18
-
19
-
20
-
21
-
22
-
23
-
24
-
25
-
26
-
27
-
28
-
29
-
30
-
31
-
32
-
33
-
34
-
35
-
36
-
37
-
38
-
39
-
40
-
 41
41 -
 42
42 -
 43
43 -
 44
44 -
 45
45 -
 46
46 -
 47
47 -
 48
48
 |
 |
42
Appendix. CRU (Customer Replaceable Units) instructions
Removing the optical drive (Flex 2-15/2-15D only)
- - - - - - - - - - -
To remove the optical drive, do the following:
1
Remove the keyboard. For details, see “Replacing the keyboard” on page
39.
2
Remove the screw shown in the illustration
.
3
Gently pull the optical drive out
.
The following table provides a list of CRUs (Customer Replaceable Units) for
your computer, and informs you of where to find replacement instructions.
Safety, Warranty,
and Setup Guide
User Guide
AC power adapter
O
Power cord for AC power adapter
O
keyborad
O
Optical drive
O
a
b
a
b