Lenovo M55e User Manual - Page 44
Installing, internal, drives
 |
UPC - 883609167608
View all Lenovo M55e manuals
Add to My Manuals
Save this manual to your list of manuals |
Page 44 highlights
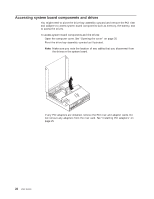
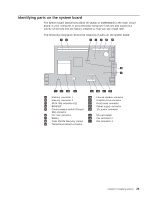
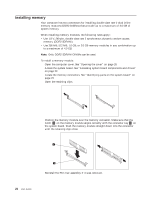
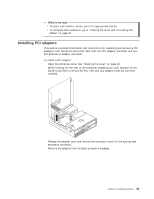
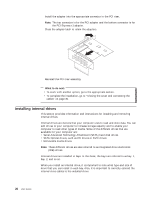
5. Install the adapter into the appropriate connector in the PCI riser. Note: The top connector is for the PCI adapter and the bottom connector is for the PCI Express x1 adapter. 6. Close the adapter latch to retain the adapters. 7. Reinstall the PCI riser assembly. What to do next: v To work with another option, go to the appropriate section. v To complete the installation, go to "Closing the cover and connecting the cables" on page 35. Installing internal drives This section provides information and instructions for installing and removing internal drives. Internal drives are devices that your computer uses to read and store data. You can add drives to your computer to increase storage capacity and to enable your computer to read other types of media. Some of the different drives that are available for your computer are: v Serial Advanced Technology Attachment (SATA) hard disk drives v SATA Optical drives, such as CD drives or DVD drives v Removable media drives Note: These different drives are also referred to as integrated drive electronics (IDE) drives. Internal drives are installed in bays. In this book, the bays are referred to as bay 1, bay 2, and so on. When you install an internal drive, it is important to note what type and size of drive that you can install in each bay. Also, it is important to correctly connect the internal drive cables to the installed drive. 26 User Guide
-
 1
1 -
2
-
3
-
4
-
5
-
6
-
7
-
8
-
9
-
10
-
11
-
12
-
13
-
14
-
15
-
16
-
17
-
18
-
19
-
20
-
21
-
22
-
23
-
24
-
25
-
26
-
27
-
28
-
29
-
30
-
31
-
32
-
33
-
34
-
35
-
36
-
37
-
38
-
 39
39 -
 40
40 -
 41
41 -
 42
42 -
 43
43 -
 44
44 -
 45
45 -
 46
46 -
 47
47 -
 48
48 -
 49
49 -
50
-
51
-
52
-
53
-
54
-
55
-
56
-
57
-
58
-
59
-
60
-
61
-
62
-
63
-
64
-
65
-
66
-
67
-
68
-
69
-
70
-
71
-
72
-
73
-
74
-
75
-
76
-
77
-
78
-
79
-
80
-
81
-
82
-
83
-
84
-
85
-
86
-
87
-
88
-
89
-
90
-
91
-
92
-
93
-
94
-
95
-
96
 |
 |
